Slate Tile is My Love Language

  As usual, spring weather brings a list of spring projects. At the top of our list was to come up with a solution for our concrete patio! I know. Thrilling. We would spend weekends scrolling through websites and strolling home improvement stores trying to find a way to cover up the concrete (and the giant crack in the patio) all while sticking with the guidelines of the solution being thin enough to work with our current door situation.

1746

We had bounced around all sorts of ideas and then settled on this tile from Lowes! I didnt realize that most bathroom tile can actually be used outside! In one evening, we bought lots of slate tile boxes, mortar, grout, cement cleaner, and flowers (for me of course).

We also had to purchase a tool to grind down the cement crack. Keep scrolling for DIY tips and a fun surprise at the end!

I spent a lot of time washing down Bunker after this process. Cement dust was EVERYWHERE:

1749


Now for the cement cleaner, which dripped into my flower beds...1759

For those of you wondering why Derek was doing all the work, I would like to point out that I was working on trimming out our flower bed. Here you can see the almost finished product (and Derek getting ready to lay the mortar): 1773

We then mixed up the mortar and started to lay the tiles down. I was following behind cleaning up the tiles:

1788

For the next 2 days, we worked on wiping down the tile and getting it ready to be sealed. Not pictured is grouting the tile with a dark gray grout! 1856

TADA!!! Finished Product:1829

In the end, this project turned out better than we had hoped. We absolutely love the slate and it really helps pull together our front patio area. Our next project will be adding a pergola to help create a little more dimension and shade to Bunker.

1900

And for those of you who don't know (but I have been telling everyone, so I am not sure how you wouldn't know by now), we are picking up our goaties next month!

1565

xo

1C9CB29E8B0C8A114637371B8A14BD11

10 Things You May Not Know About Bunker

  We are quickly coming up on our 1 year anniversary of moving into Bunker. Since anniversaries and top 10 lists are always great, I figured we would combine this into a blog. So. Here we go. Top 10 things you may not know or that you just forgot.

10. Bunker was actually a garage. Thankfully when we bought the property, the bank had already cleaned out the garage for us.

BEFORE

9. We have a slim fit washer and dryer which sits right next to our kitchen sink. When Derek made a quick trip to Lowes, he spotted this beauty and got the sales associate to knock off a few hundred dollars. What he didnt tell me until later was that the discount was given because there was blood on the side of the unit.

BUT I now understand. I caught my hand on the lid of the washer and now have a scar. A LAUNDRY scar. #realhousewives

9.Bunker move 2-13

8. A lot of people ask how we keep Bunker warm & cold. Solution? A hotel AC/ Heater unit!

Windows 6 Windows 8

7. Our neighbor won the Indiana Body Building Competition in the 70s. Shes hardcore. And her husband isn't too bad either.

Bunker Railing 15

6. We managed to fit our entire Ikea kitchen into our little hatchback IMG_5397

5. Bunker has had 3 couches in 1 year.

IMG_5908 IMG_7328 IMG_7270

4. This tiny little cabin is on the back of our property.  We think it will make a lovely mother-in-law suite. Our moms arent so sure.

IMG_8743

3. Our mortgage is 83% less than what we were paying in rent.

53642557

2. We still haven't met our mailman but we did fix our mailbox

IMG_8753

1. Surprise. There is no #1. There is always way too much pressure on the #1 on a top 10 list.

IMG_5206

Blinded by the Light

Embarrassing story (besides the fact that I had to use auto correct to spell that word) I am 28 years old and just figured out how to upload my pictures from my IPhone onto my computer. I was complaining to my mother-in-law that our blogs take so long to write because I have to 1. Send the picture from my phone to my email. 2. Open the email. 3. Save the picture to my computer 4. Name it. 5.Transfer to a folder. 6. Upload that picture to the blog.  And then she said the magic sentence, "You know you can just plug your phone into your computer and download the pictures into a folder?" No Joy. I didn't know that. So here we are. Blogging made WAY easier. PS. This is Joy. Isn't she cute? She is FANTASTIC.

My mother-in-law was a huge help in the sealing process. We had to mix, pour, smooth, and examine all in very specific time frames. My cell phone is still recovering from my sticky fingers messing with the stop watch.

I was glancing through my newly downloaded picture folder, I discovered one simple thing I wanted to highlight. Our light fixture.

IMG_4168

As you can imagine, lighting can be a bit of an issue in a Garage Home. We have 4 small windows that measure about forearm in height and a full arm in length (keep in mind I have freakishly long arms for a girl of my height).

We bought a ceiling fan from Lowes which we loved, but the light was very teeny tiny (see picture below). Honestly, you could barely tell the light was even on! After a whole winter of a wimpy ceiling light, Derek suggested we go on a light hunt. I assumed we would need to start from scratch and purchase a new EVERYTHING.

bunker 111

Have you ever found yourself in this situation? Well. I am here to save you from a headache and complicated process. All you need to do is go buy a light fixture and ATTACH it to your fan! What you say?! That is a thing? YES! And it is the best thing Derek has ever thought of.

So. We went on a light fixture hunt. Our hunts usually take place on Sunday afternoon. We browse the local hardware stores. Not holding hands because we aren't allowed to hold hands if we are at hardware stores. 

As we drove around, we ended up back at Lowes. We found a light fixture that was quite funky and we both stared at it. We then thought it was perfect BUT I said, "Man. This would be way cooler if it had Thomas Edison bulbs in it...but to buy 14 bulbs for this light would cost at least $100."...And then what happens? We find the light fixture box. Pull it off the shelf. And it says, "Includes 14 Thomas Edison bulbs". FATE.

We grabbed the light and scampered home. Within an hour, Bunker was 100 times brighter and about 29 times cooler. All summer she has been representing a really unique light. And we love it.

"I like it. It is the perfect amount of confusing" - Derek Lavender

IMG_7611 12 27

Warning: Now that I have learned the new trick with pictures, my blogs will be much more frequent.

Have a wonderful weekend friends!

  • The Lavenders IMG_8463

Radical Railing

  From October until May, we had an unfinished railing for our loft. To some of you risk takers, this may sound fun. Not knowing if you are going to fall 10 ft onto concrete, living the high of sleep walking to your death, or being able to dangle from your feet to be able to reach down and grab a drink off the counter.......to a person who has a slight fear of heights and always climbs into bed head first, it was TERRIFYING.

For this post, I am proud to show you our completed railing. But first....You must get an idea of how scared I was for 4 months:

Bunker Railing 20

Here you will notice there is not a single thing keeping us from toppling over. The wire you see is actually about 4 ft back from the edge of the loft.

Bunker Railing 3

We had some friends in from Warsaw and I was able to just lean over and snap this picture. Once again, terrifying. More than one occasion we discussed the possibility of death if I was to accidentally lean too far over the edge. And for the record, I have fallen out of trees, fell down our ladder, and managed to fall off the top standing area of a combine. I had a real reason to be fearful.

We brainstormed for several weeks about ideas for the railing. It needed to be inexpensive, modern (but not too modern), and safe. Derek came up with a drawing and an idea about making the railing out of tubing, one metal wire, leftover roof materials, and a few scraps of cedar.  I always have the hardest time imaging his ideas but they always come out way cooler than I expected. Take a peak:

Bunker Railing 14 Bunker Railing 5 Bunker Railing 4

This is the process of adding the tubing and wires. He used a pulley system to attach the wire and then proceeded to string it through the tubing. I seriously slept better the night this railing went up. PS. Notice the Christmas tree in the bottom right hand corner. We had just the railing up for a few months before we got around to finishing it off.

Bunker Railing 6 Bunker Railing 7 Bunker Railing 8

Next up was adding the leftover metal roofing to cover up the plywood. I am happy to announce that Derek only cut himself once! He then trimmed out the tubing in cedar which really added a lot!

Bunker Railing 11 Bunker Railing 9

Once the metal was in place, he continued to trim with cedar. I was so giddy at this point. I was stating to really see progress and was getting an idea of what Derek had in mind!

And I just had to add the picture of Tenny being obsessed with Derek's juggling skills.

Bunker Railing 12

Bunker Railing 13

And here you can see our completely railing!!! I absolutely love how unique it is. It adds the perfect welcoming touch to Bunker and incorporates materials we had leftover!

Bunker Railing 16

And we bought a motorcycle and I have ridden on it 3 times. It hurts my rear.

Happy Thursday friends.

The Bunker Shelf Blog that is 3 months late

  I am excited to share with you one of my favorite projects we have done so far. It makes the FAVORITE list because it makes cooking way more enjoyable!

We have always planned on there being some sort of shelf in the kitchen area but our ideas were pretty vague. We would brainstorm and bounce ideas around but we find most of our inspiration comes from wandering down a Menards aisle.Bunker Shelf 1

ps. If any of you know my husband, you know he likes to keep things original. Therefore, if I ever state I got an idea from Pinterest, my idea gets thrown out. So, we really try over here to use our own creative juices or I just dont tell him where I got the idea from... 

On a cold Sunday, you would have found us wandering all those stores (Home Depot, Lowes, Menards) in search for good shelving material.  A few hours later, we came across a big pallet full of beams. These beams were ideal for our shelf but they all had hot pink streaks through them. It was a SITE folks. Here we are in our church clothes lifting and heaving these beams trying to find the best ones for the shelf. After we searched and moved the whole pallet of beams, we found 2! Our beams do have hot pink streaks in them, but they are actually hidden by the wall or the other beam. They were also only $15 a beam. I felt like we basically stole them from Home Depot!


Once we got them home, Derek started the fun process of mounting them to the wall. We used special anchors to make sure the beams would stay in place. We also ran cable lines from the ceiling to assure the beam did not swing out and bonk anyone on the head. By "bonk" I mean, knock someone unconscious. These things have some serious weight to them.

Bunker Shelf 4

Bunker Shelf 2

Bunker Shelf 3

Bunker Shelf 5

Bunker Shelf 7

Bunker Shelf 8

Once the beams were in place, Derek stared on the electrical. The basic purpose behind the shelf is to provide lighting in that corner of the room. We had though of all sorts of "light adding" ideas, but a shelf seemed to make the most sense. It provided storage, as well as appeal! Our exposed shelf is a bit unique because Derek added 6 pucket lights which are attached the the kitchen switch. And by add, I don't mean he just popped them in the shelf. The poor guy had to bore holes through 6 inch beams. Now when I turn on the lights for the main room (which is essentially the whole house), our kitchen shelf lights up as well!

Bunker Shelf 13

Bunker Shelf 10 Bunker Shelf 11 Bunker Shelf 9 Bunker Shelf 14

Well folks. If you made it this far in the post, it means you must at least semi- keep up with our projects and Longshot. I owe you an apology. I have been seriously slacking in the blogging area! Thank you for being patient with me! We have 2 more fun projects coming up, as well as some gardening posts.Follow along as I try to convince Derek I don't always kill things I touch.

Until then. HAPPY EASTER!

Before & After Cedar Wall


Aren't before and afters fun? Well I have another one for you. The good news is this before and after is fairly simple so you can easily implement it in your own home. We thought up this idea but by no means do we claim to be the original Cedar Wall inventors. We are pretty pumped about it though.

The Scene:

On Sunday, we were drinking coffee and talking about the house. I mentioned that I would love to get something to cover up the back of our closets and the shoes. This had always been in the plan but we never had decided on what we wanted to cover it up with!

So, in typical Derek fashion, he says we should head to some home improvement stores and see if we can come up with any ideas. By our second store (Home Depot), we stumbled upon packs of outdoor cedar siding which was the exact length of our wall. I was GIDDY. *one reason was because I thought the pack of siding was $6. Come to find out, that was per piece...but still*  GIDDY! We bought the cedar, hustled home, and within 3 hours we had ourselves a fantastic wall.

BEFORE: We like our little shoe nook but it isn't the classiest thing to walk in and see. Remember, the white wall you see is actually the backs of 2 Ikea closets smooshed together.

Cedar Wall 9 Cedar Wall 10 Cedar Wall 7

Since the boards were the exact length we needed, there was no trimming needed (except once we got to the top).

Cedar Wall 11

Cedar Wall 12

Cedar Wall 13

All we needed was a bit of leveling, some screws, and a drill!

Cedar Wall 14

Cedar Wall 15

Derek took a piece down to his "shop" (Longshot) and cut a piece to finish off the top.

TA DA! We love the accent wall and it really makes it feel more snuggly in here...the tree doesnt hurt either!

Cedar Wall 16 Cedar Wall 19

Sorry folks, no injury stories to go along with this DIY project....

but

Merry Christmas from the Lavenders!

Cedar Wall 20

WINDOWS Before & After

I am really excited to share our last couple weeks with you but I must start with a story. Derek and I had to get some blood work done, so a nurse came to our house. As she was working away and being very opinionated about our home, she said, "I don't know why he (referring to Derek who was not in the room) did not think to put windows there."

Well genius nurse lady. Our windows are coming. She also said "For your sake, I hope you can move out of here (Bunker) as soon as possible." So that happened and we still laugh about it...

But this post is to show you some fun before and afters. We got our windows in! Here is what the nurse was seeing:

 Windows 1

The process of putting in the windows was simple (for me) but probably a bit more tricky for Derek: We ordered the windows through Menards and they arrived after a few weeks. We knew we were pushing it with winter closing in, but we got them in just in time!

Windows 2 Windows 3 Windows 17Windows 19

Windows 4 After an afternoon of hard work, Derek got them in place!

They have added so much extra light to the room. Instead of looking at the walls, it now makes your eyes look up!

Windows 20Windows 11

On to the back windows:

Remember that weekend when we got that random snow storm? Ya. That was the weekend we got started on the back windows. Thankfully our heater came in as well, so Derek was doing double duty installing!

Windows 6 Windows 7

We started first with the heater. We purchased a "hotel unit" which has worked out well! Thankfully, Derek was able to bribe his friend Neil to come and lend a hand with the lifting.

Windows 8

Once the heater was installed, Derek got working on the rest of the windows!

Windows 9 Windows 10

Please appreciate the amazing photo below:

Windows 13As I was snapping this picture in my Ugg boots (mistake #1), I stomped (yes, I step very forcefully) on a piece of wood which happened to have a screw sticking out the top. Ouch. Once I got the screw out and assessed the damage, I debated on getting a tetanus shot. I ended up not getting one and I haven't gotten lock jaw yet...but I do think one of these date nights, we will just go and get them together.

 A few other fun things.

1. We made our own Christmas tree ornaments this year. *Note- I made them, Derek ate them

Windows 12

2. It is starting to look like Christmas at Bunker!

photo 2 (38) photo 3 (34)

3. We finished the front!!

photo 4 (34) photo 1 (36)

I hope you all had a wonderful Thanksgiving... I am sure we will have new projects and adventures to share soon!

Doors, Handles, and Embarrassing Stories

Bunker move 3-2
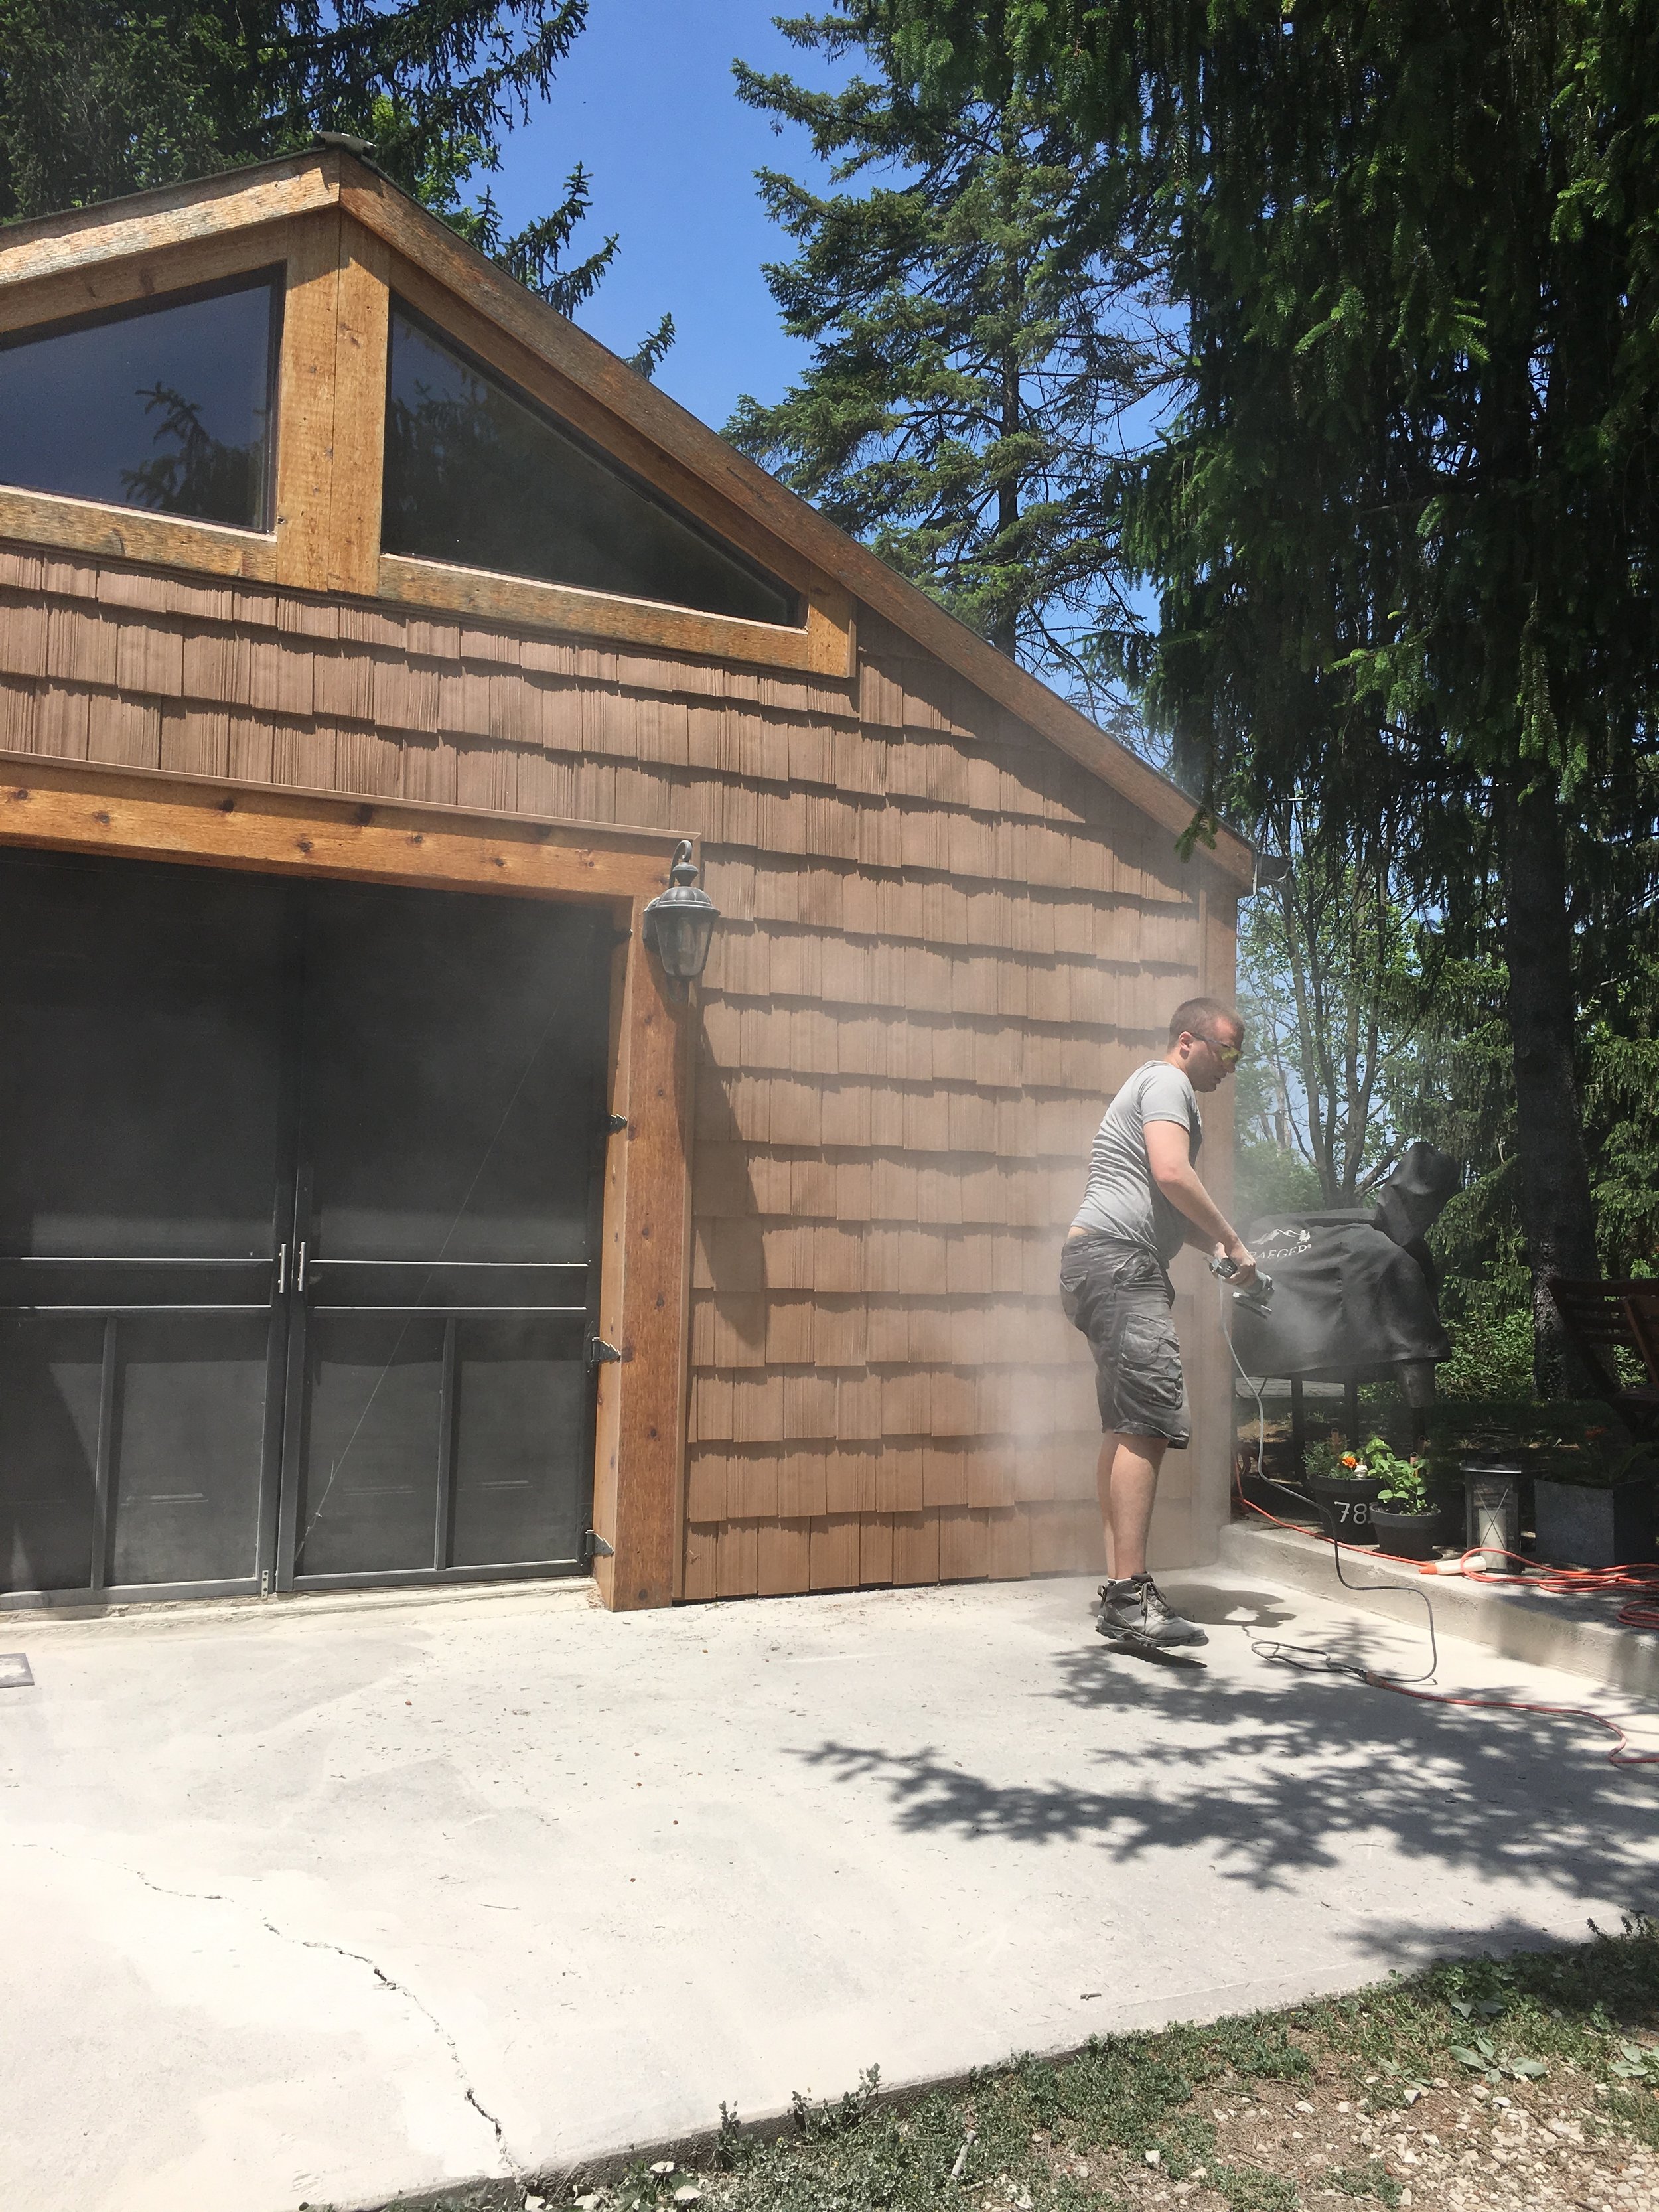
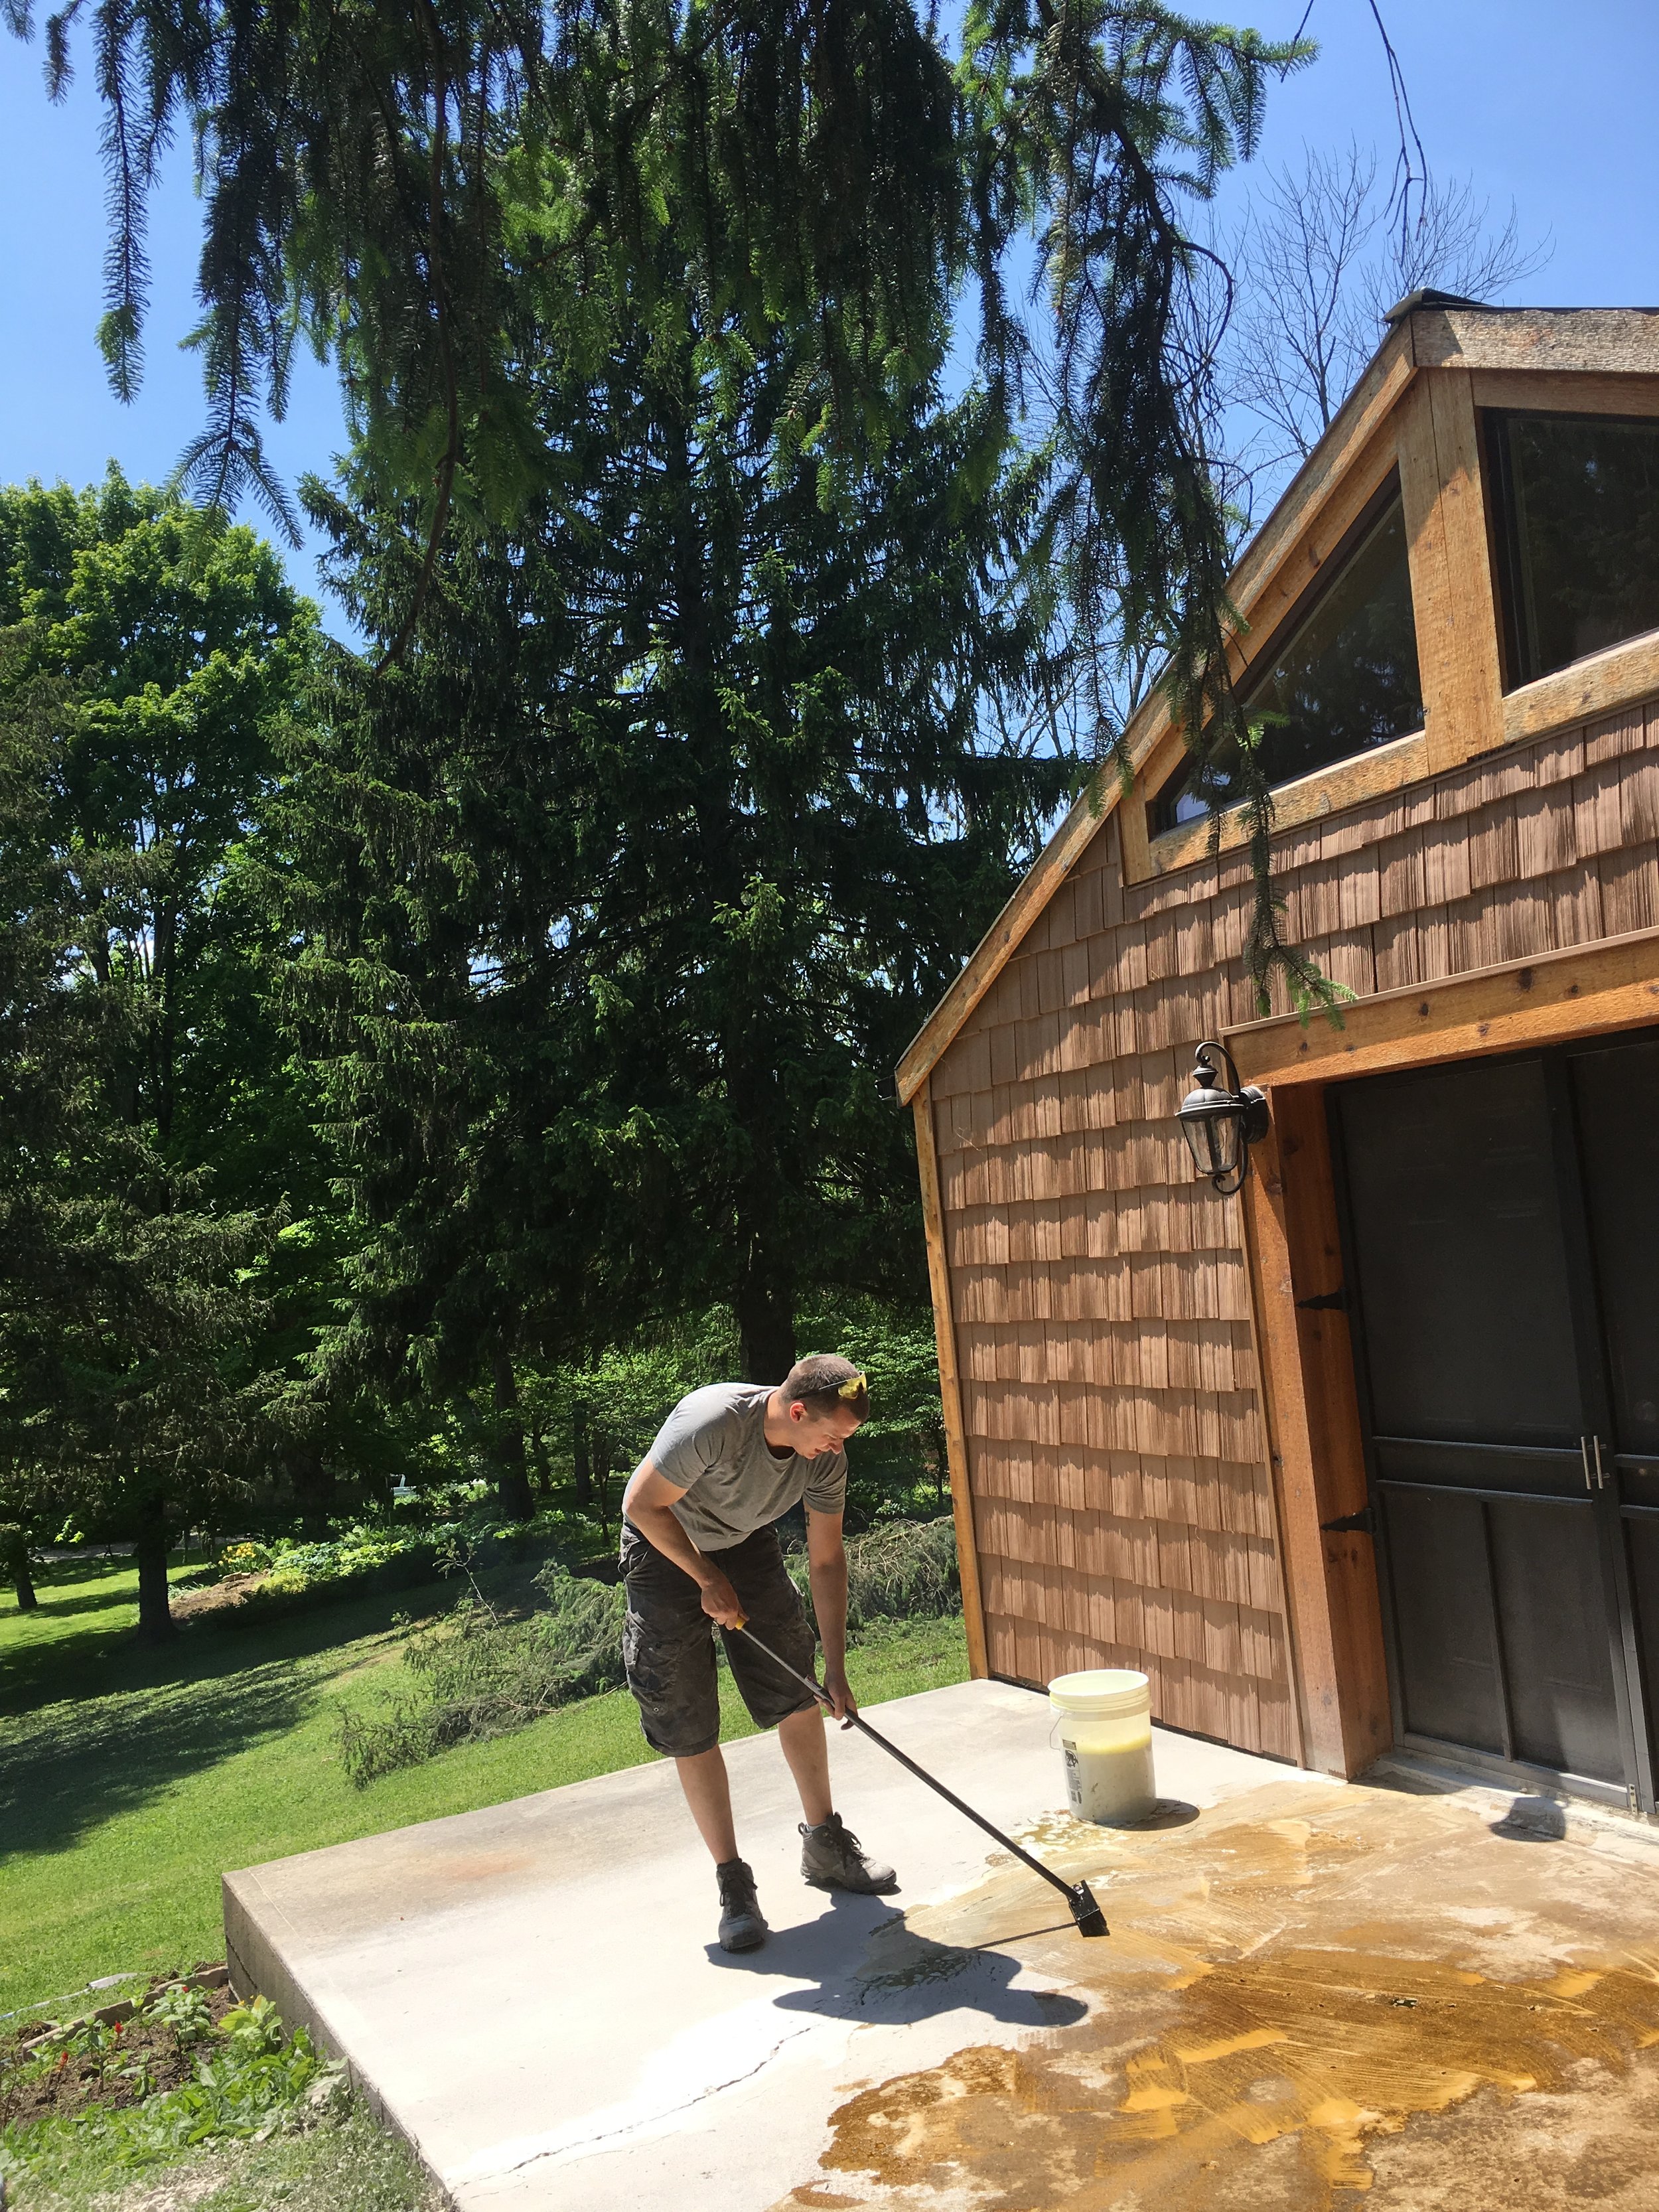
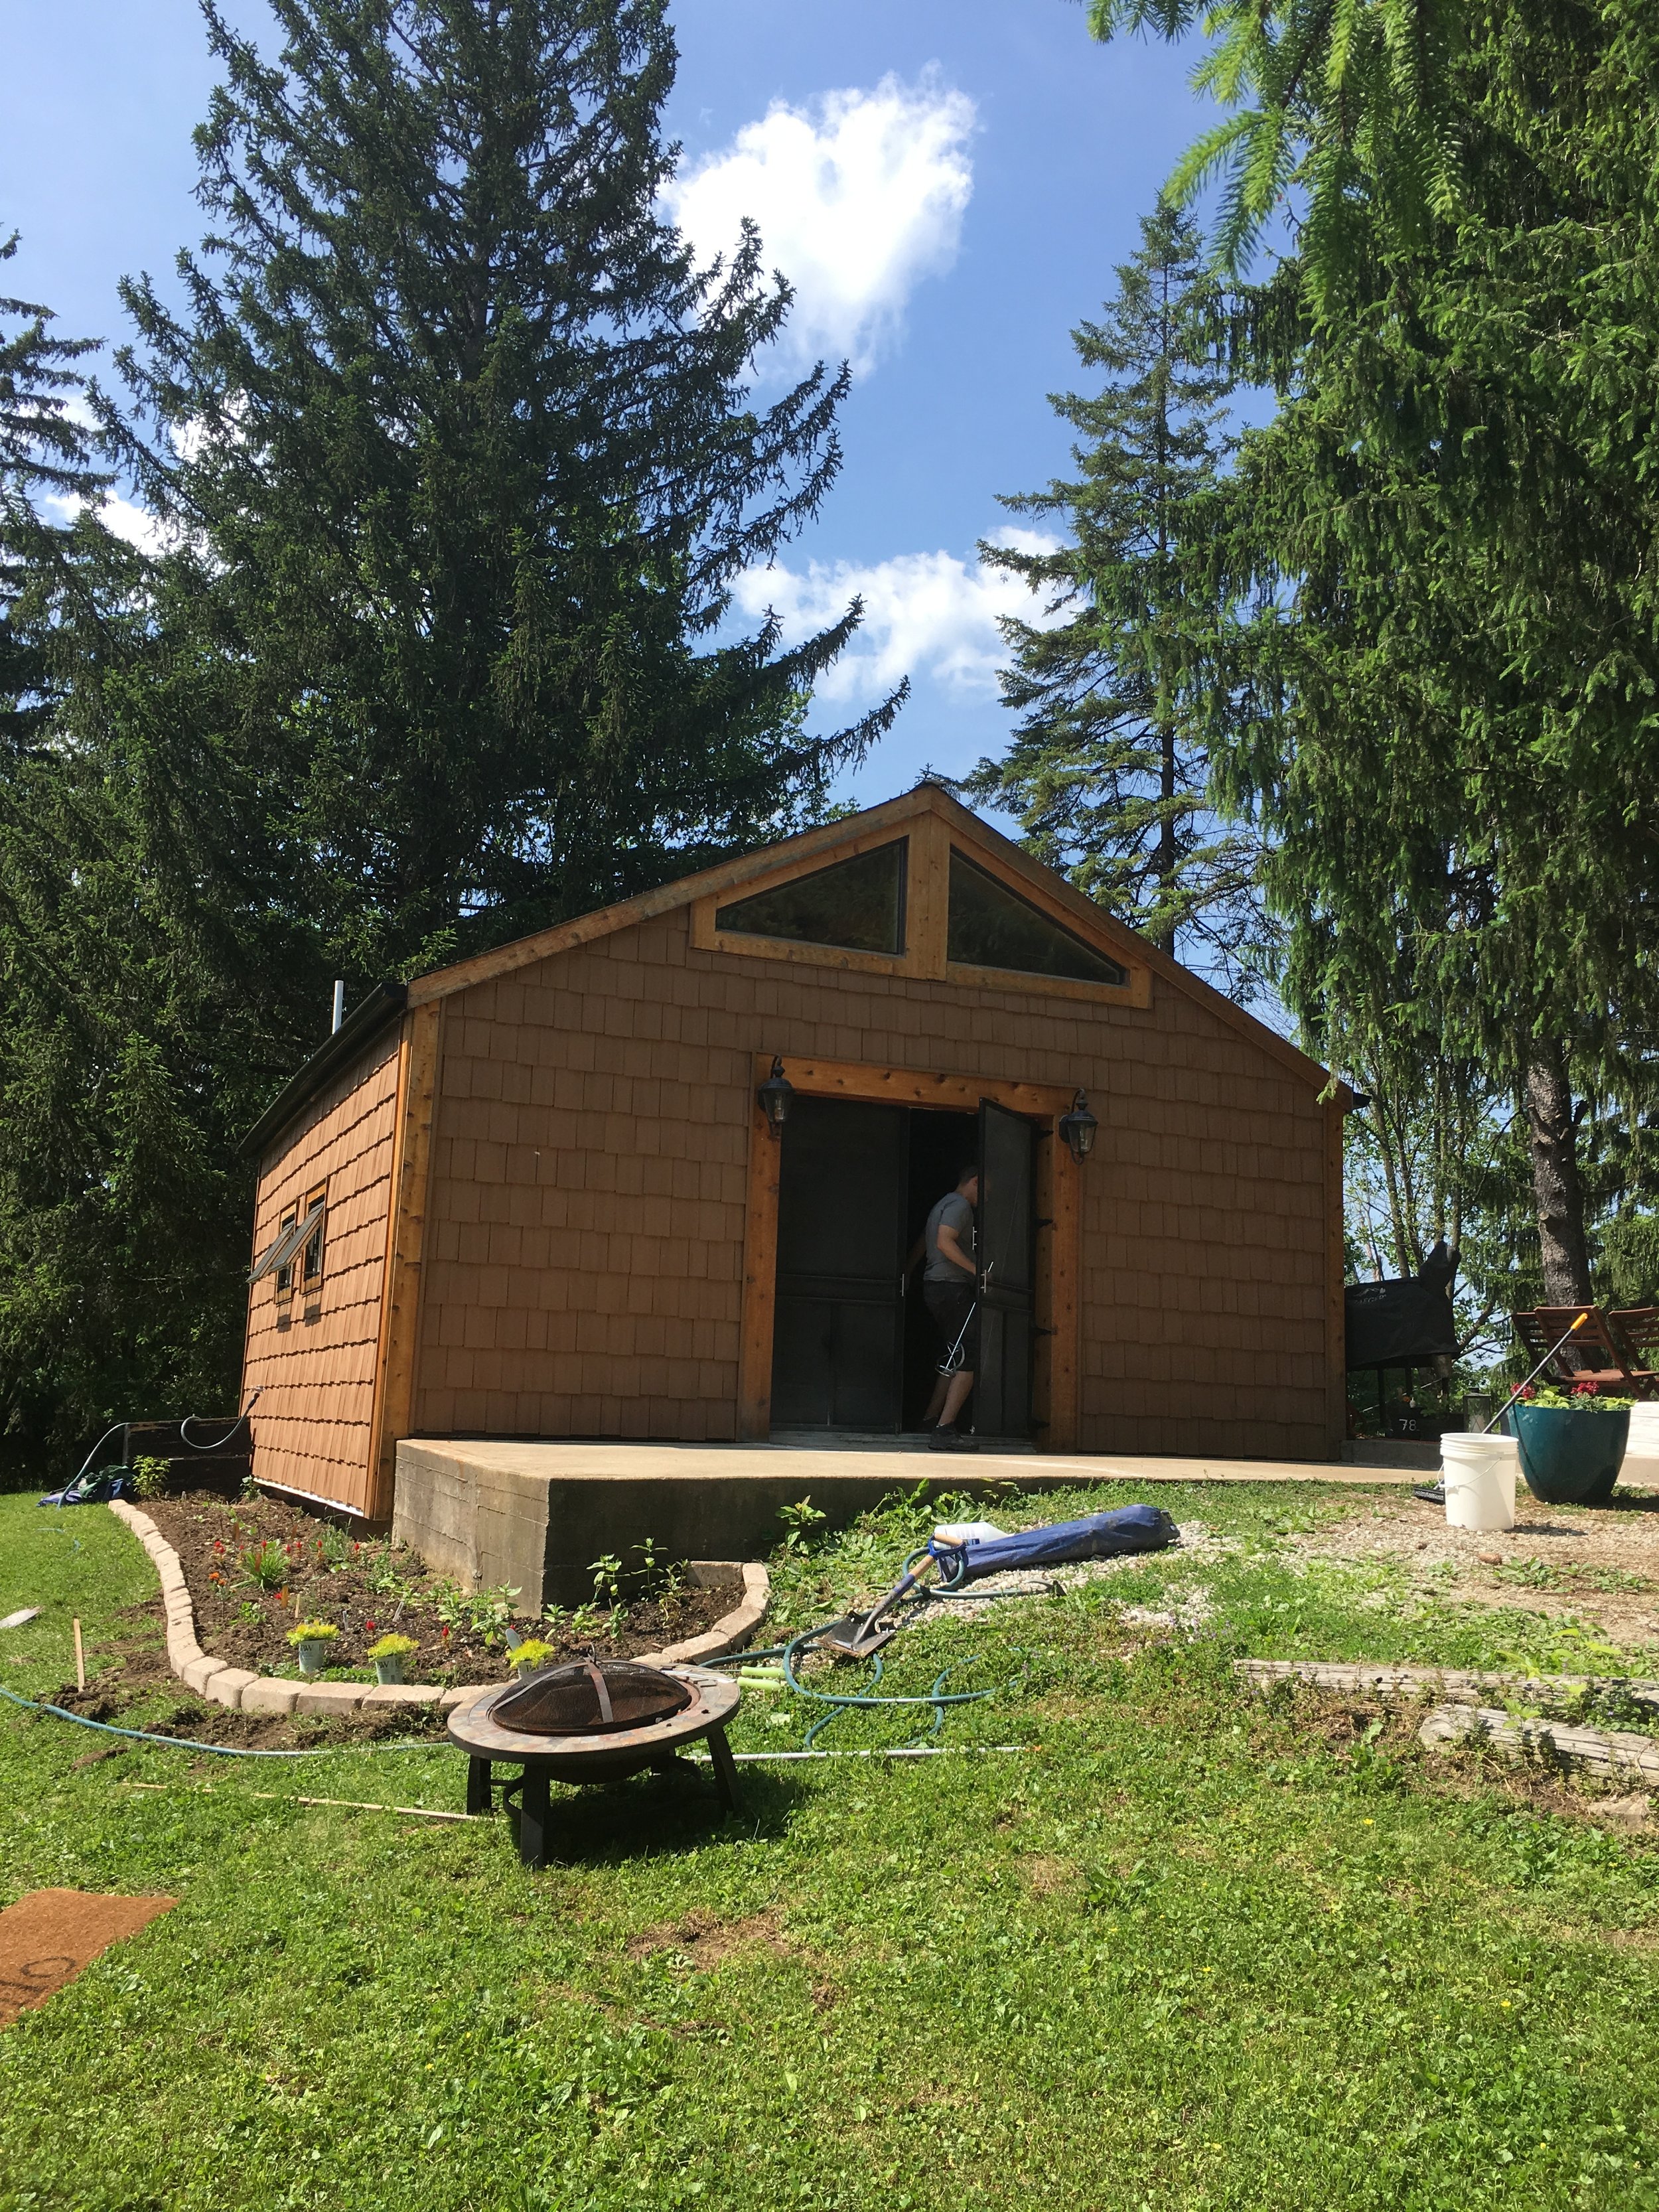
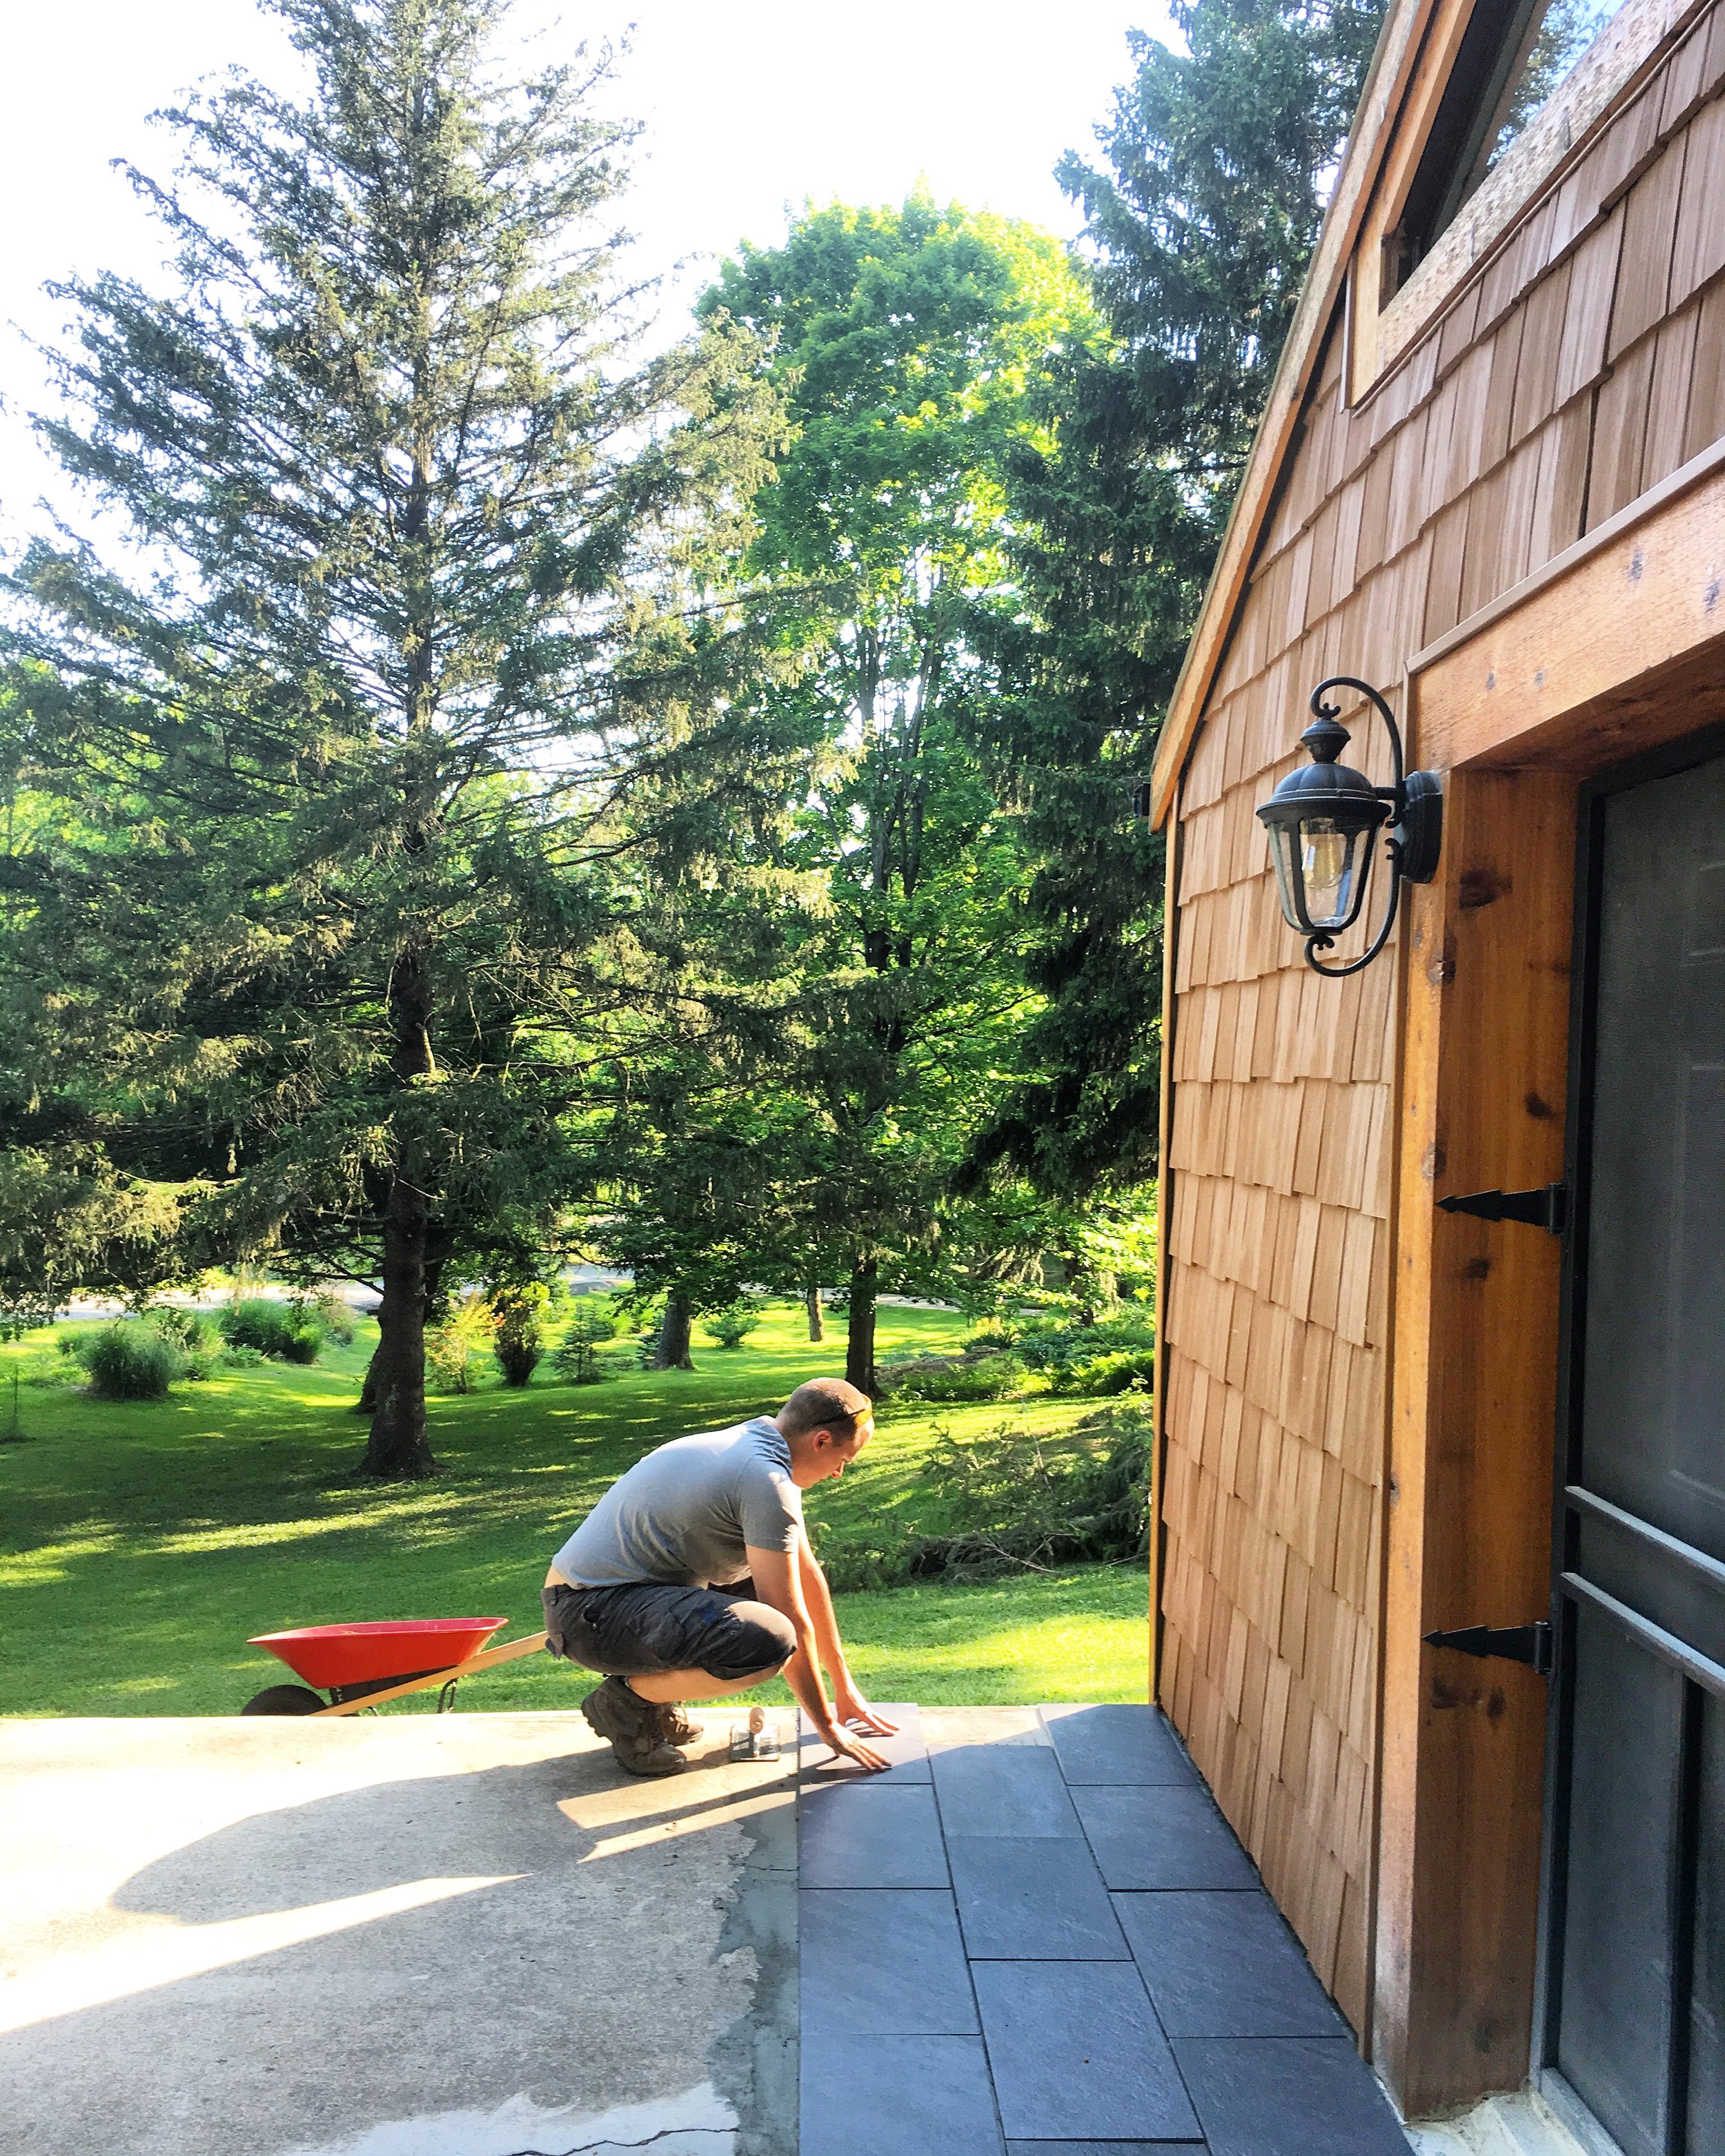
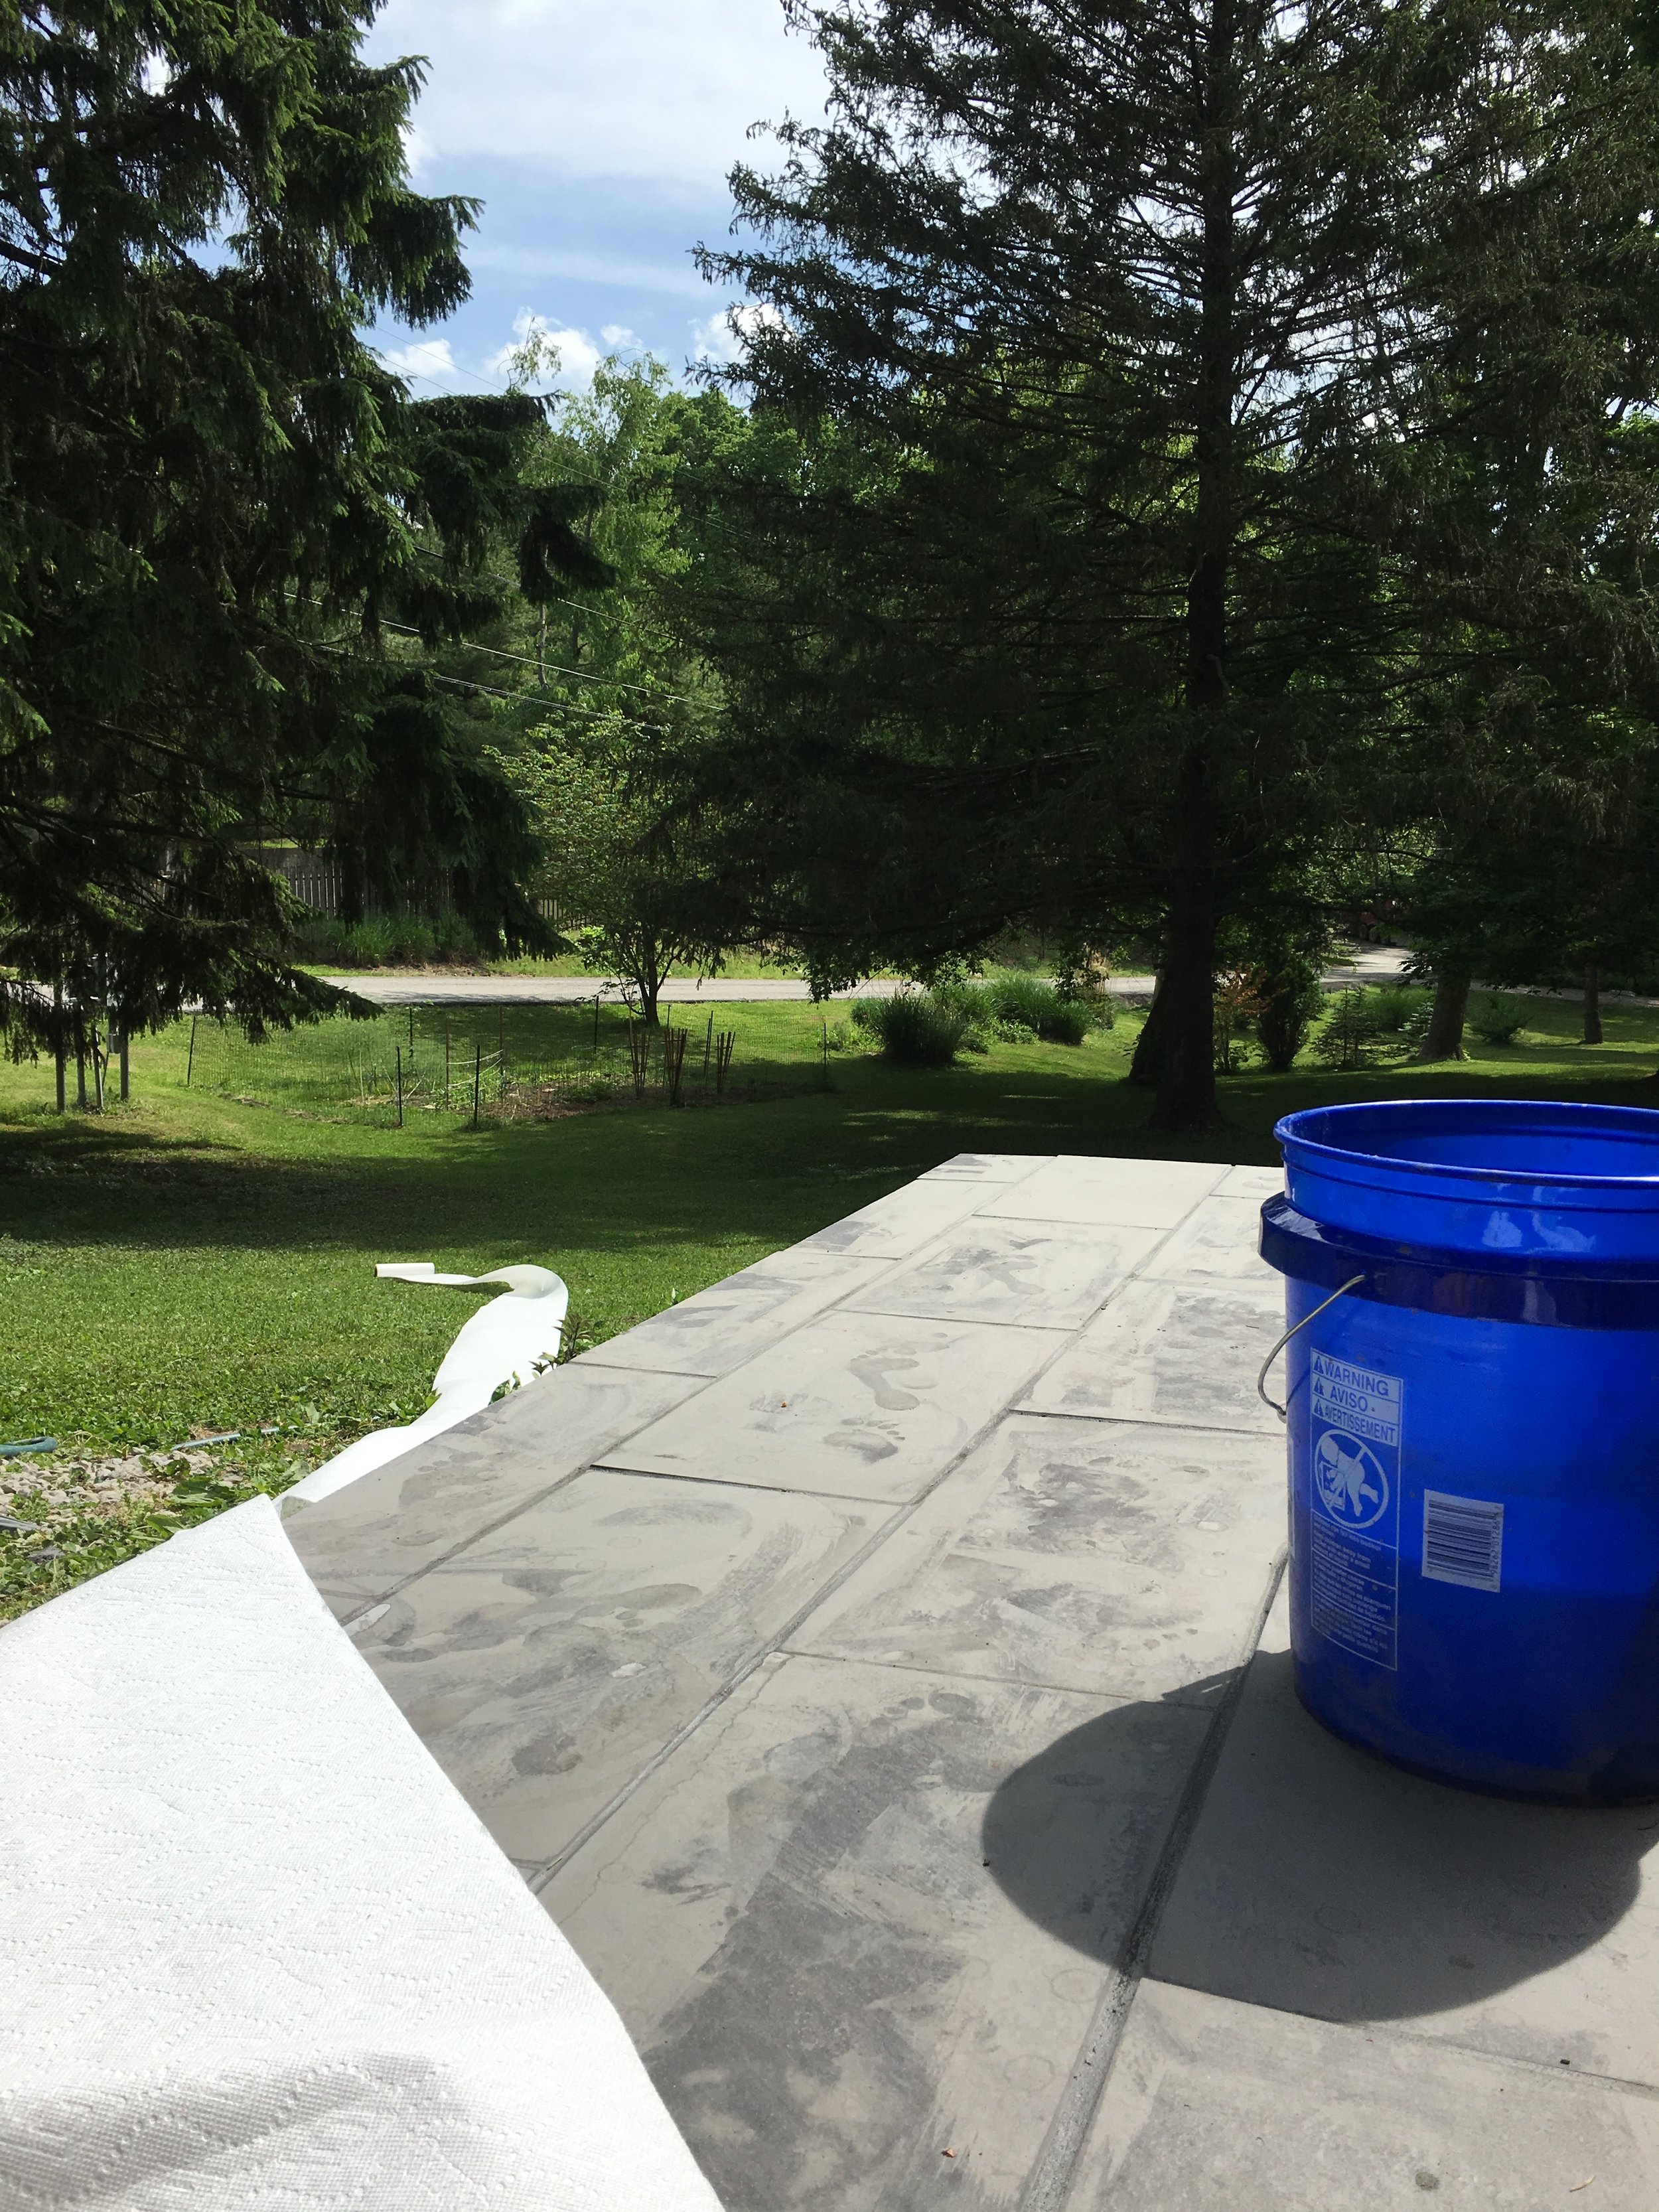
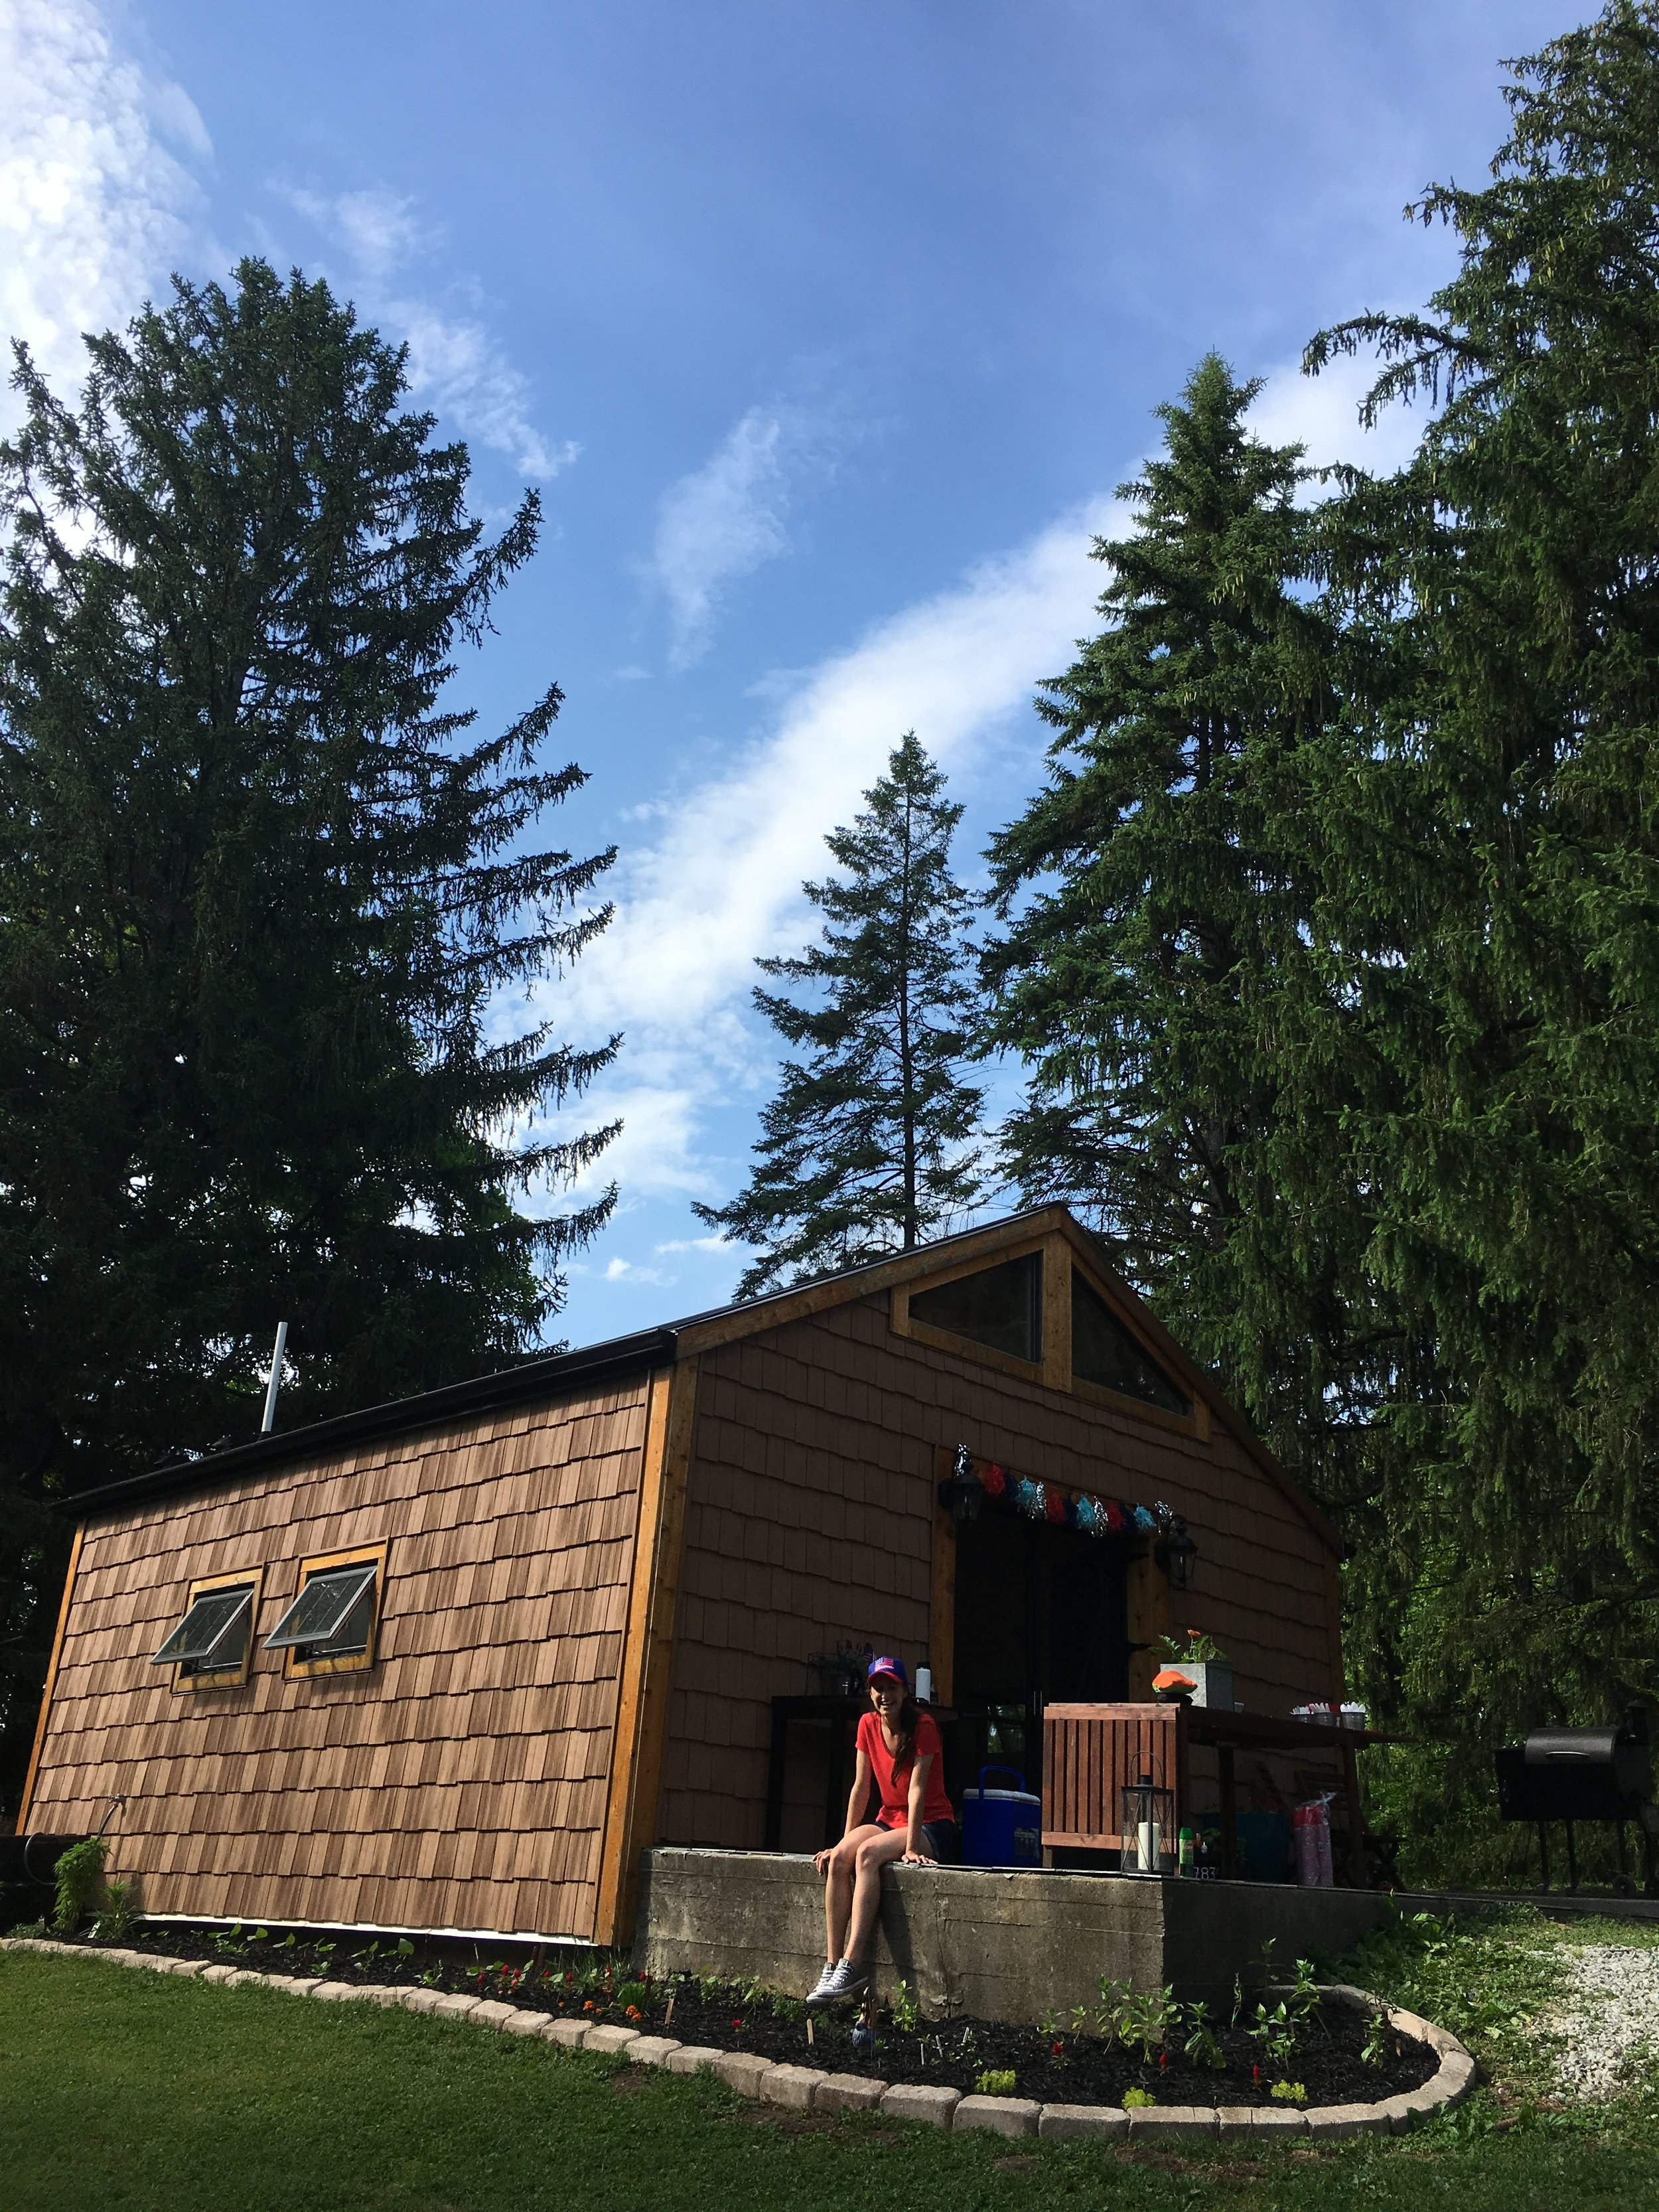
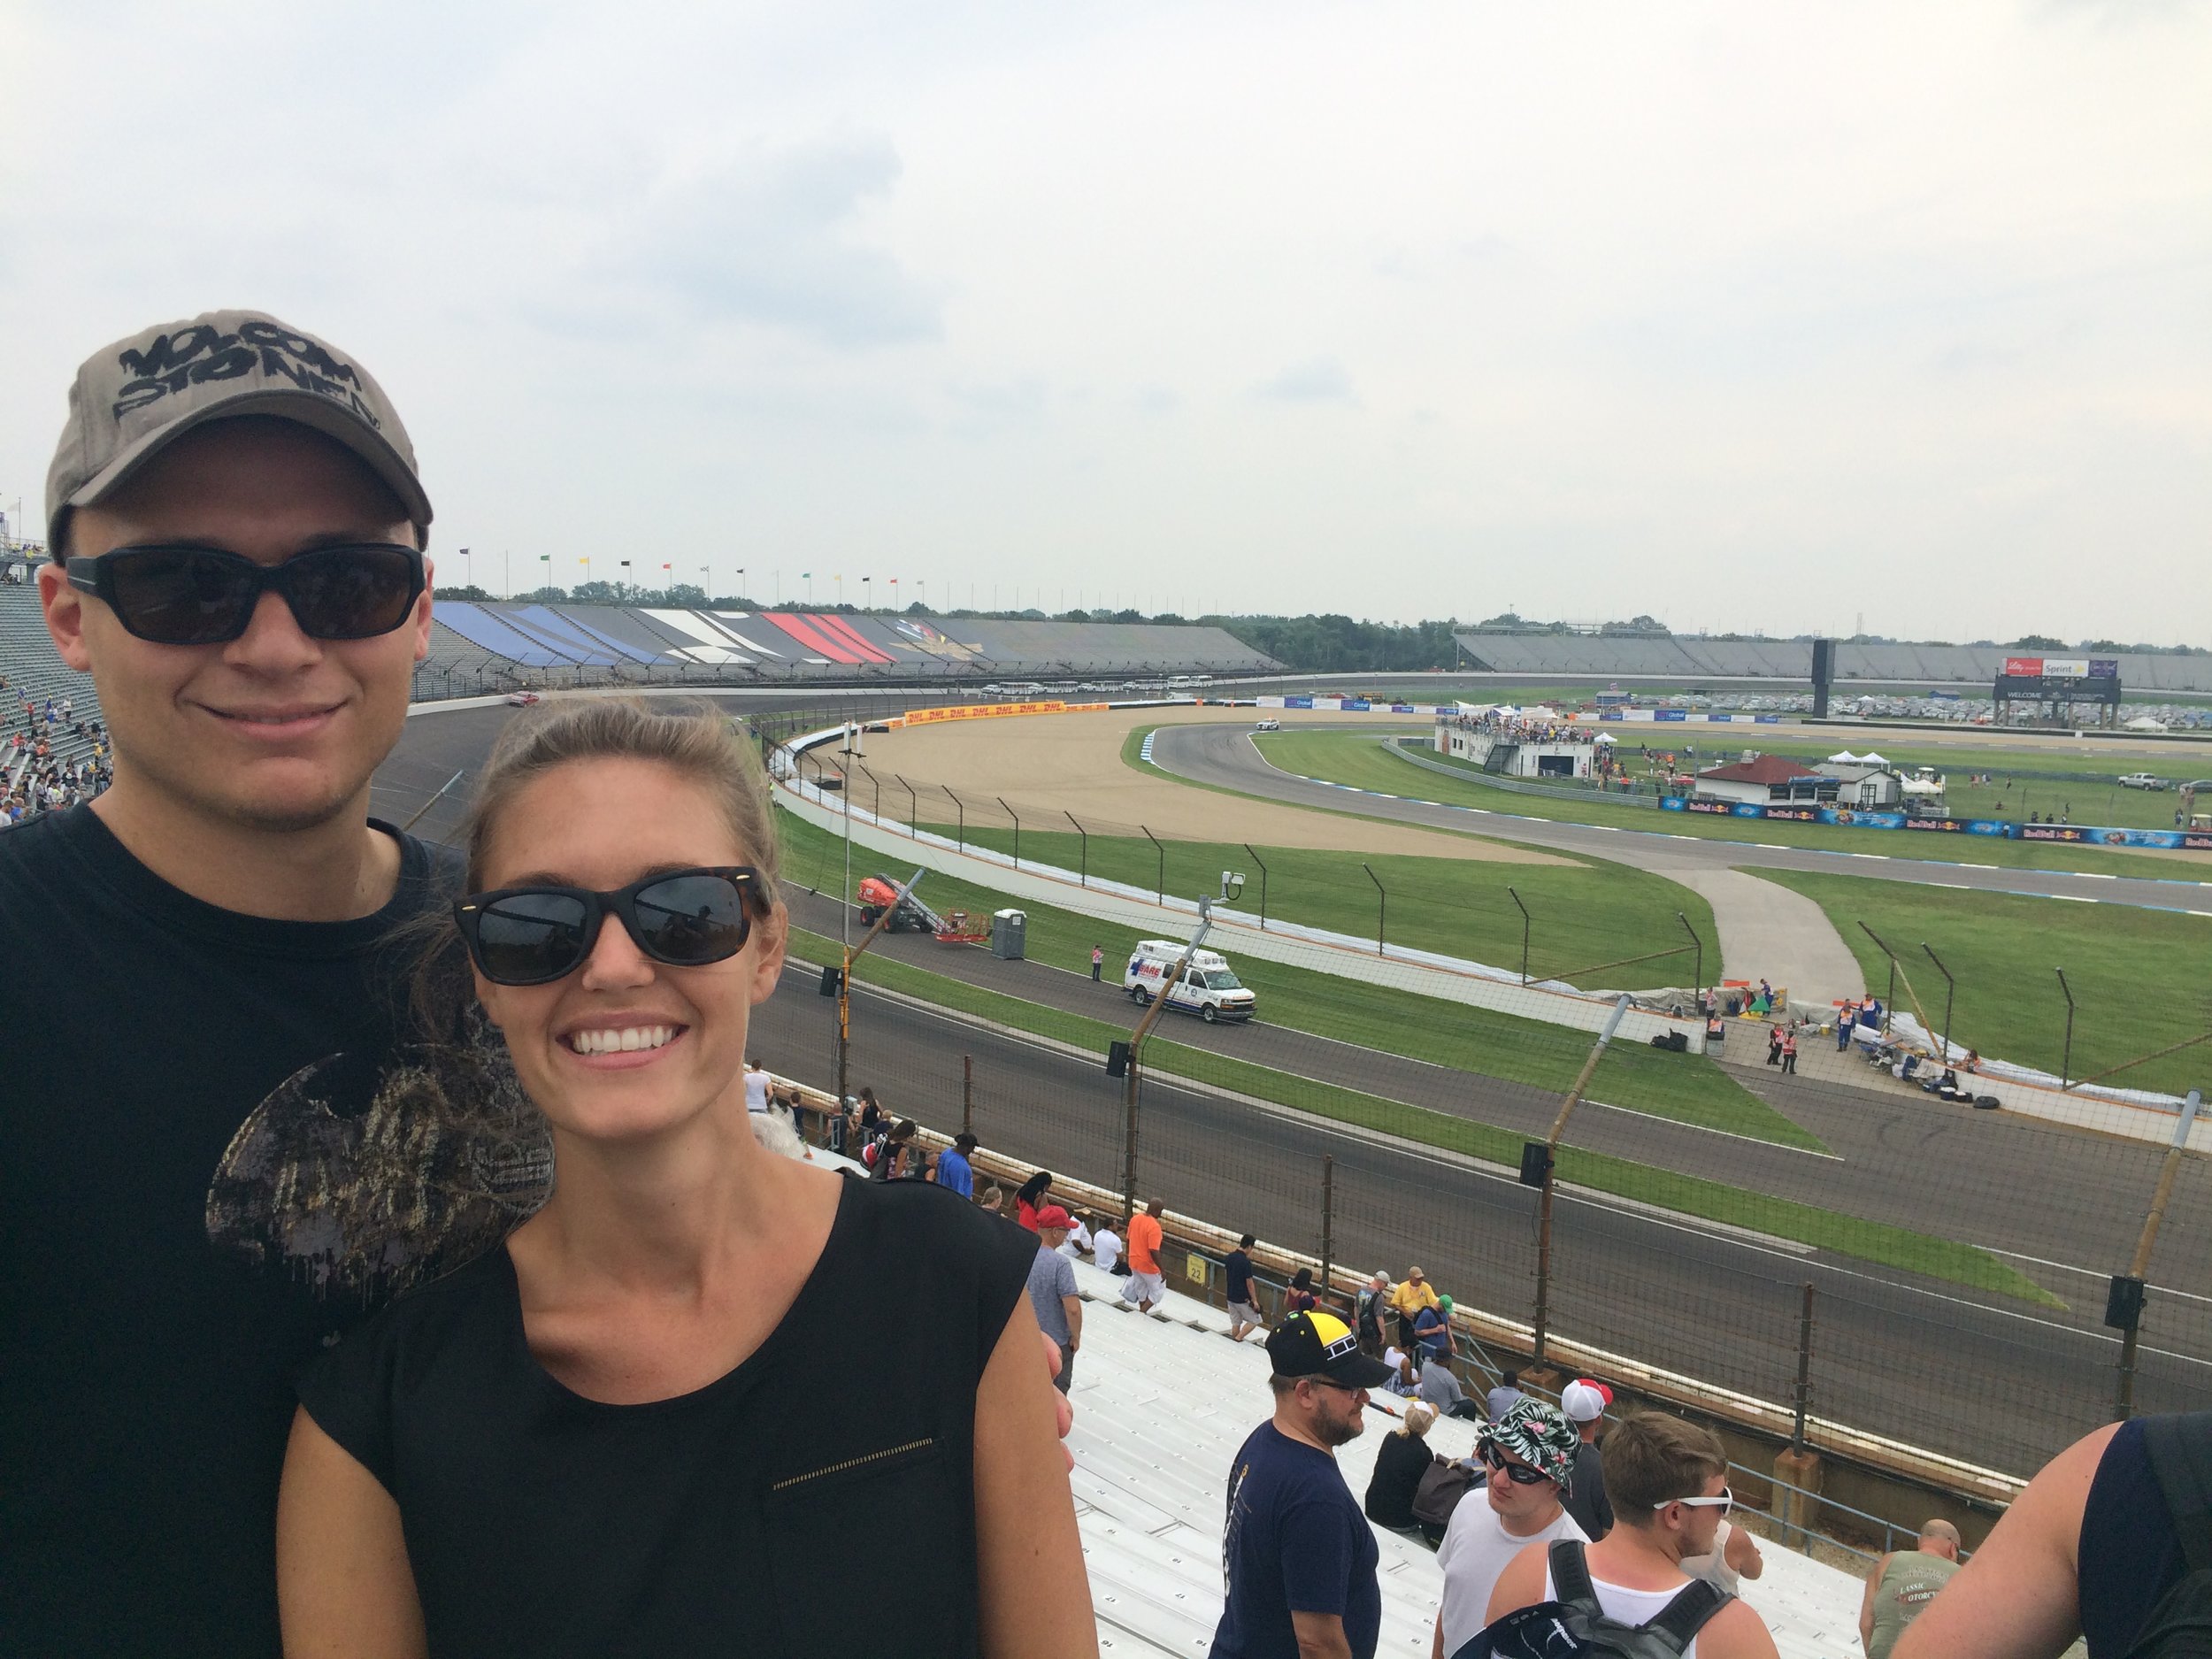
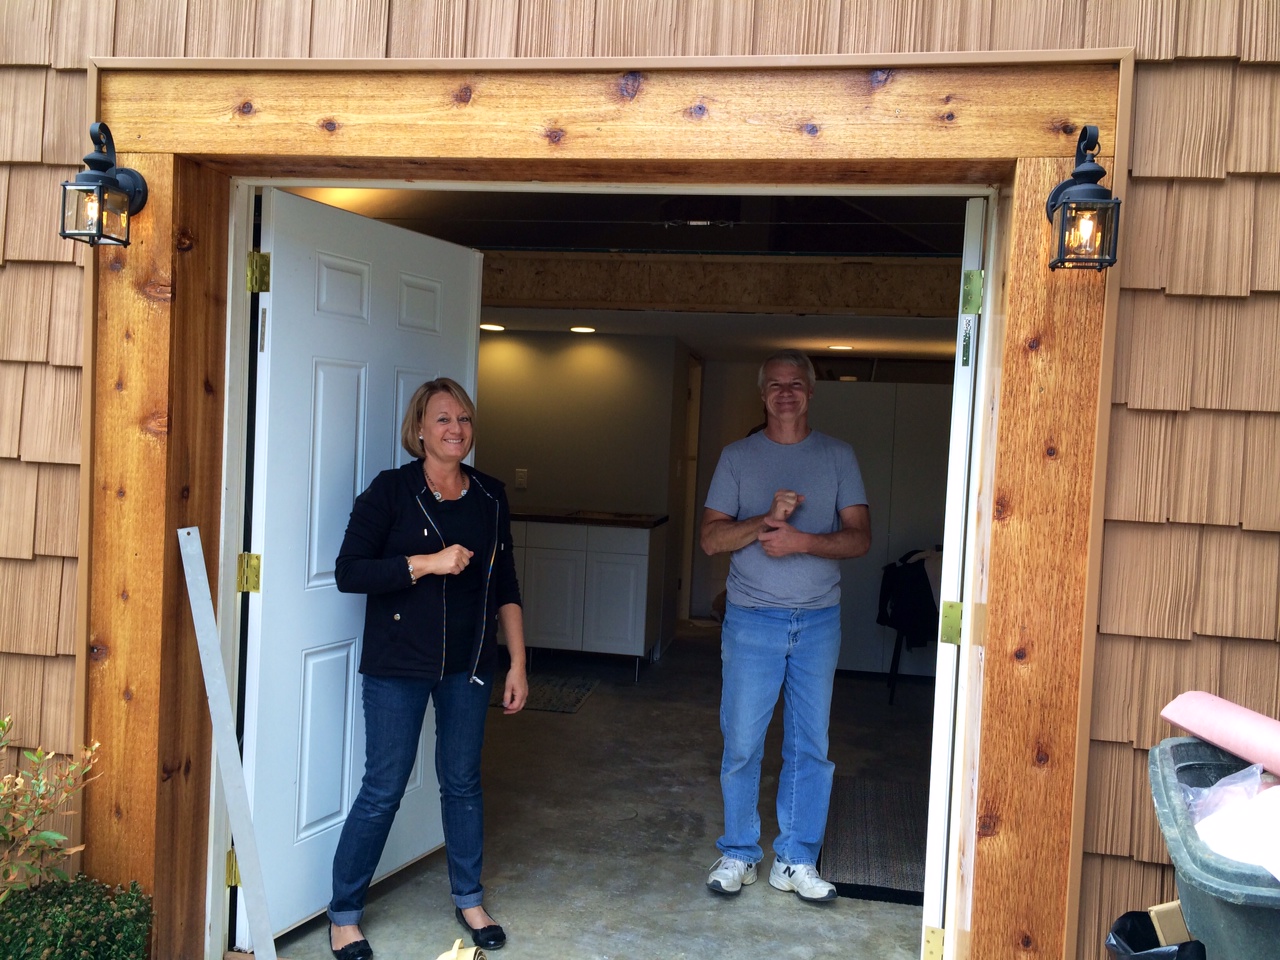
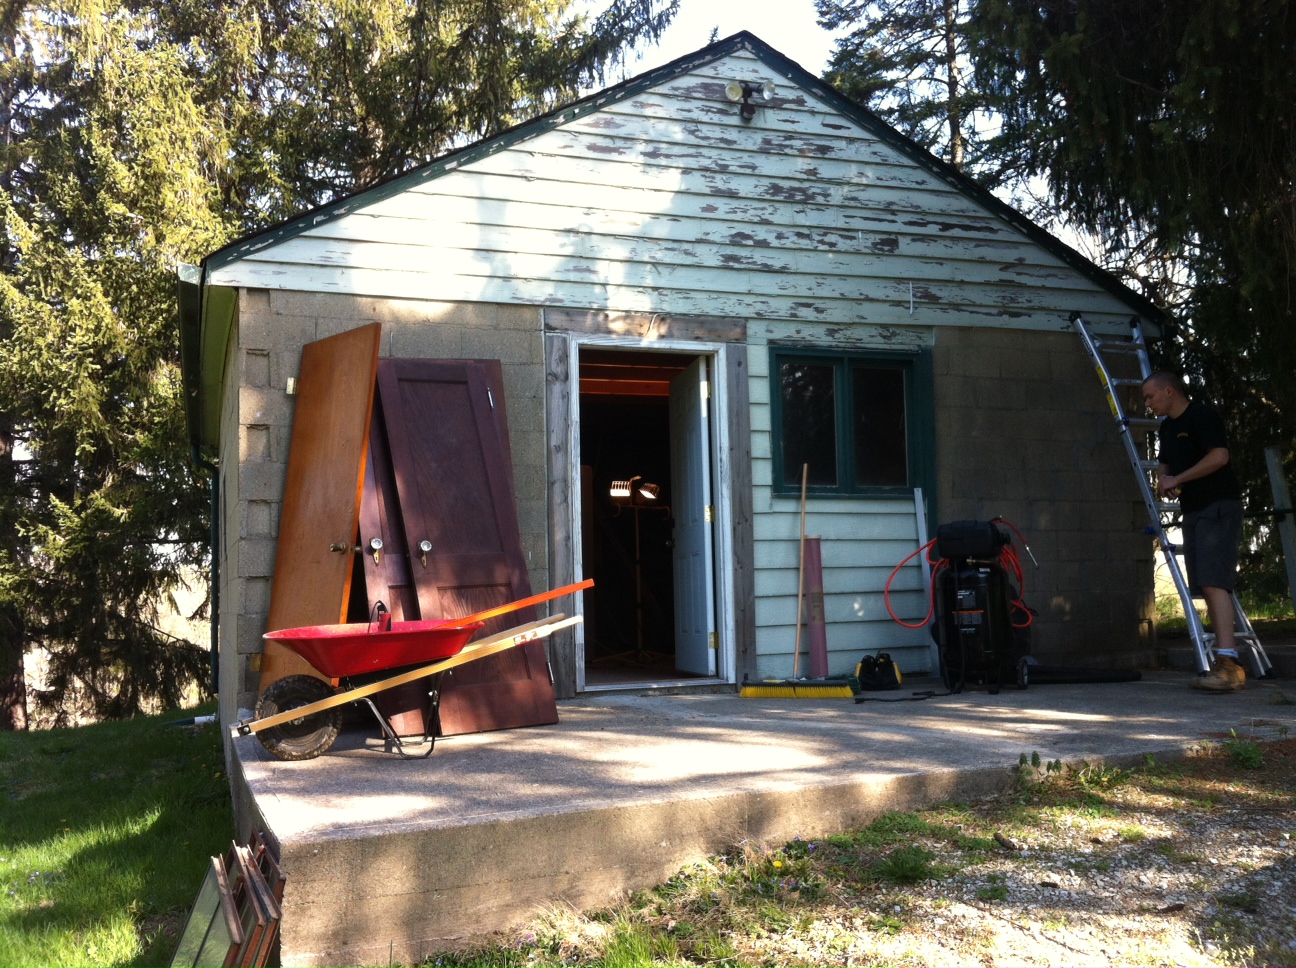
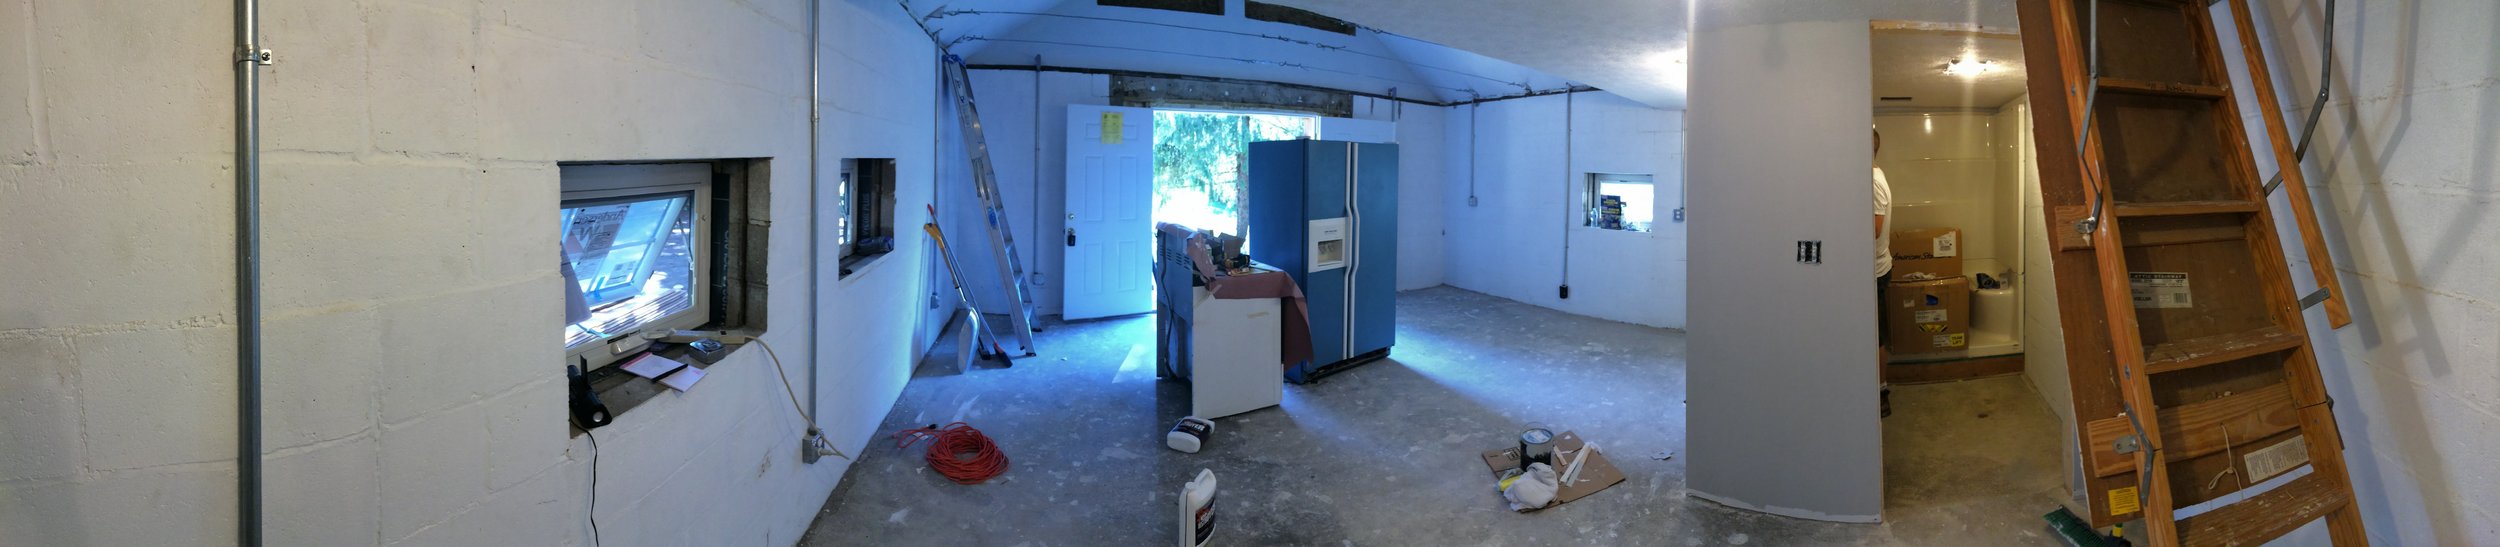
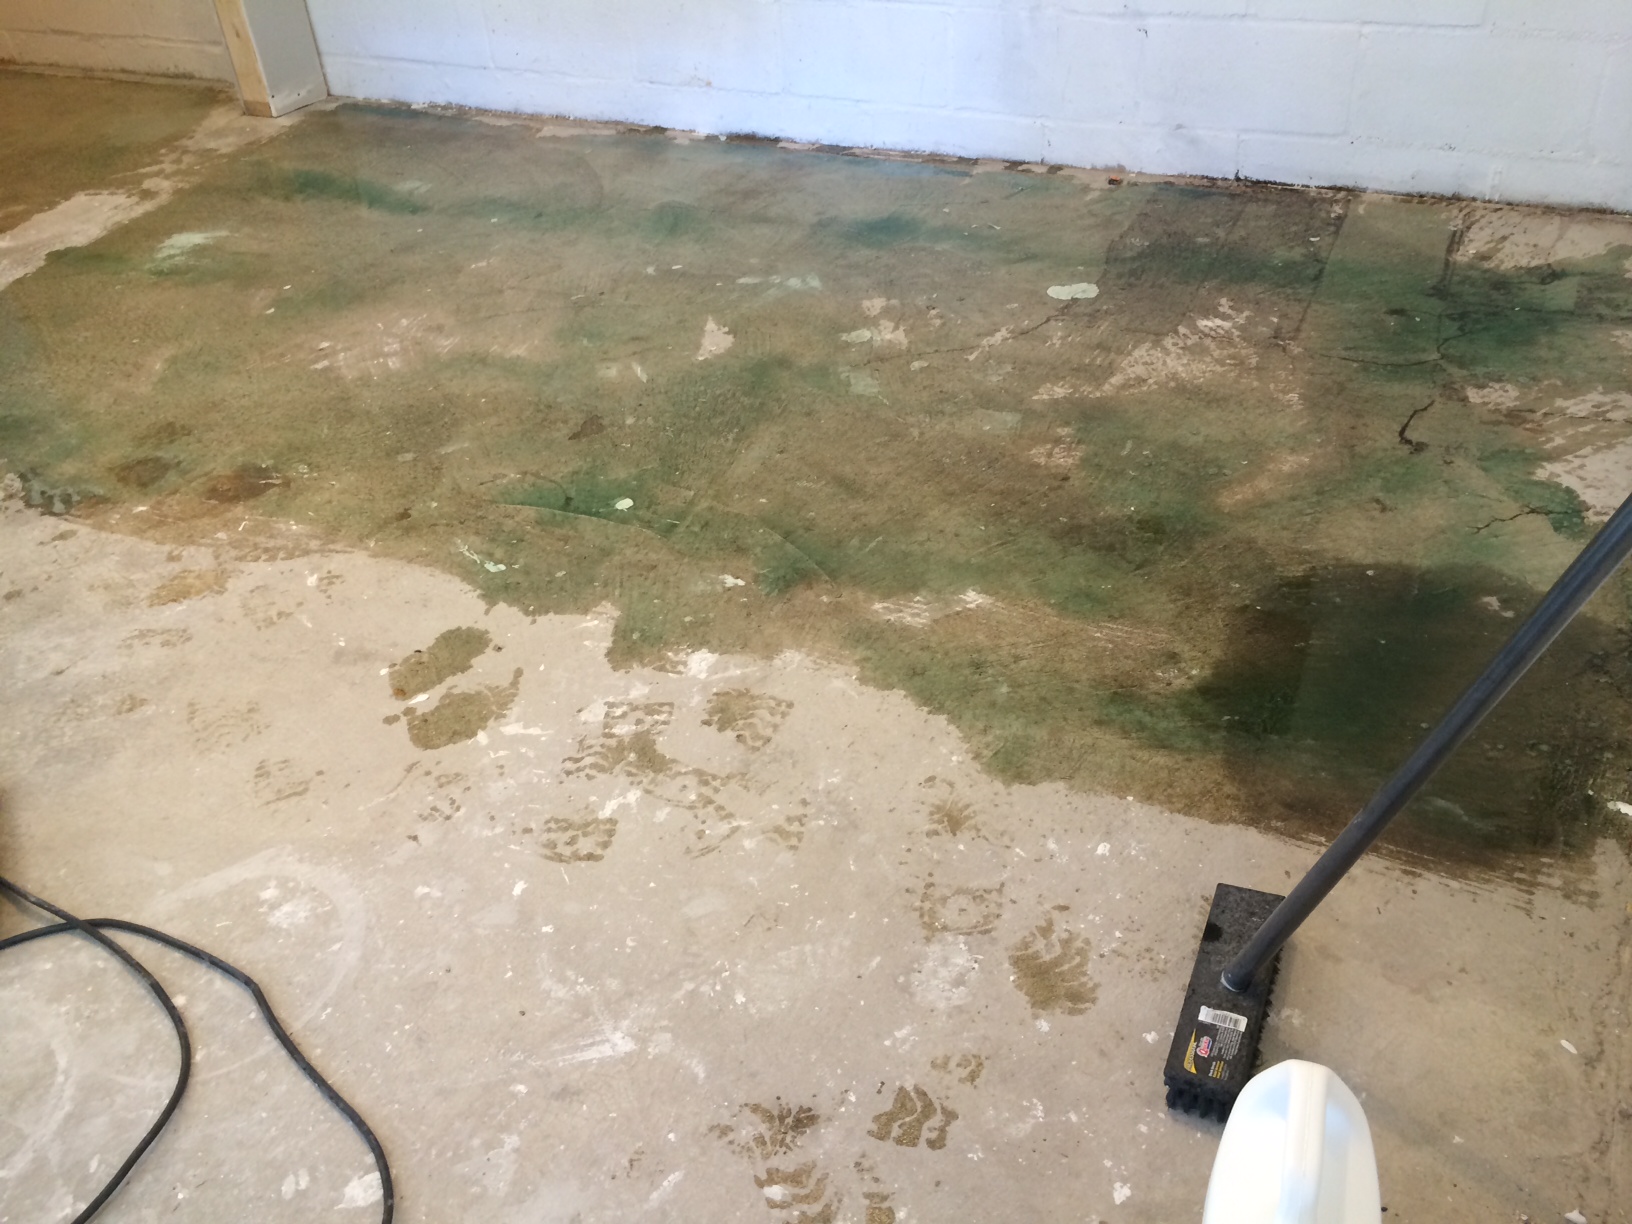
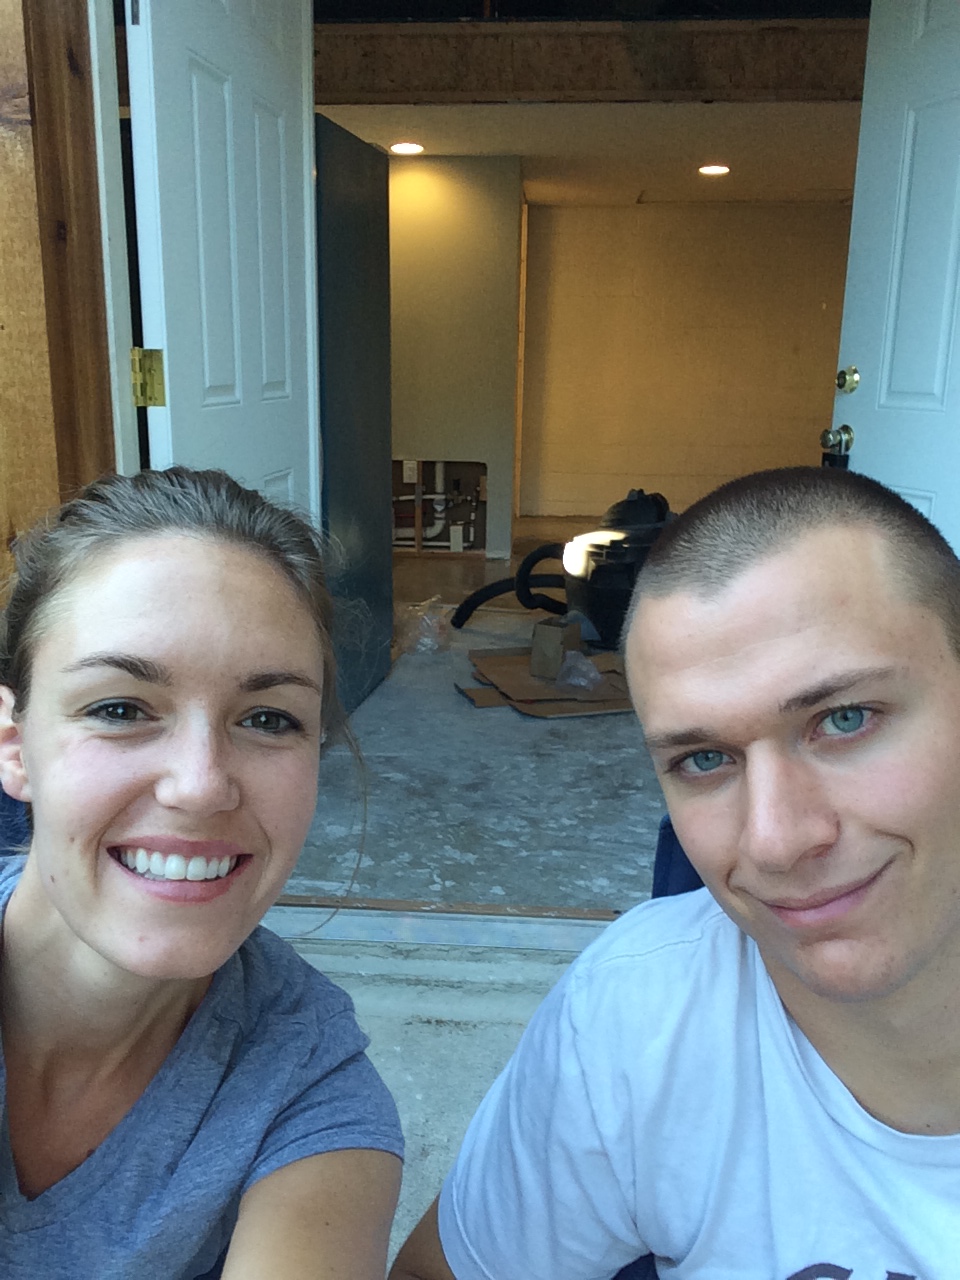
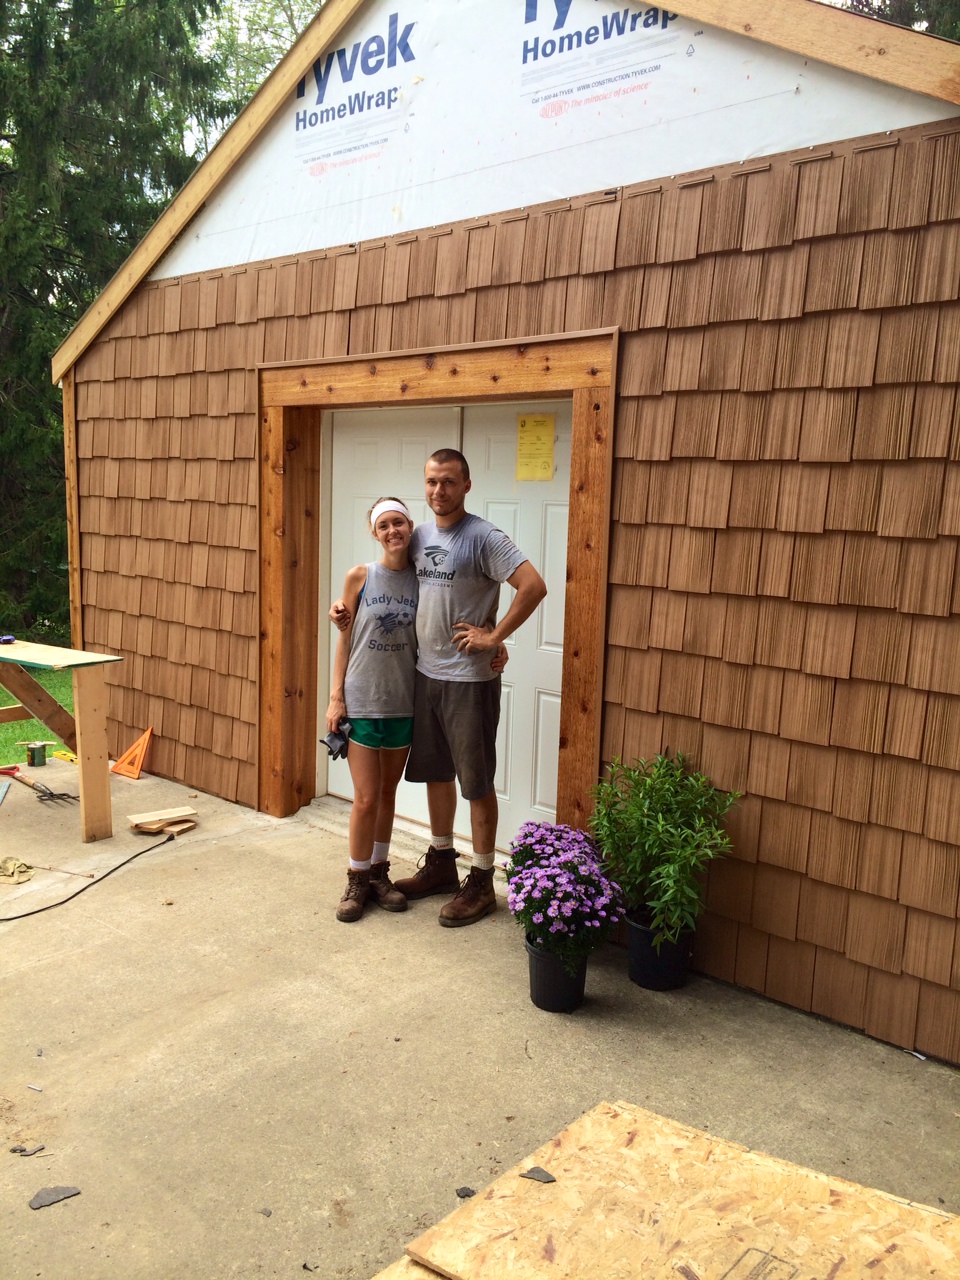
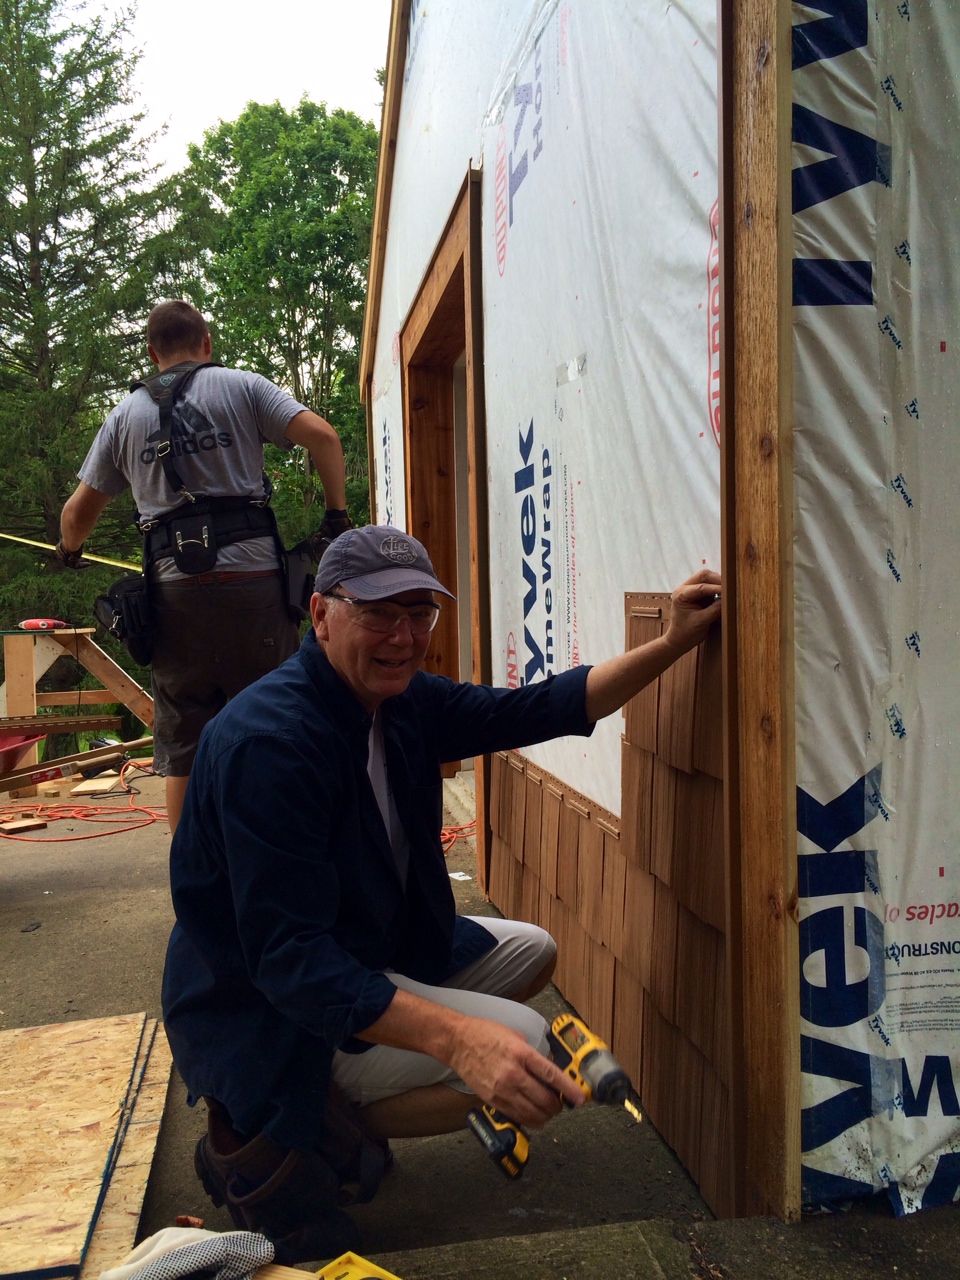
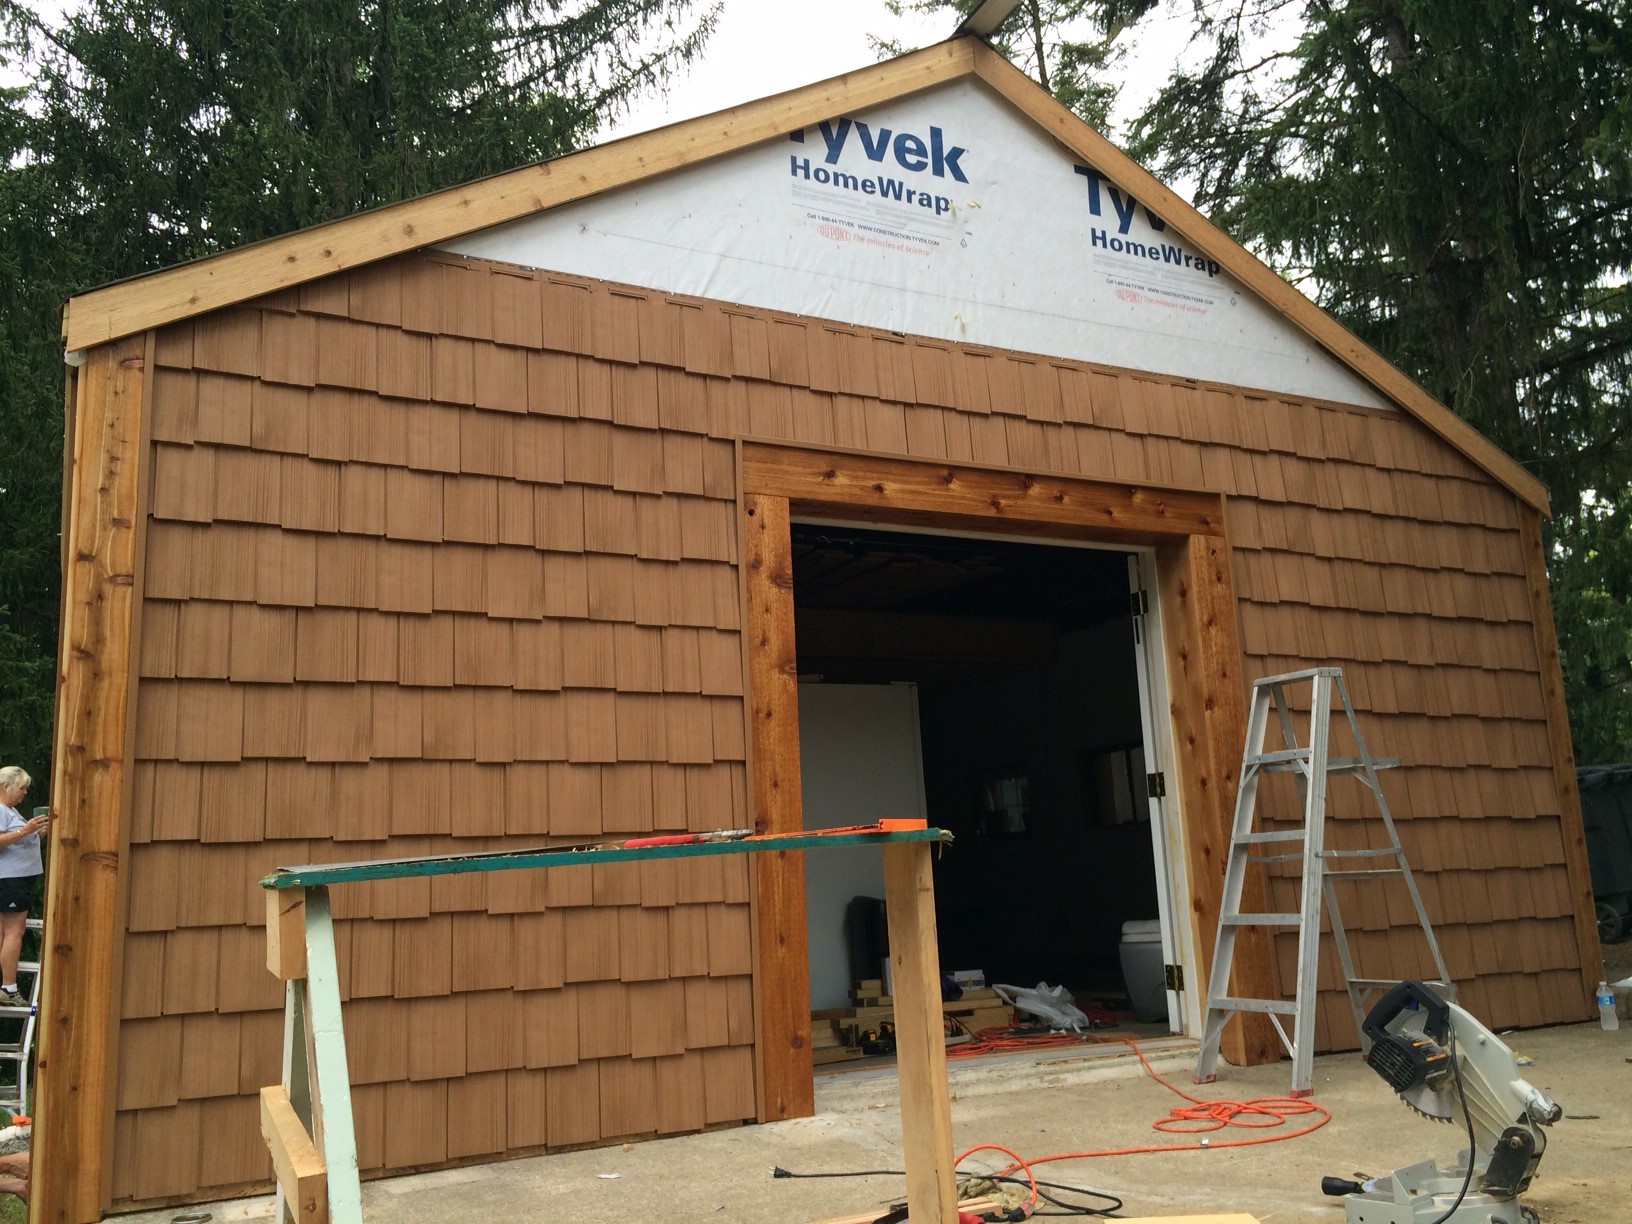
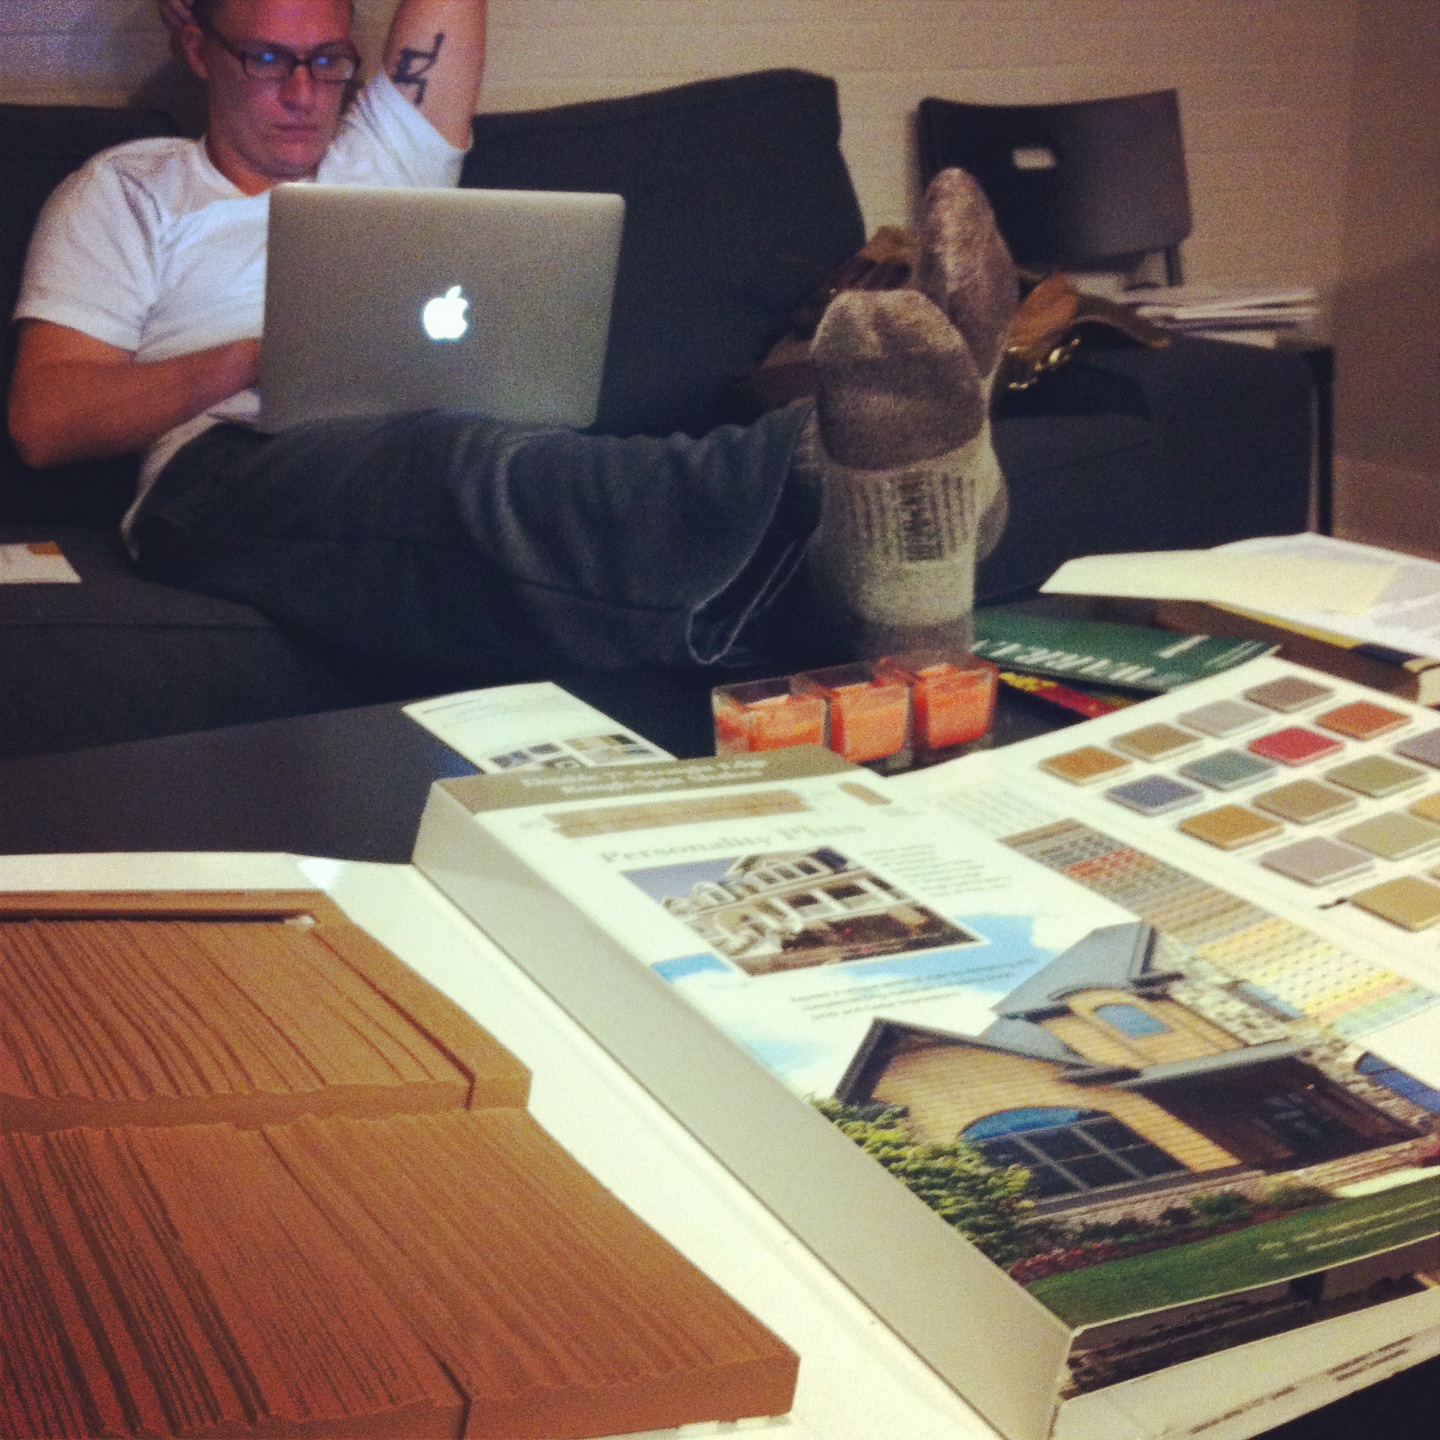
As most of you know, these past 6 months have been filled with construction project after construction project.  Although I have a very muscular build and am incredibly knowledgeable in all things construction, I found those projects to be just slightly over my head.  We are now to the point where I can be of a LITTLE more help and am excited to share what we have been up too:

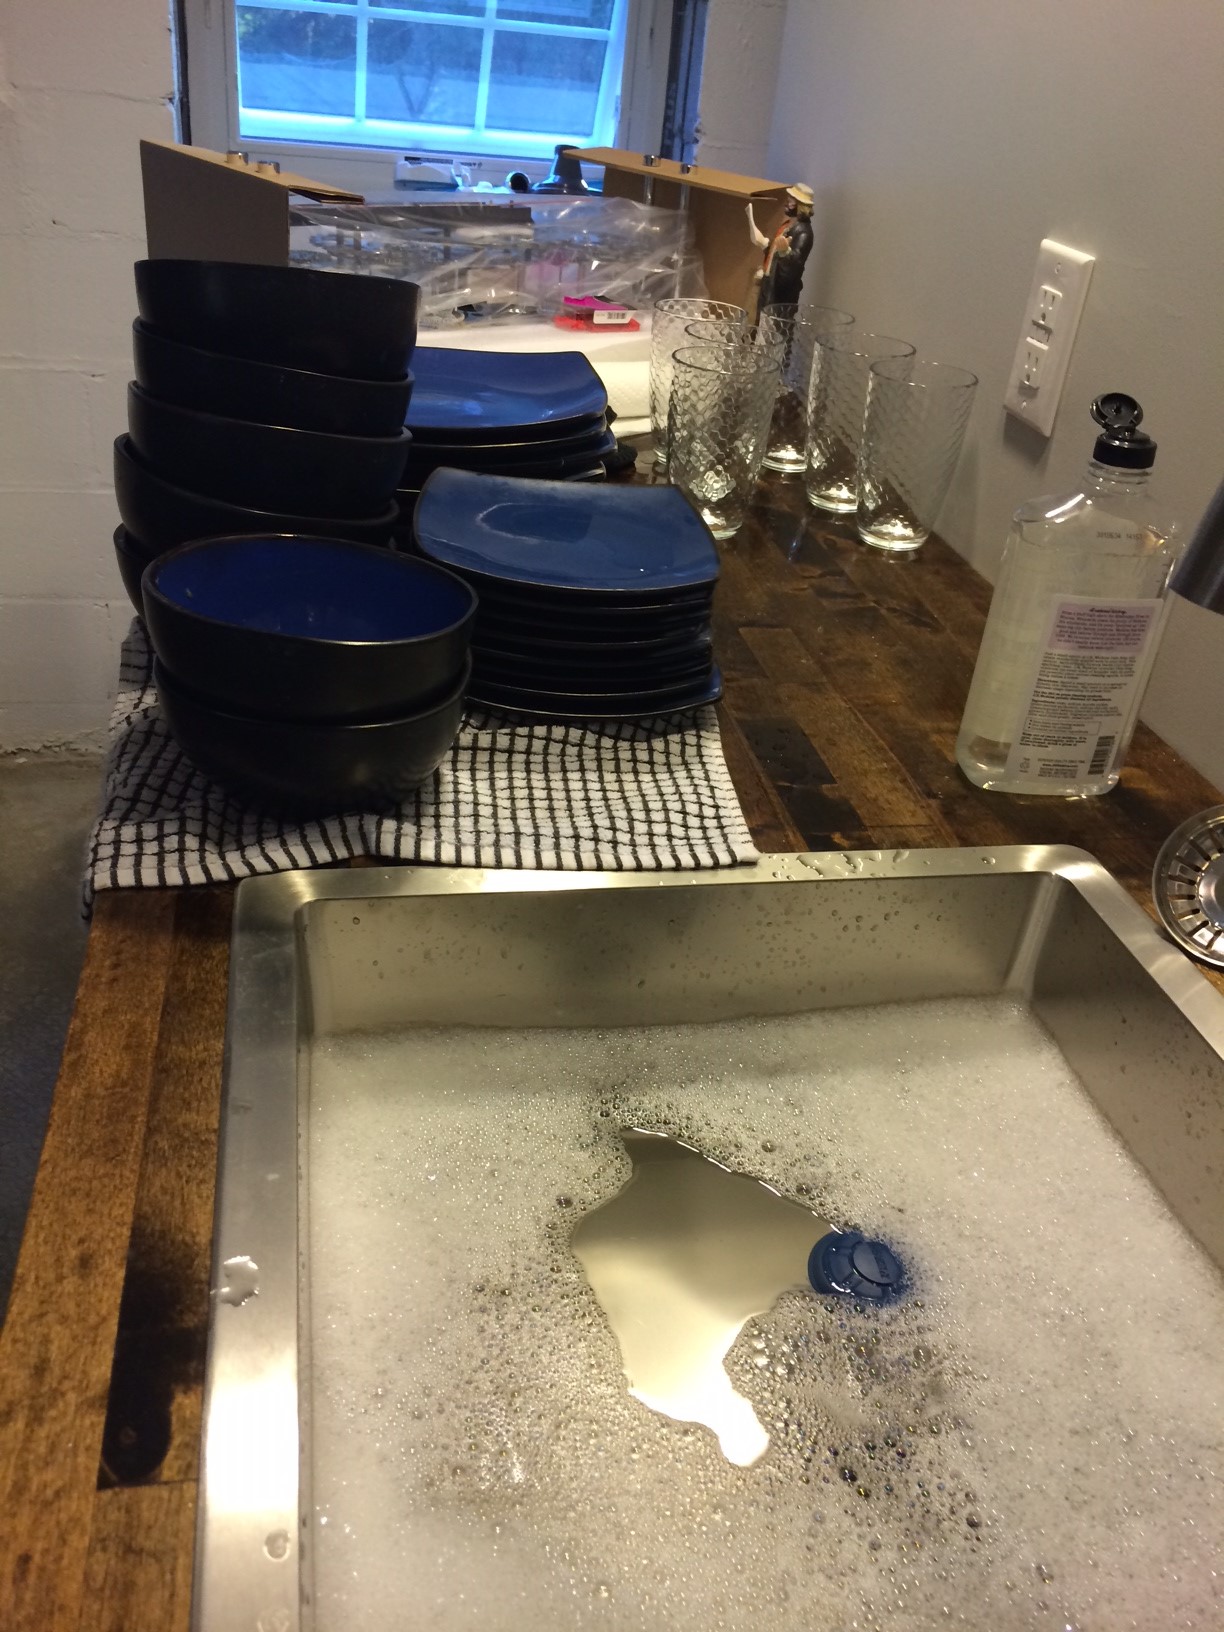
Door handles! We got these bad boys from Ikea and I love them. No funny stories to go a long with the installation...except that D accidentally put the first one on too high. This meant that you couldn't open the the drawer without first opening the cabinet door. So, if you come visit and look very closely, you will notice one of our cabinet door handles has its top chopped off...and we like it that way...adds character.

Bunker move 3-2Bunker move 3-3

Closet Space! This area has been a work in progress. We had been looking for a dresser and I found this great piece at a church sale in Winona. I walked into the sale and BOOM. There is was. Don't you love those moments when something inside clicks and you think..."That is it! That's it!". I also had that moment with our new drinking glasses. Unfortunately, Derek did not have that moment. But we kept them anyways! So. Ombre' Dresser.

Bunker Move 3-1

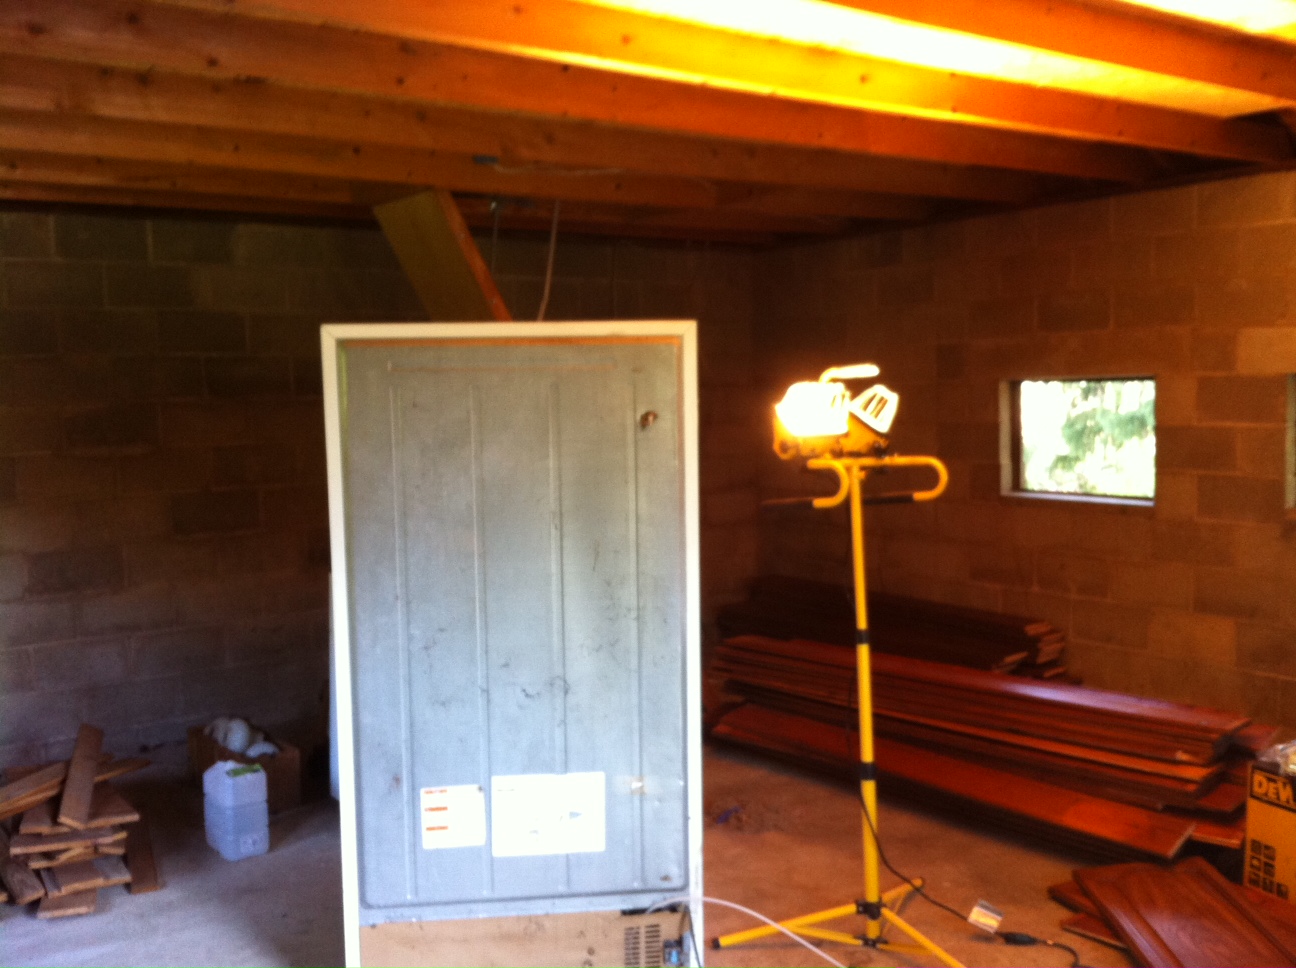
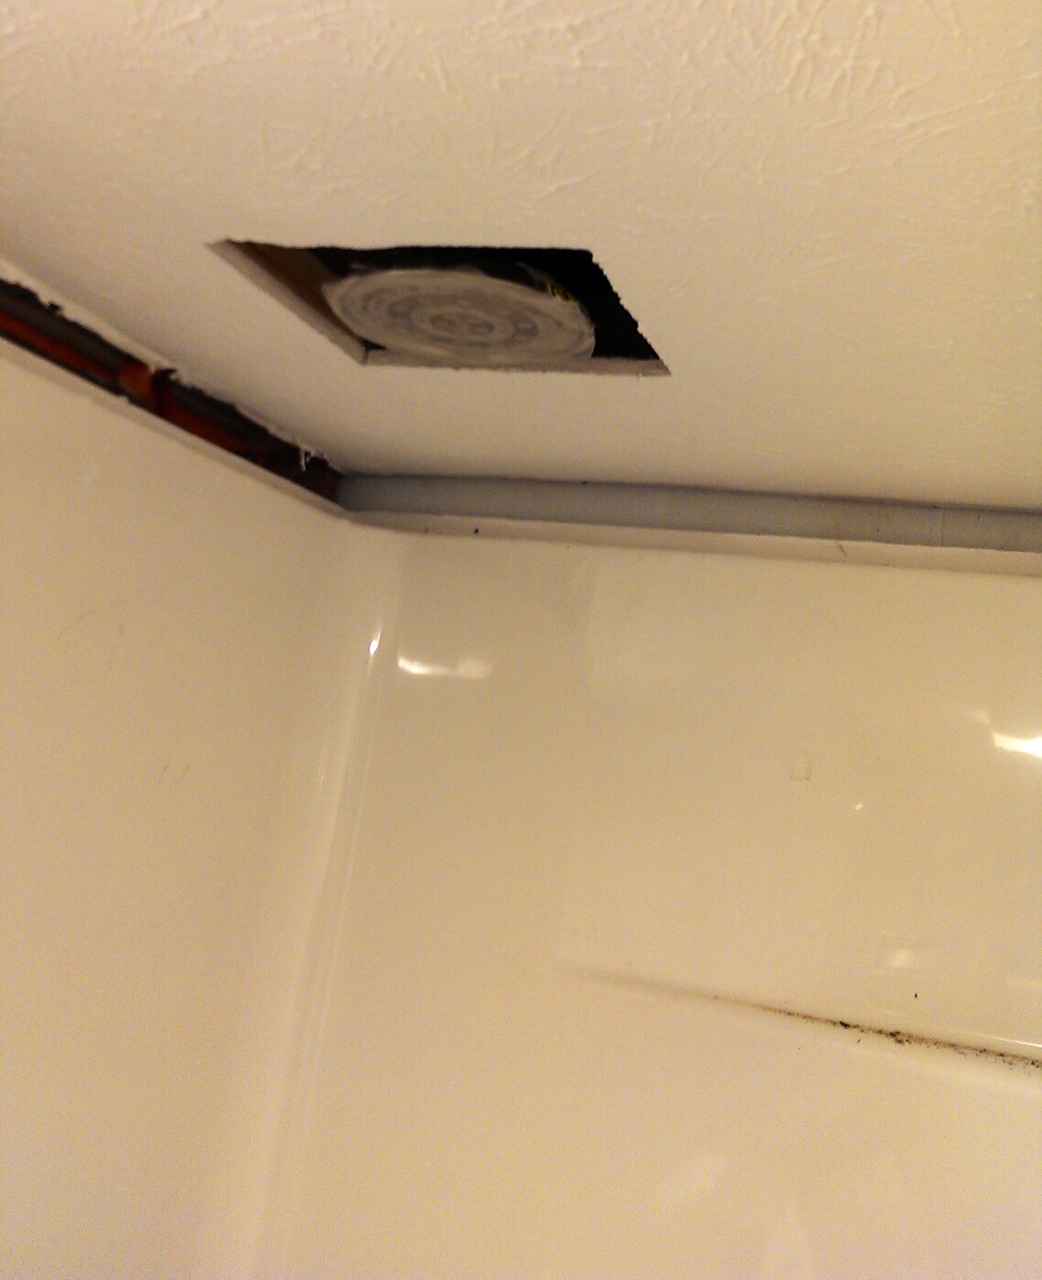
Bathroom Door!  We ended up saving all the doors from Longshot and I love every one of them. We opted to paint this door white. Once we got it in Bunker, it had the distinct smell of cat urine. After a good scrubbing and clean down, I painted this sucker a lot. For the final touch, we installed the original door handle. And it doesn't smell like cat anymore.

Bunker move 3-6 Bunker move 3-5

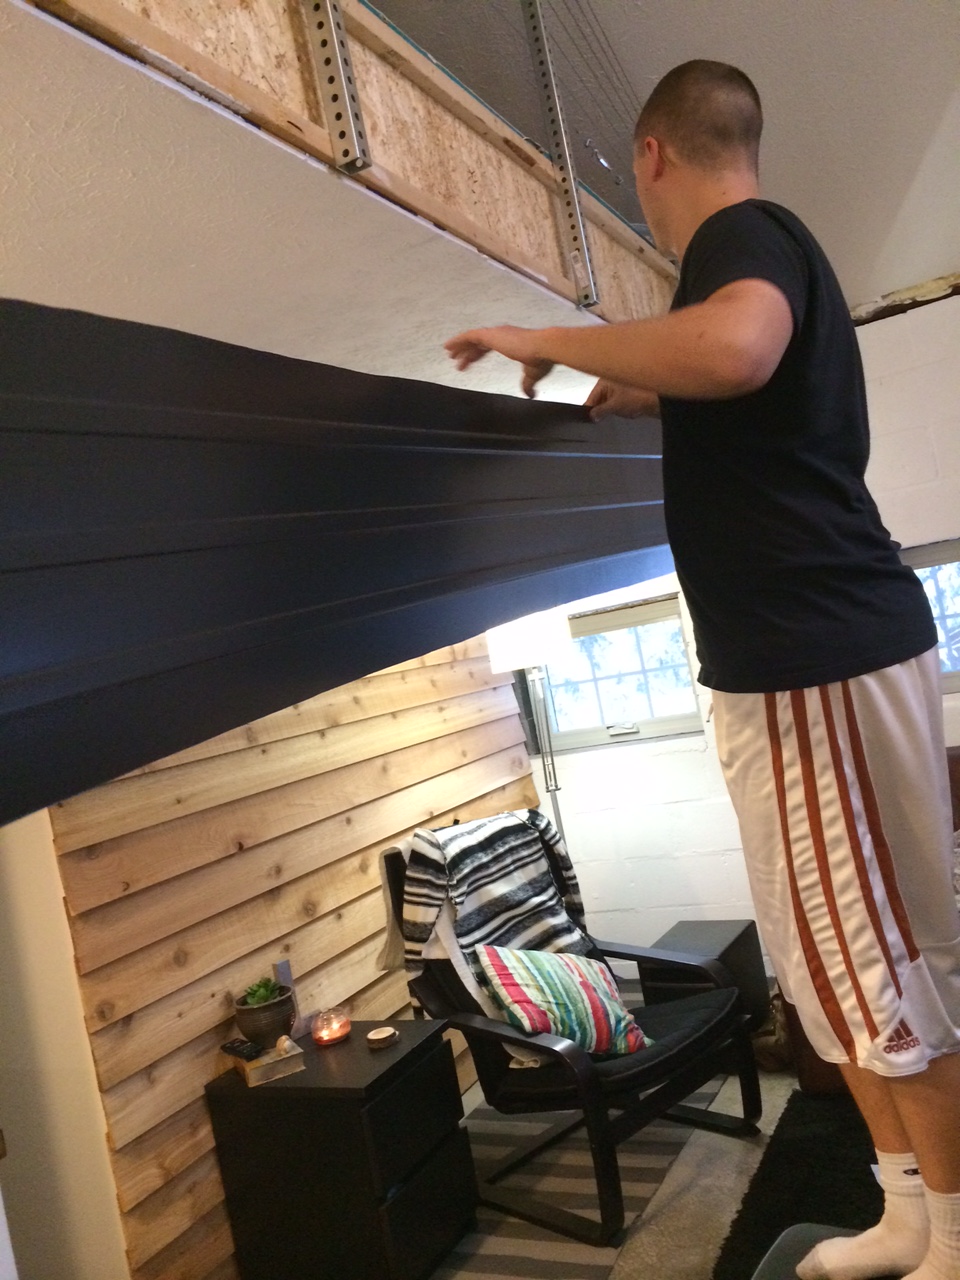
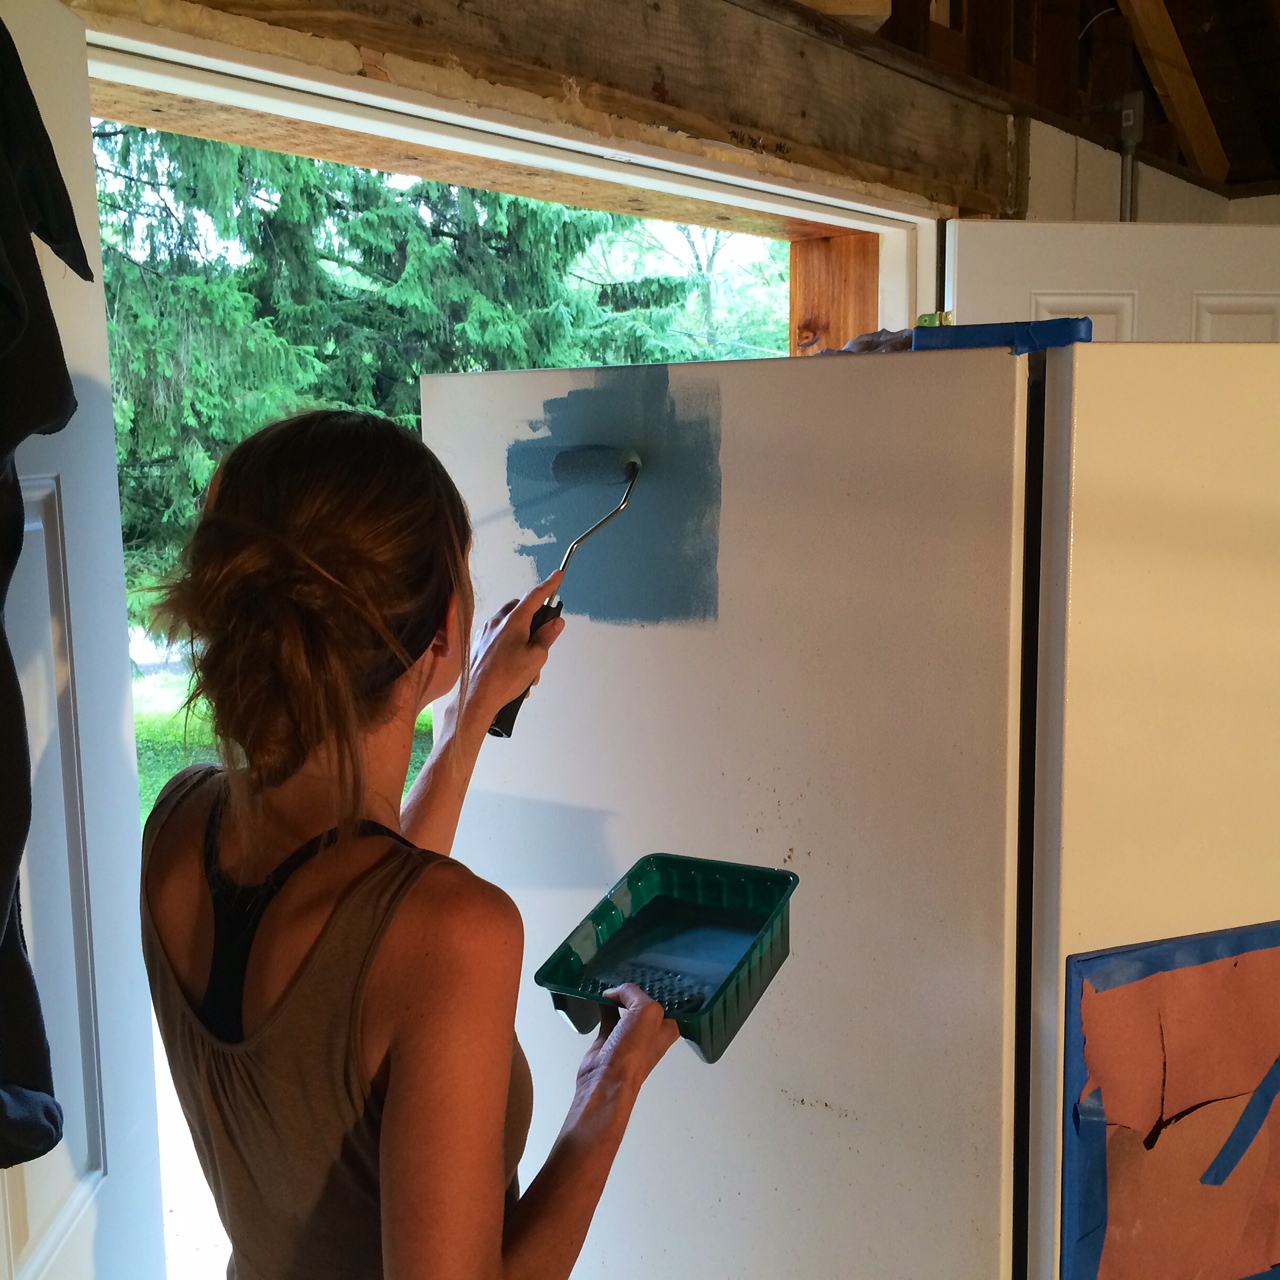
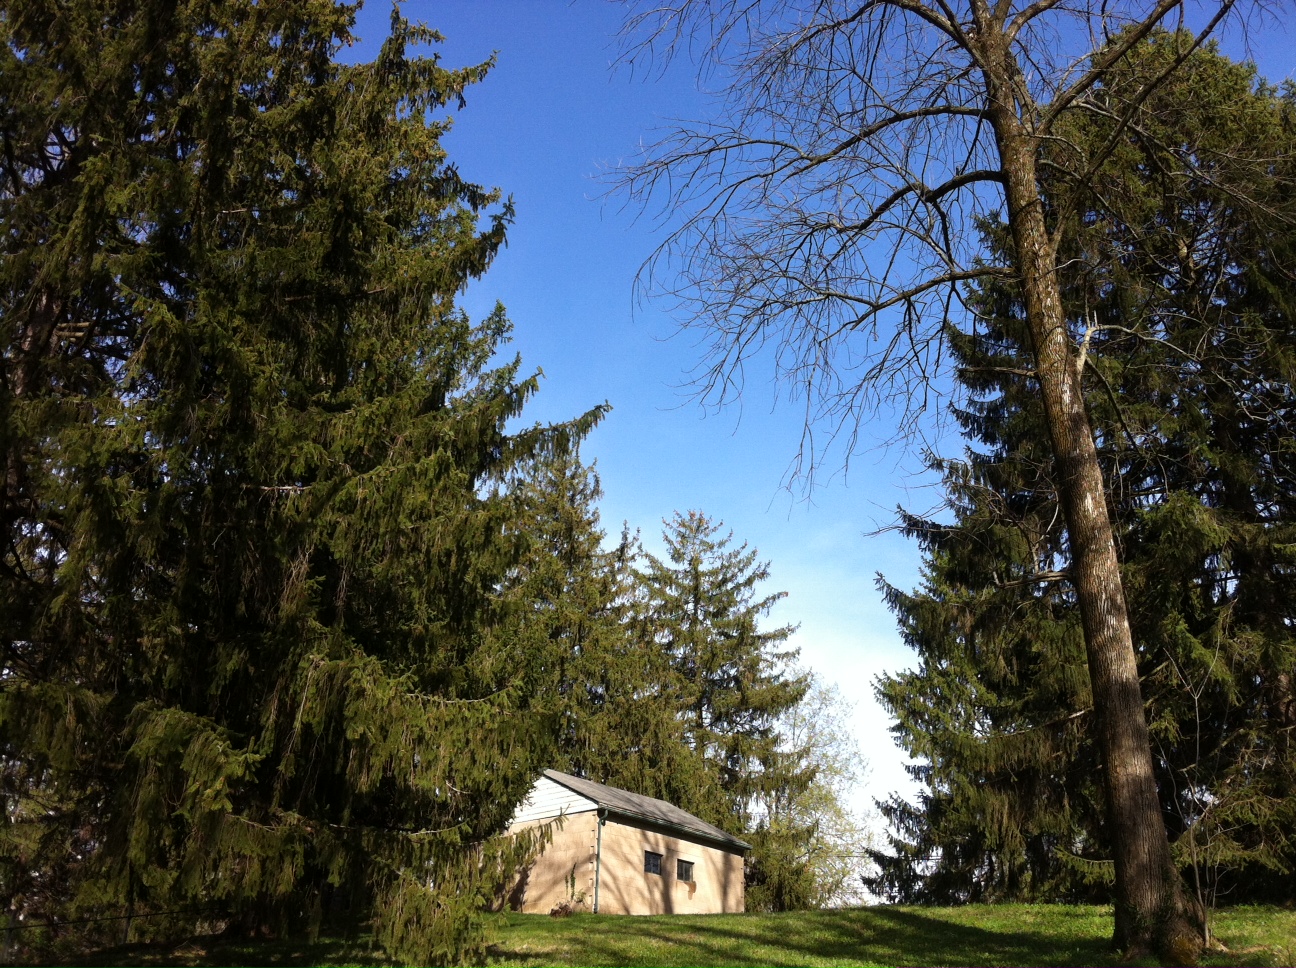
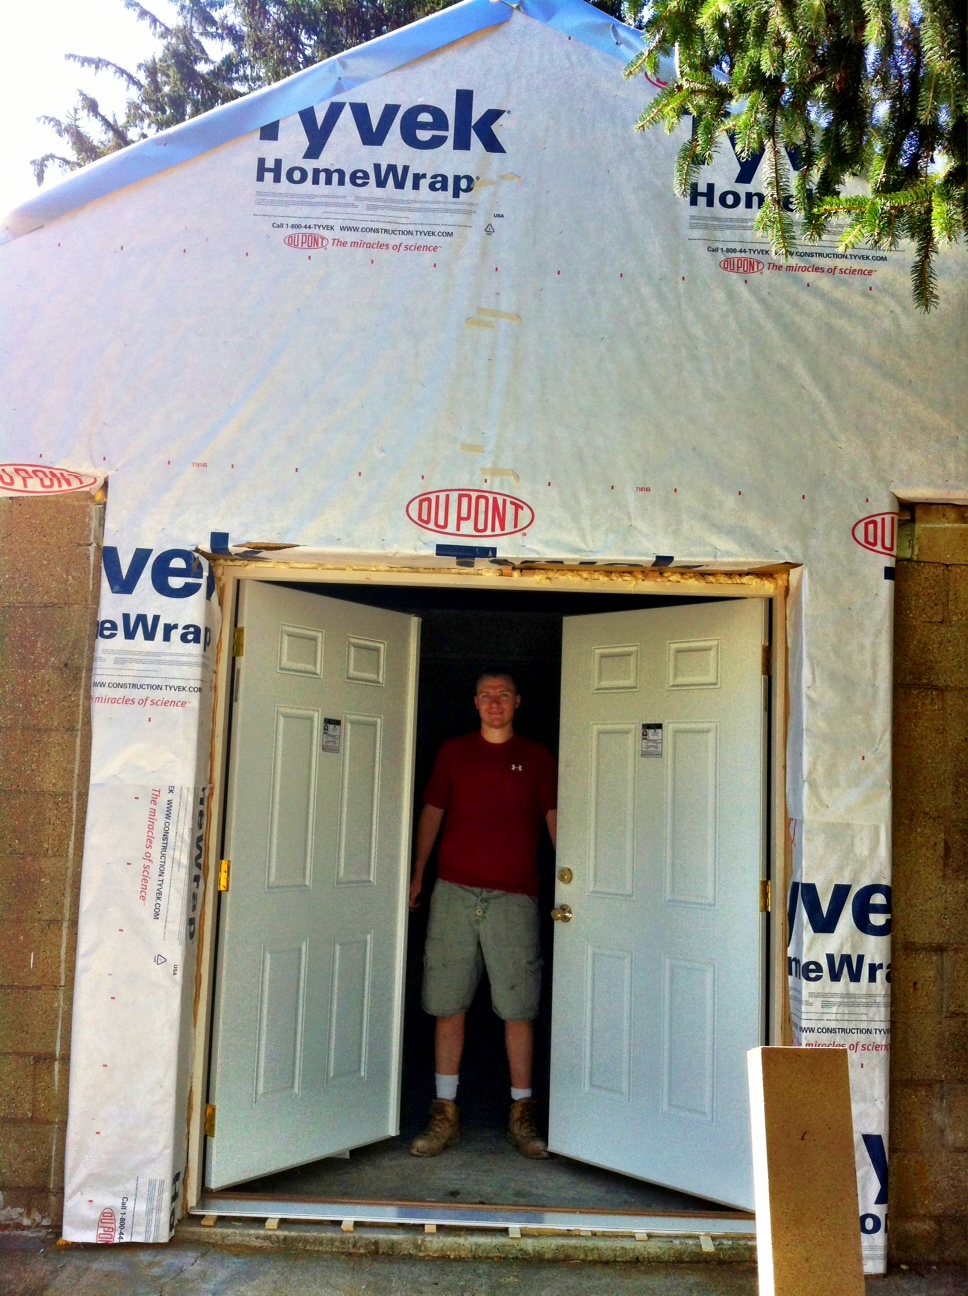
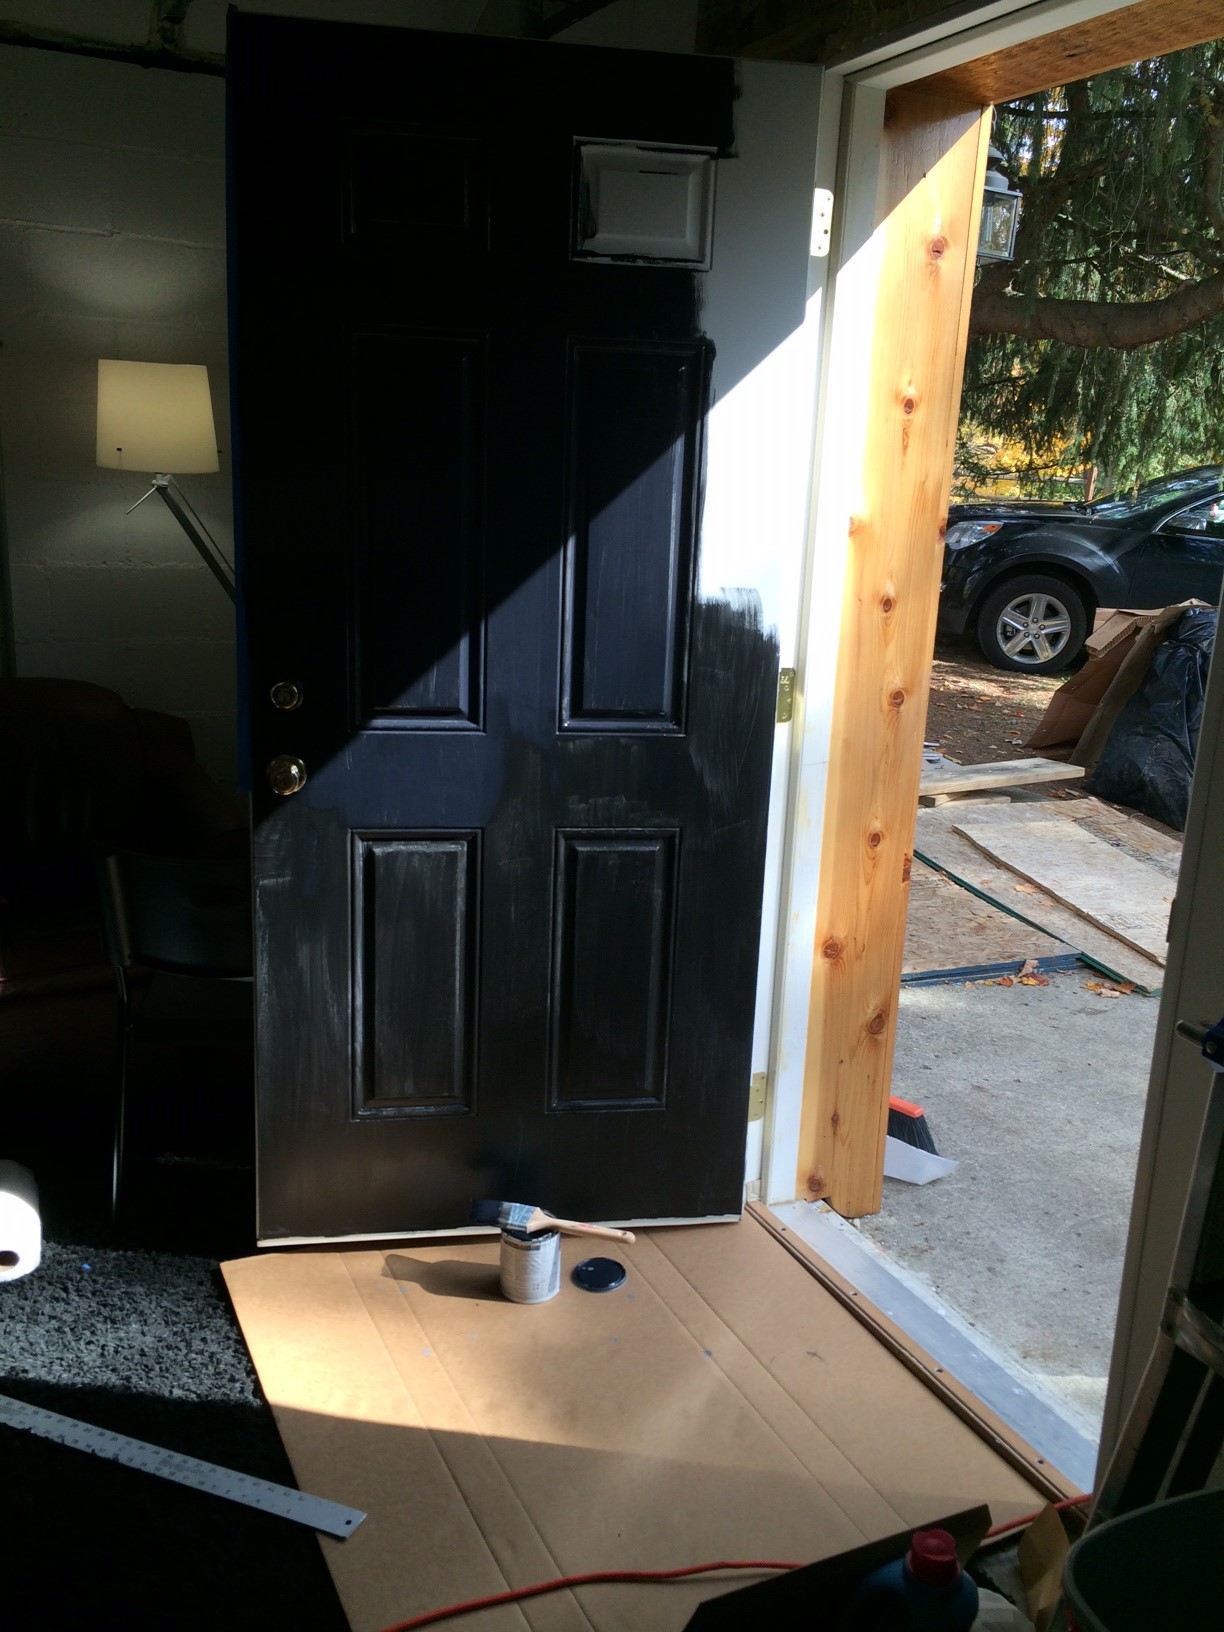
Front Door! Again with the door theme. We got our front door painted. The inside is still a plain white but the outside is now black! I really like how it turned out....

Bunker move 3-4Bunker move 3-13

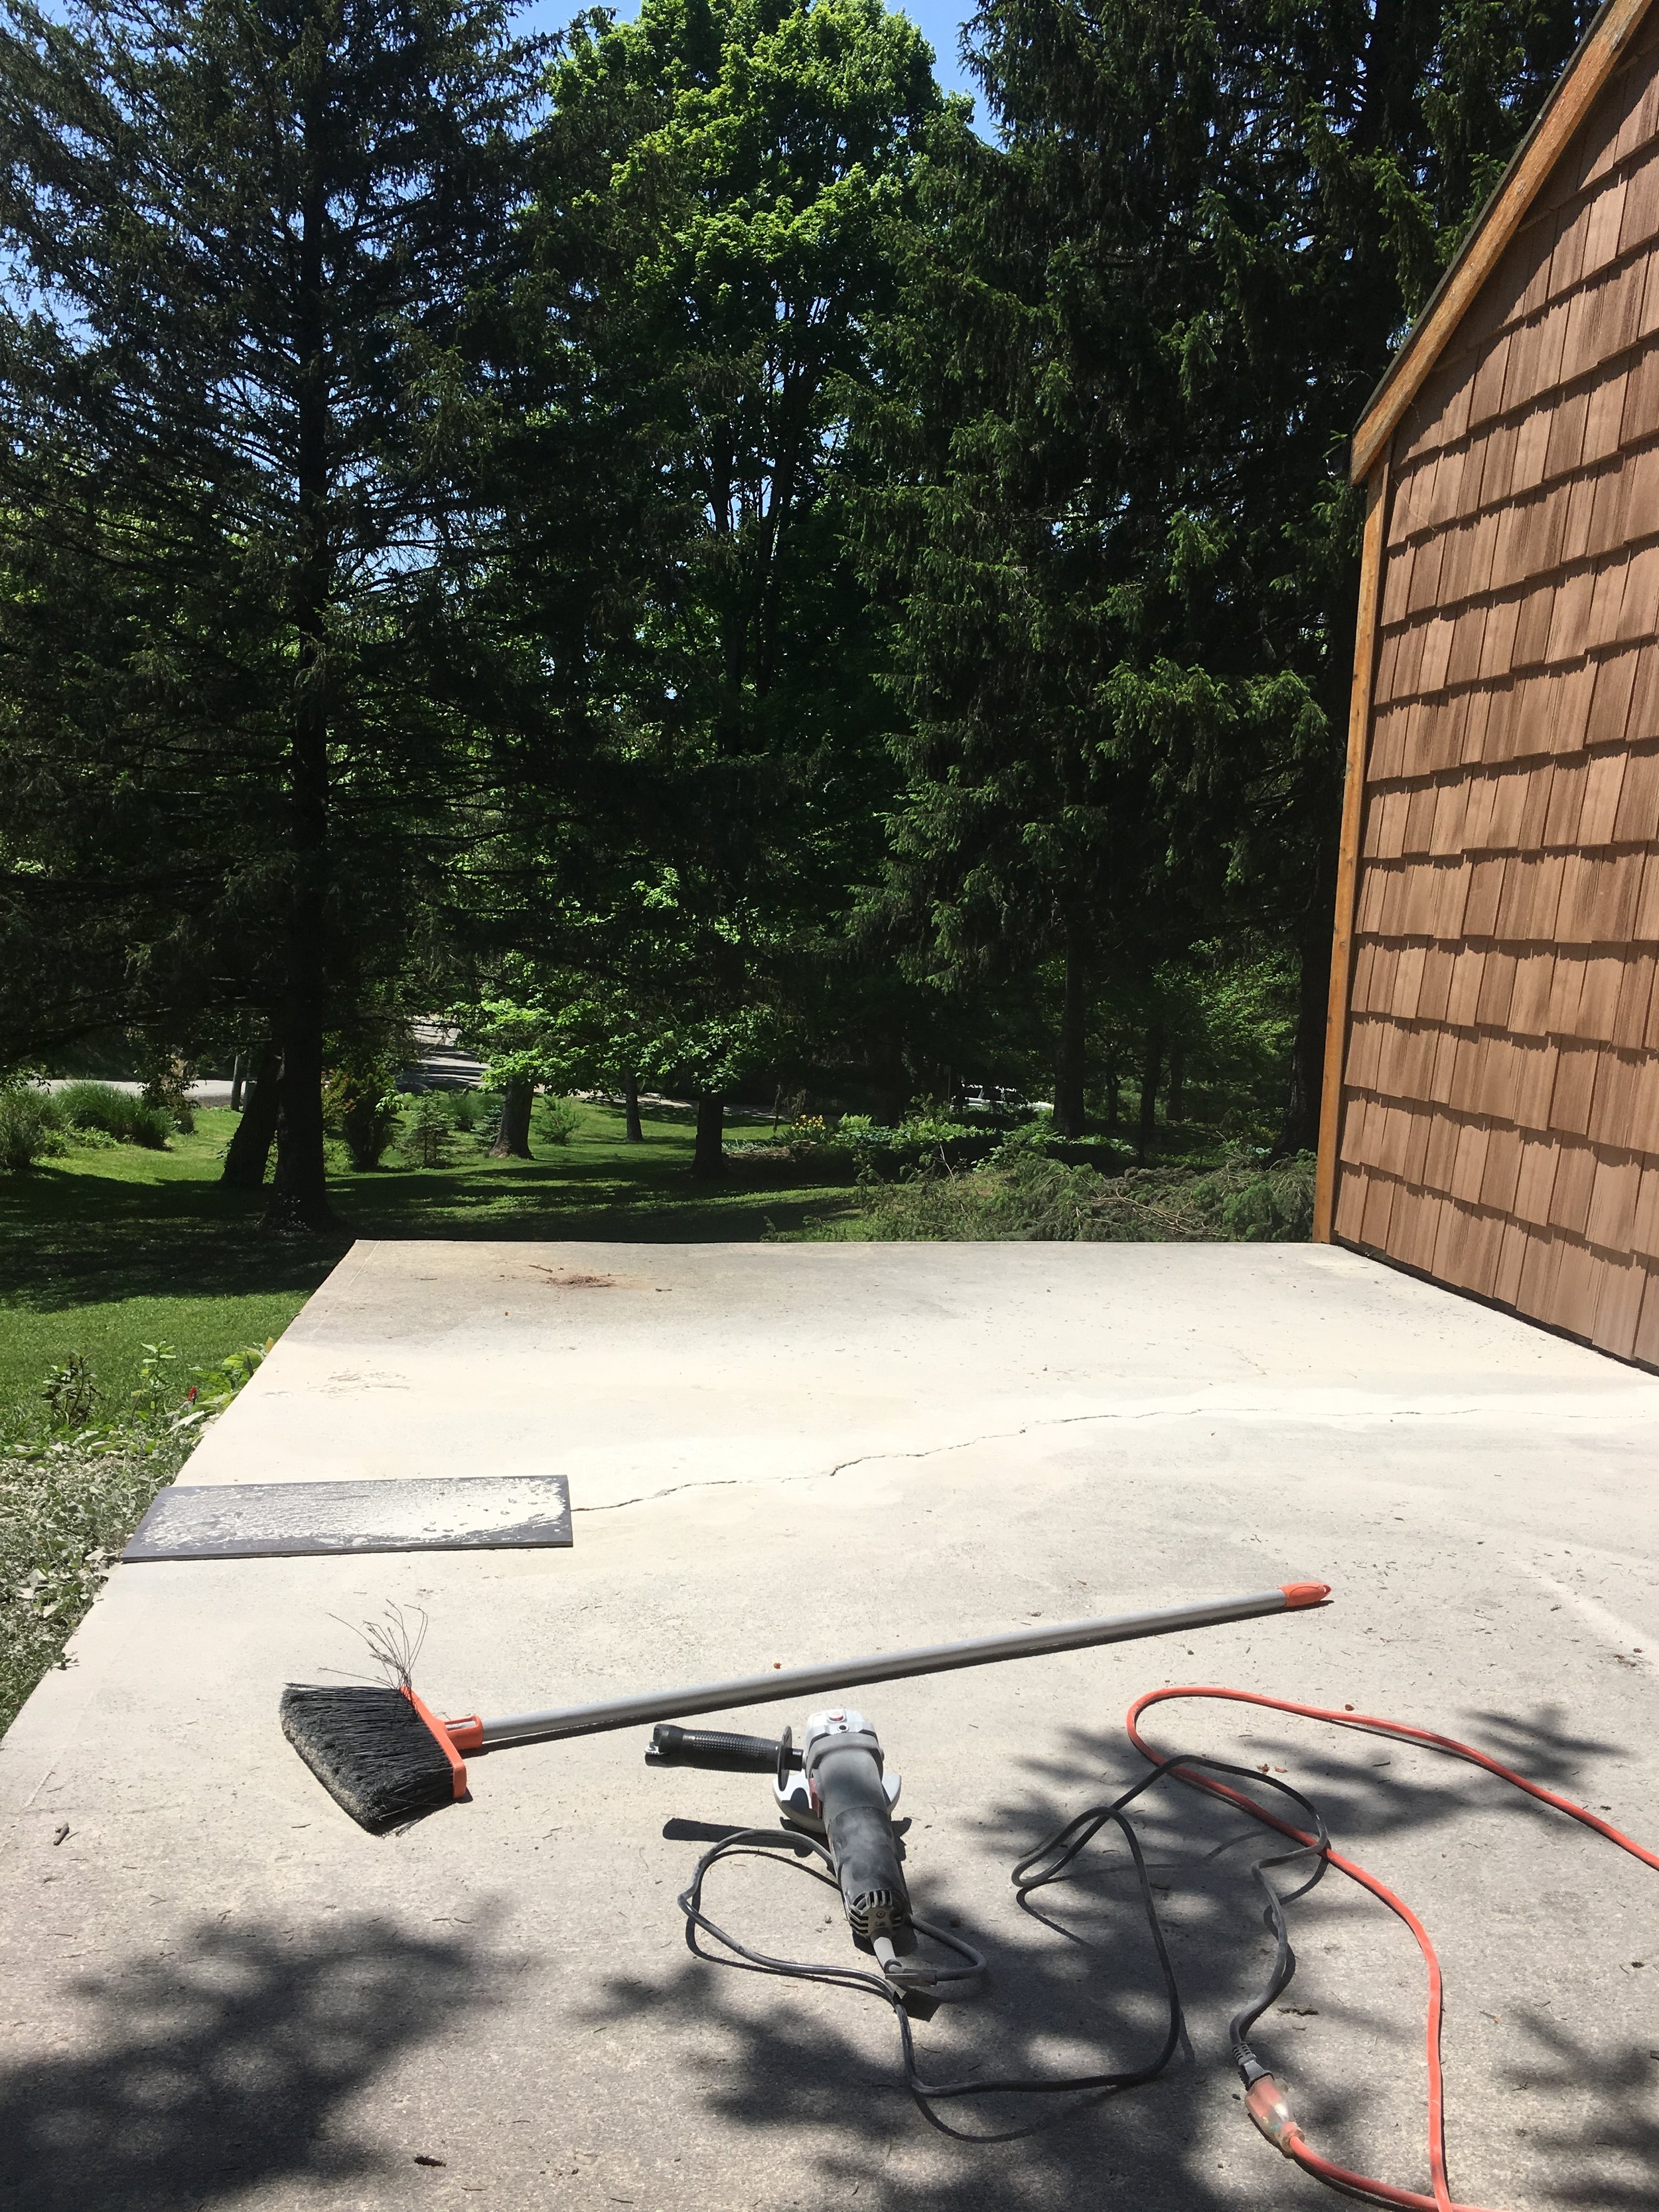
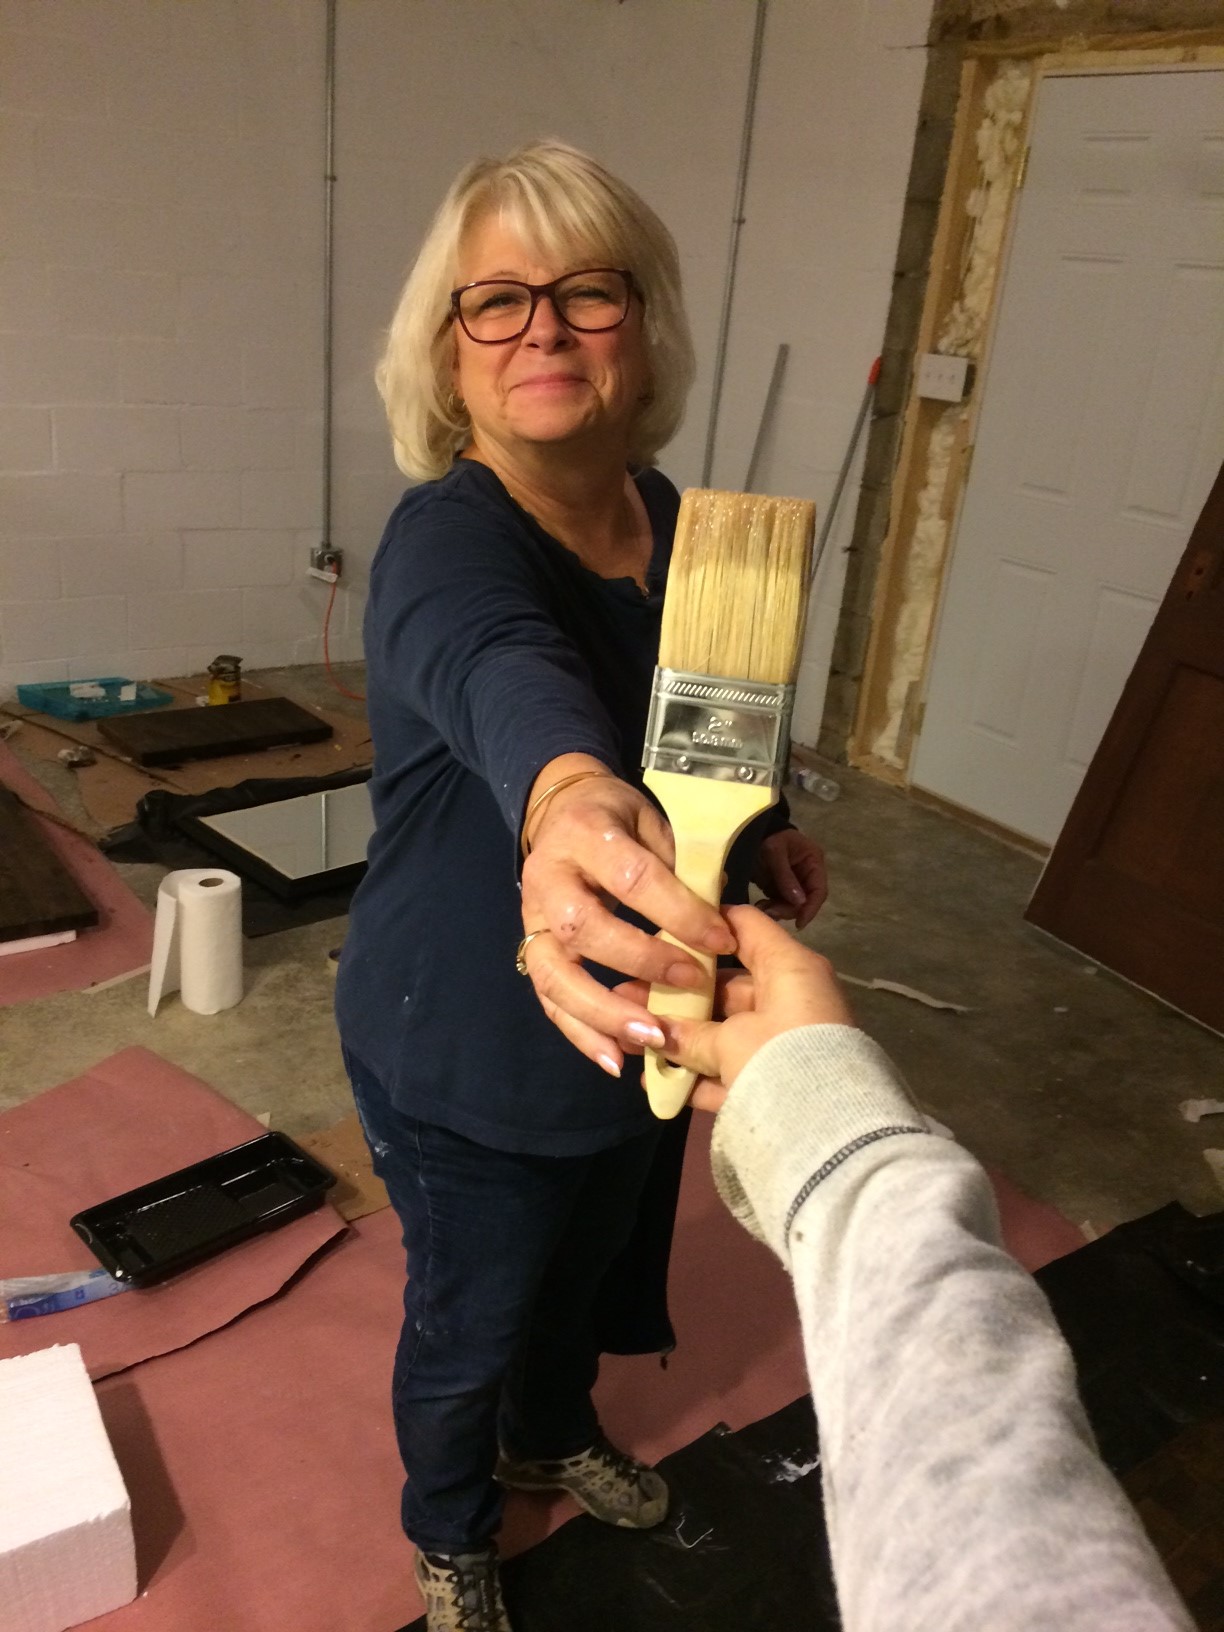
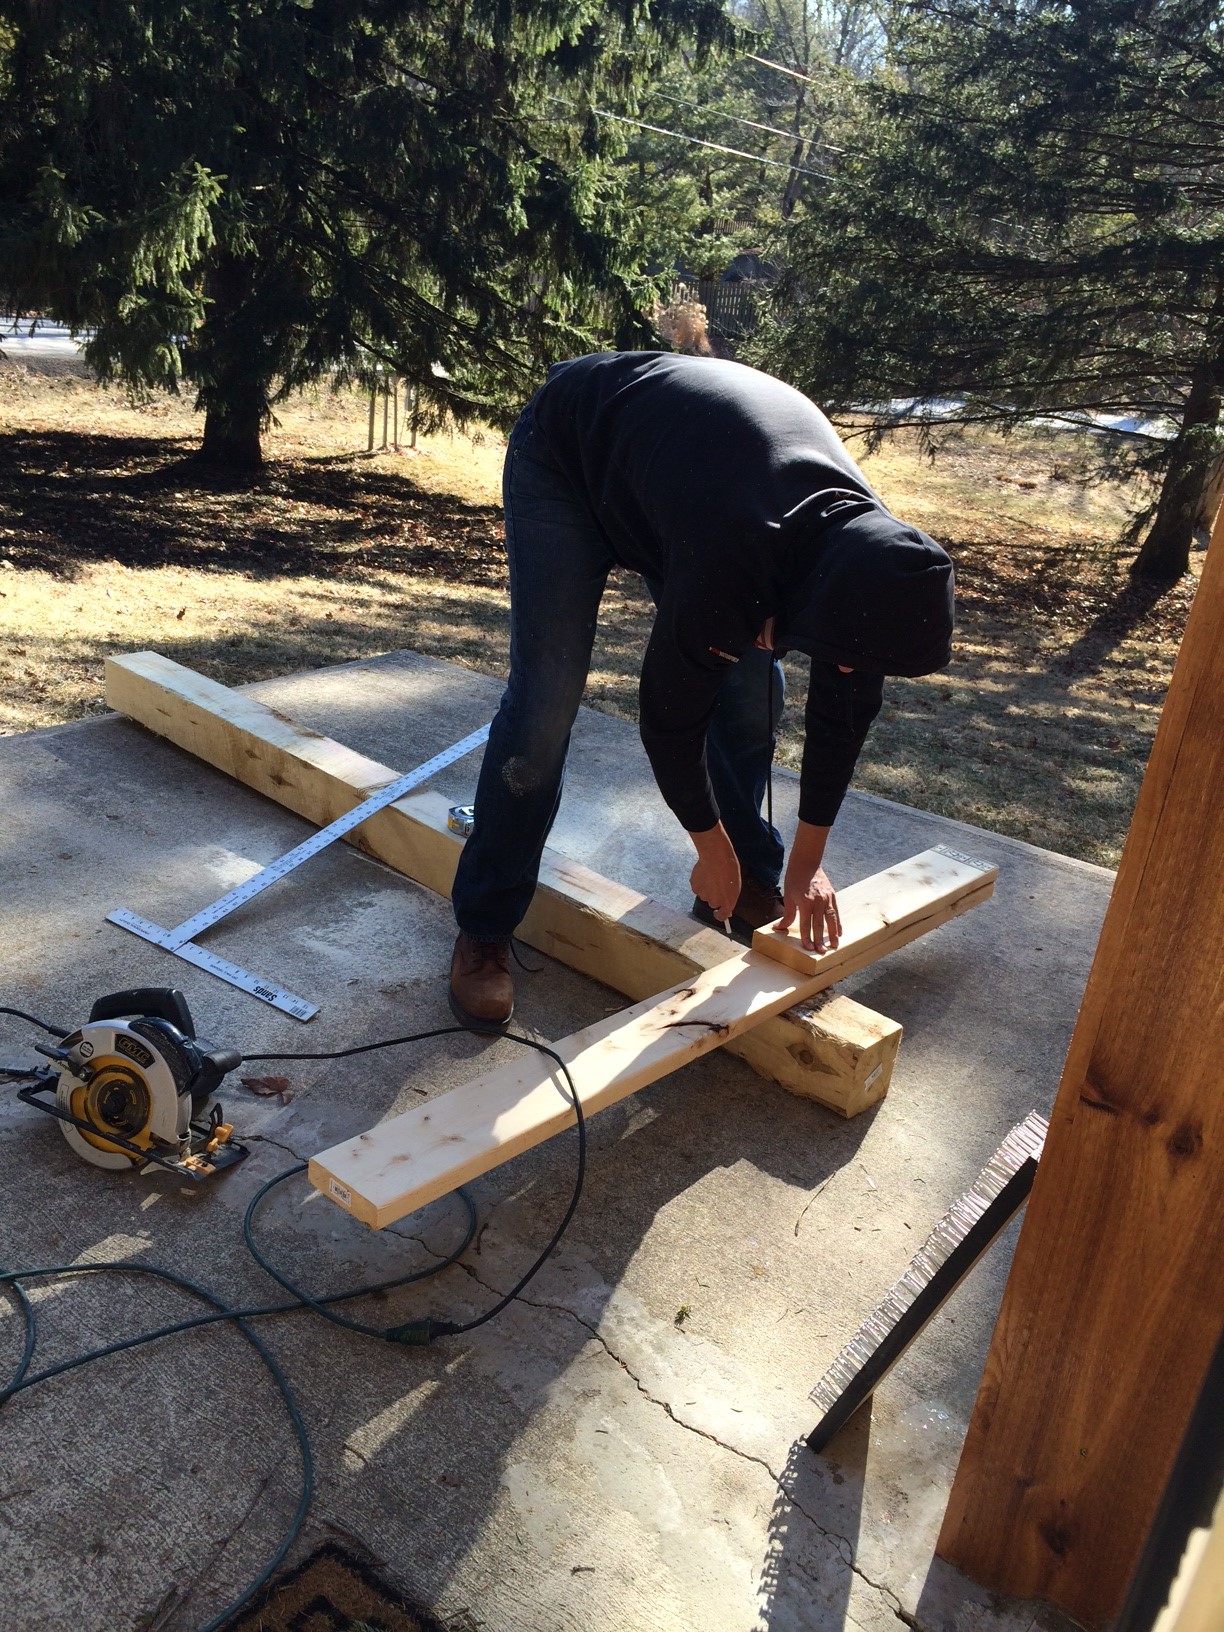
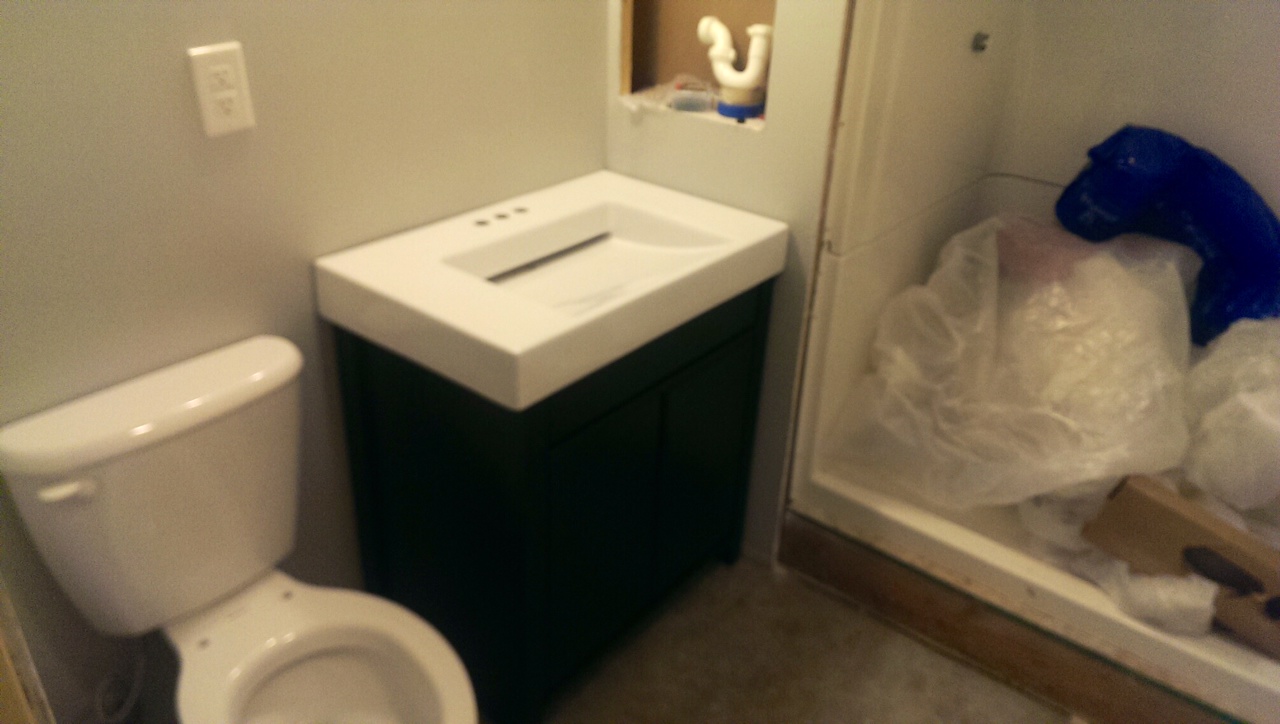
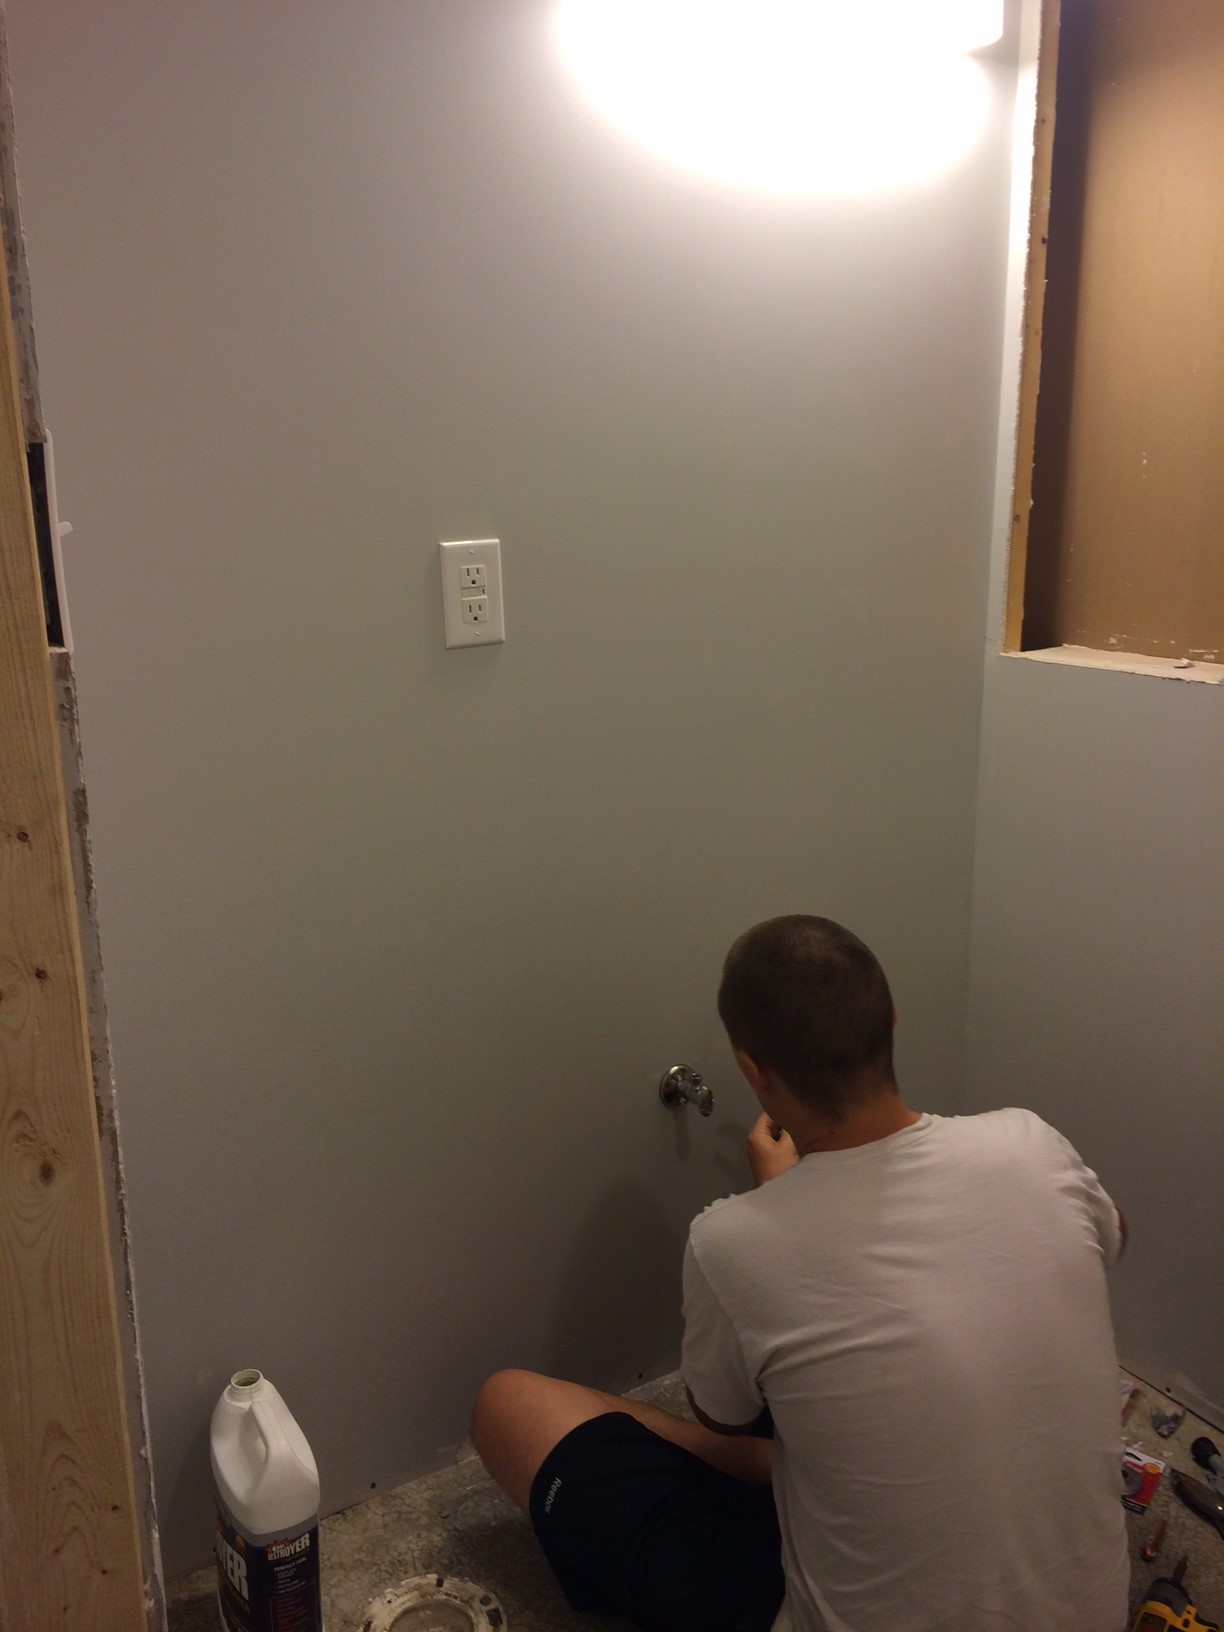
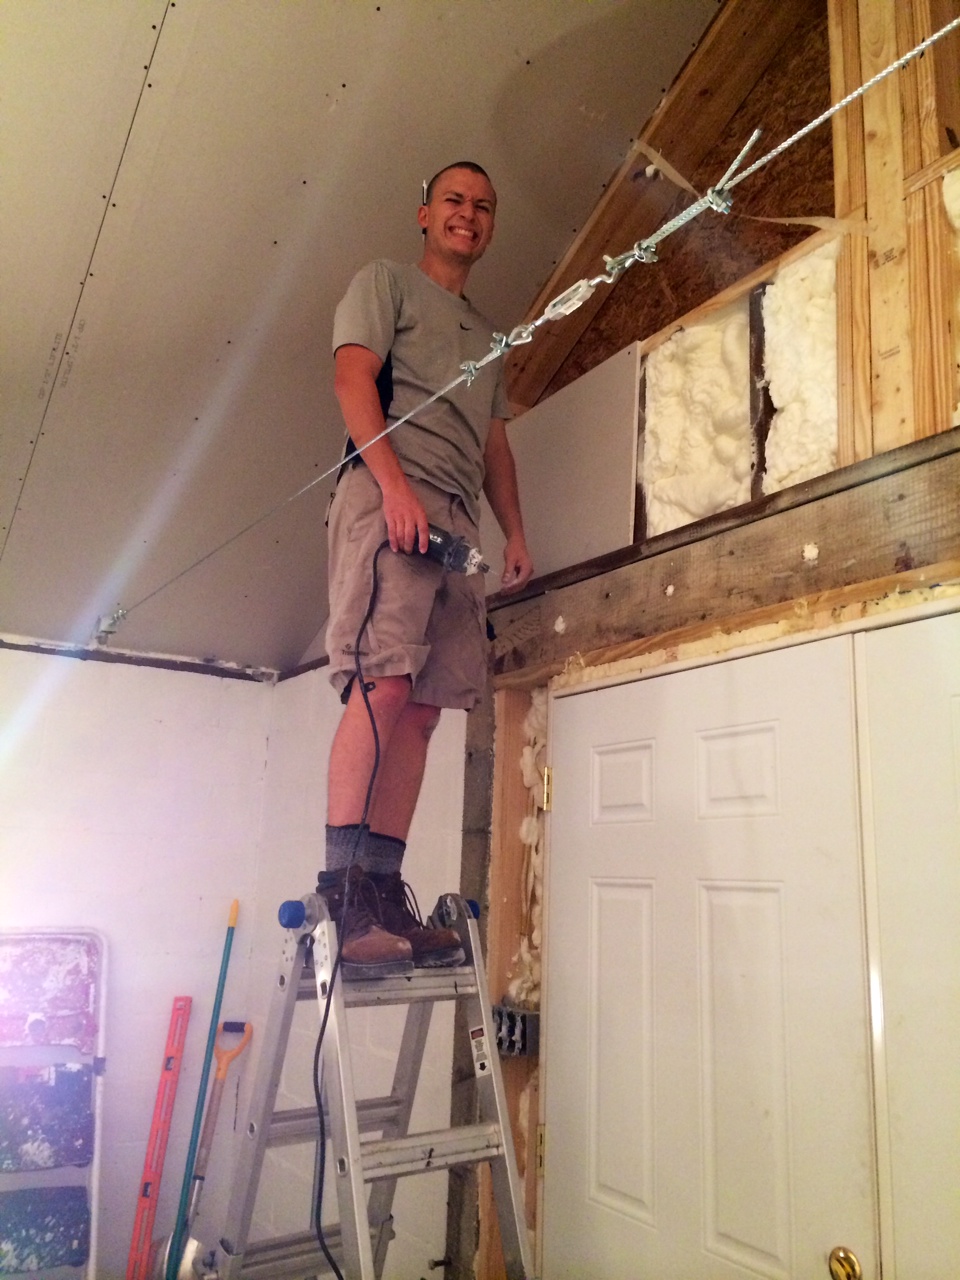
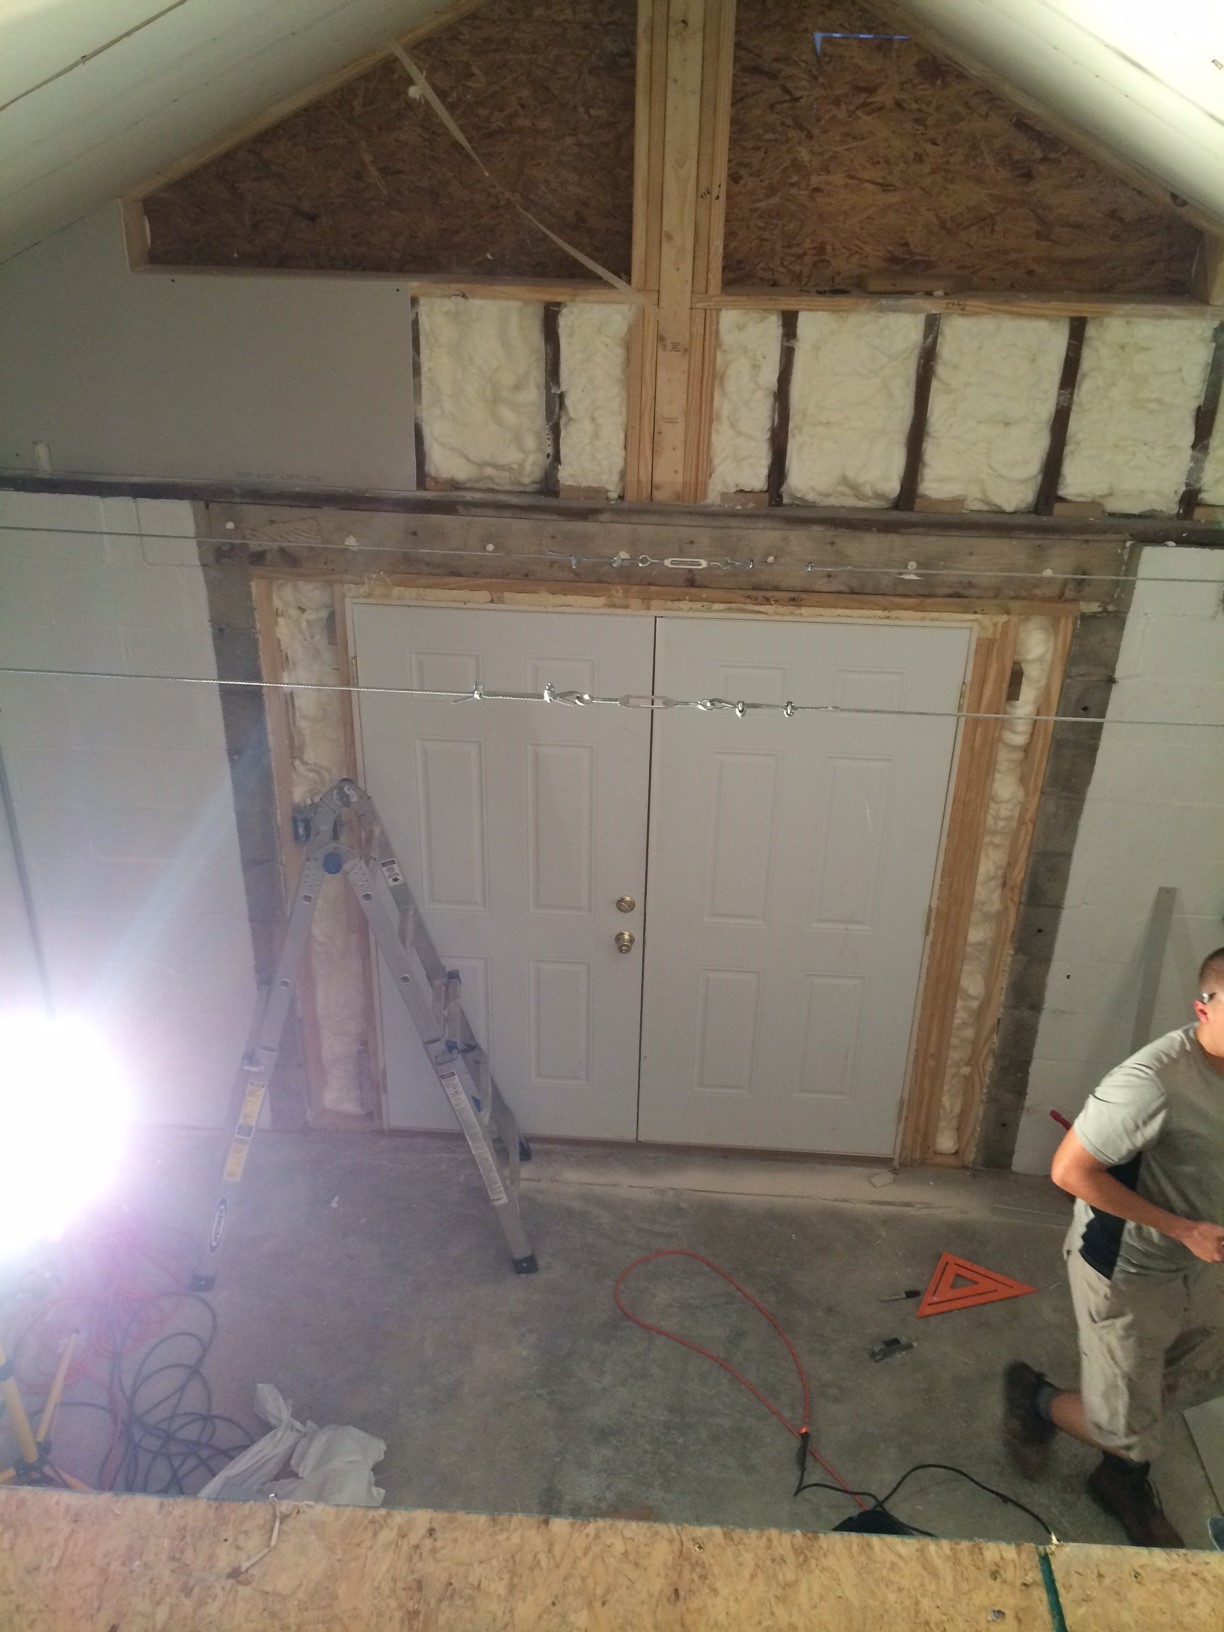
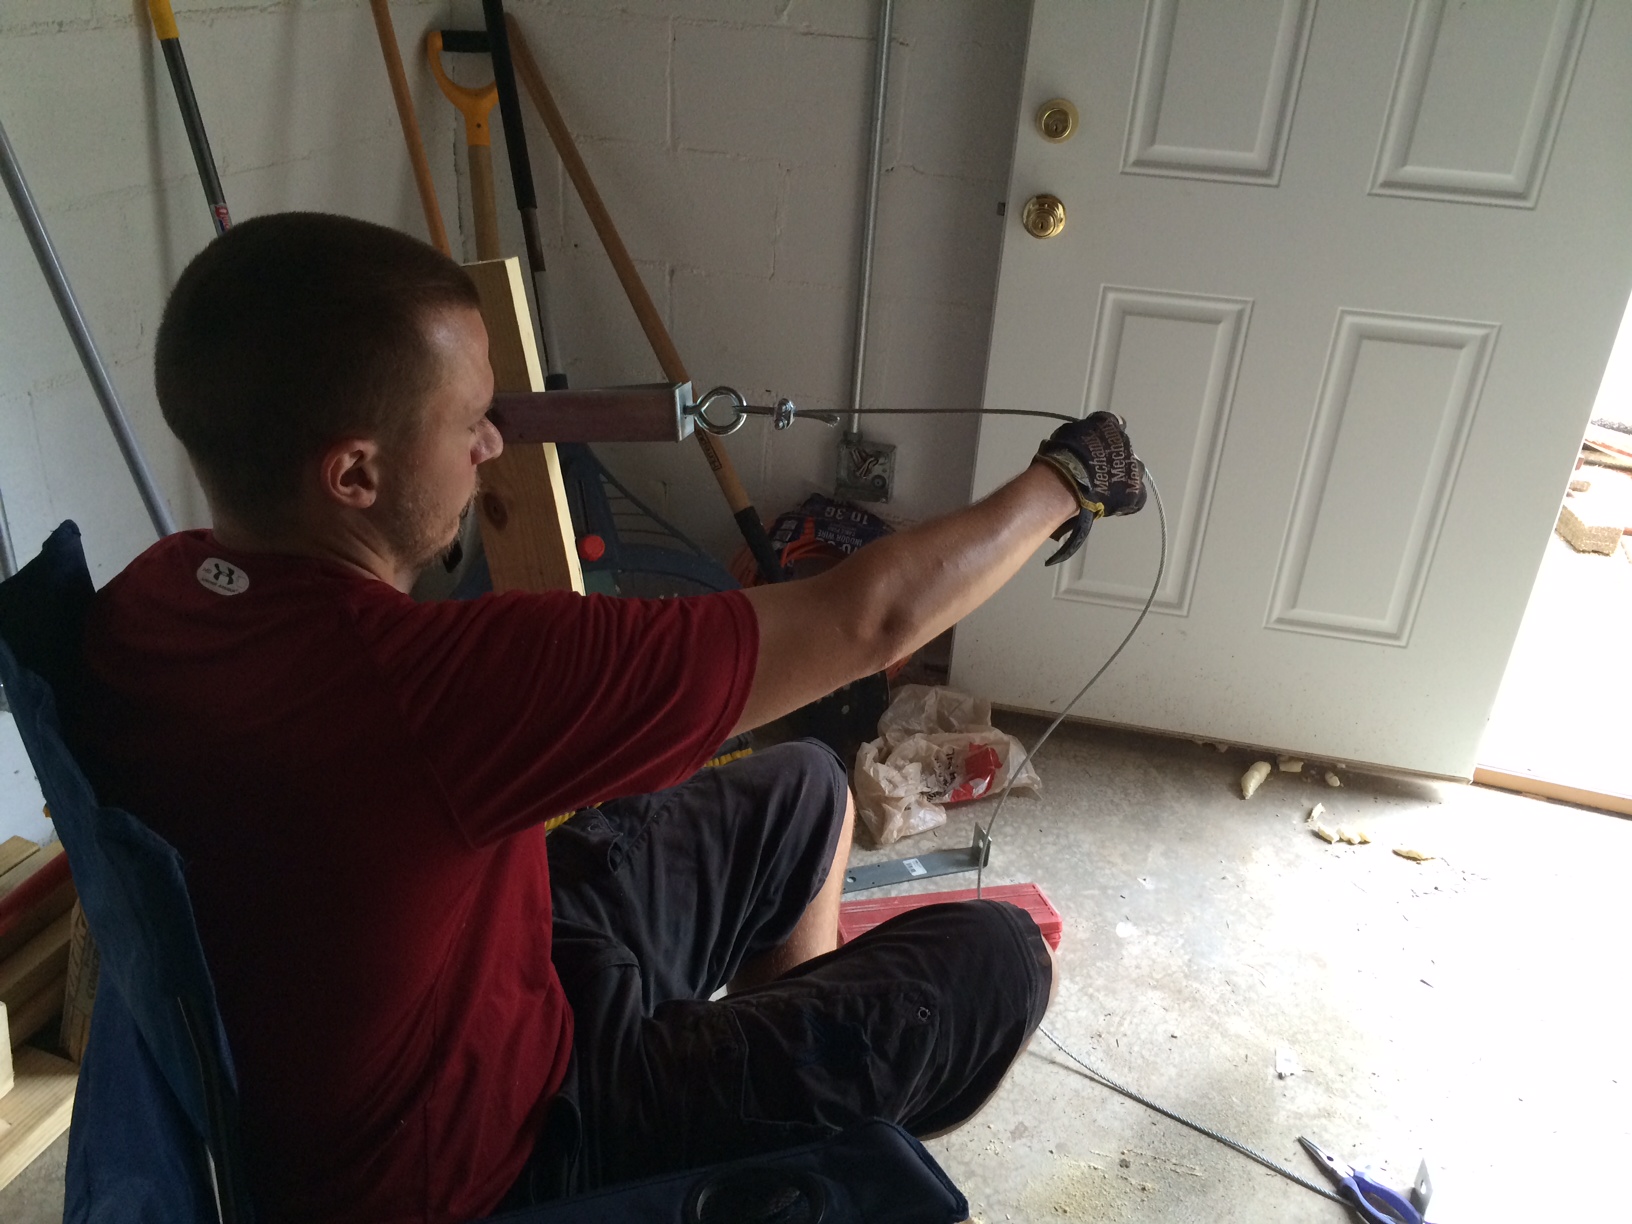
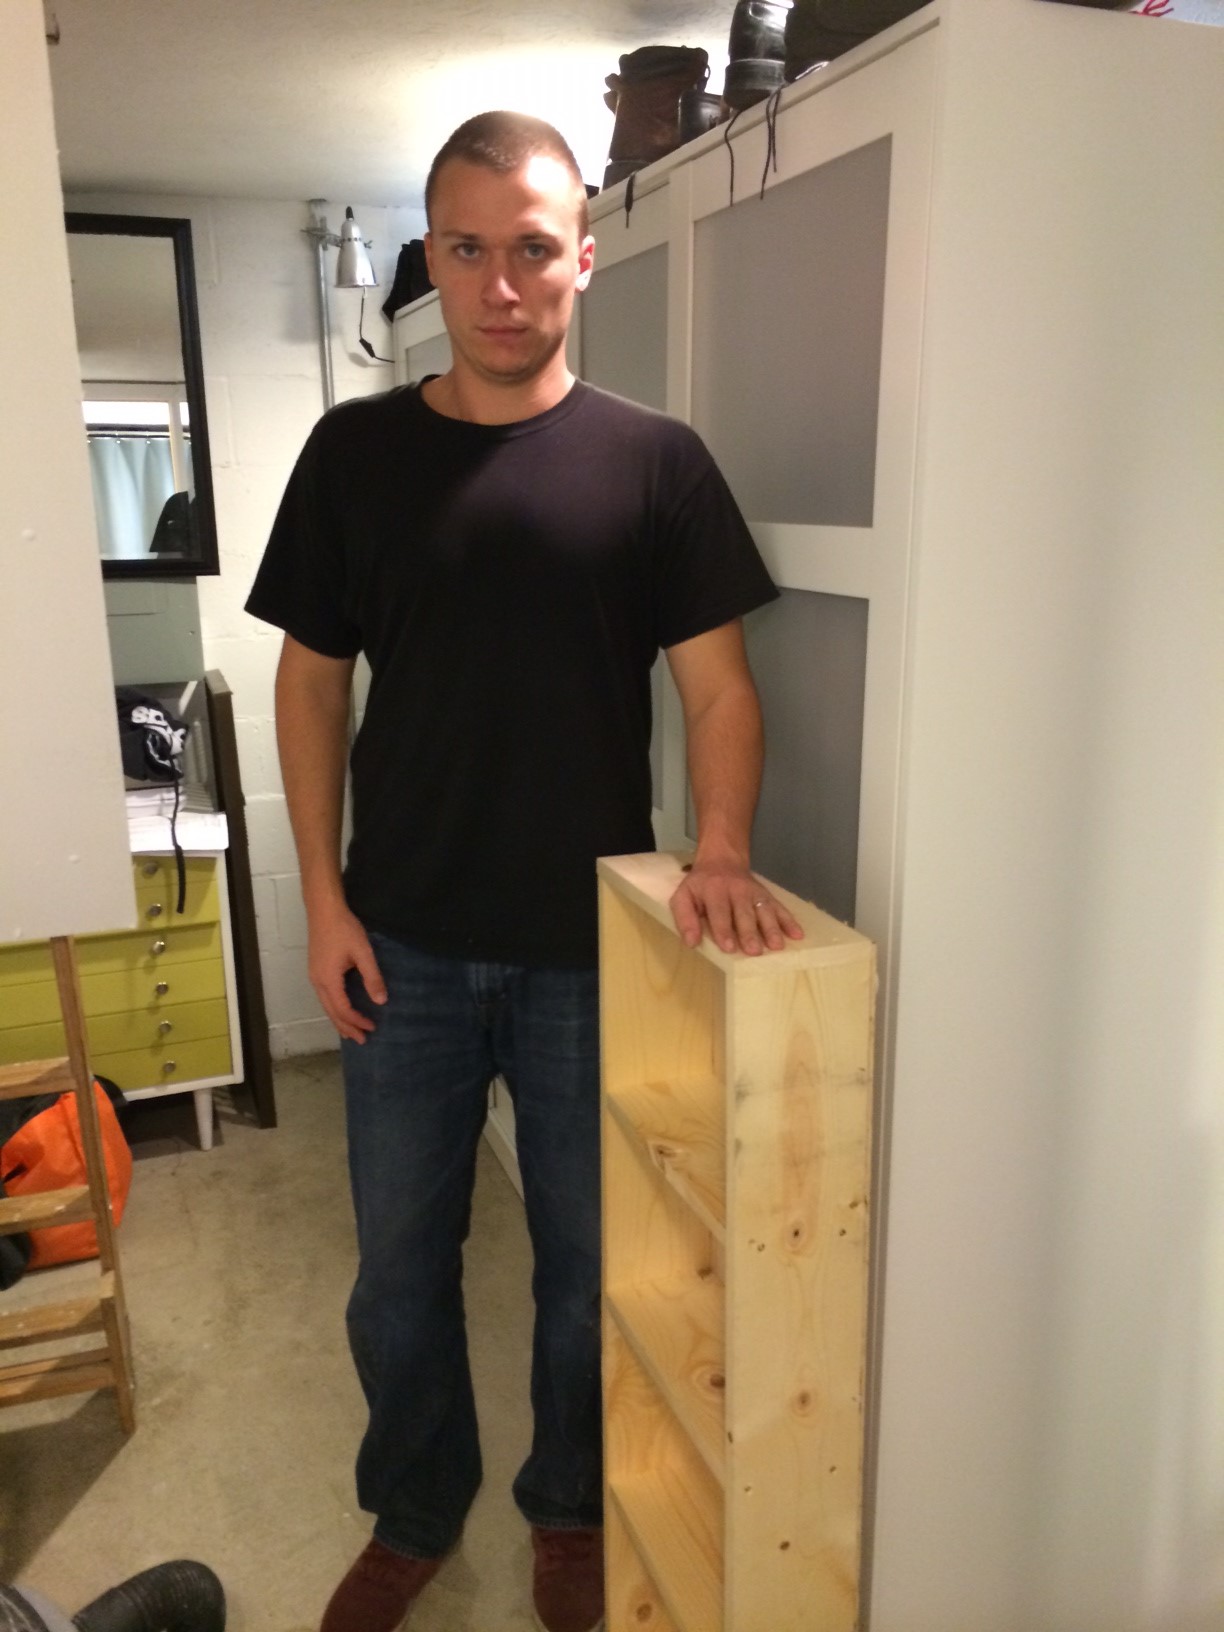
Bathroom Shelf! Remember that little space in the bathroom that we kept free for a shelf? Well Derek built us one! In 35 minutes. 
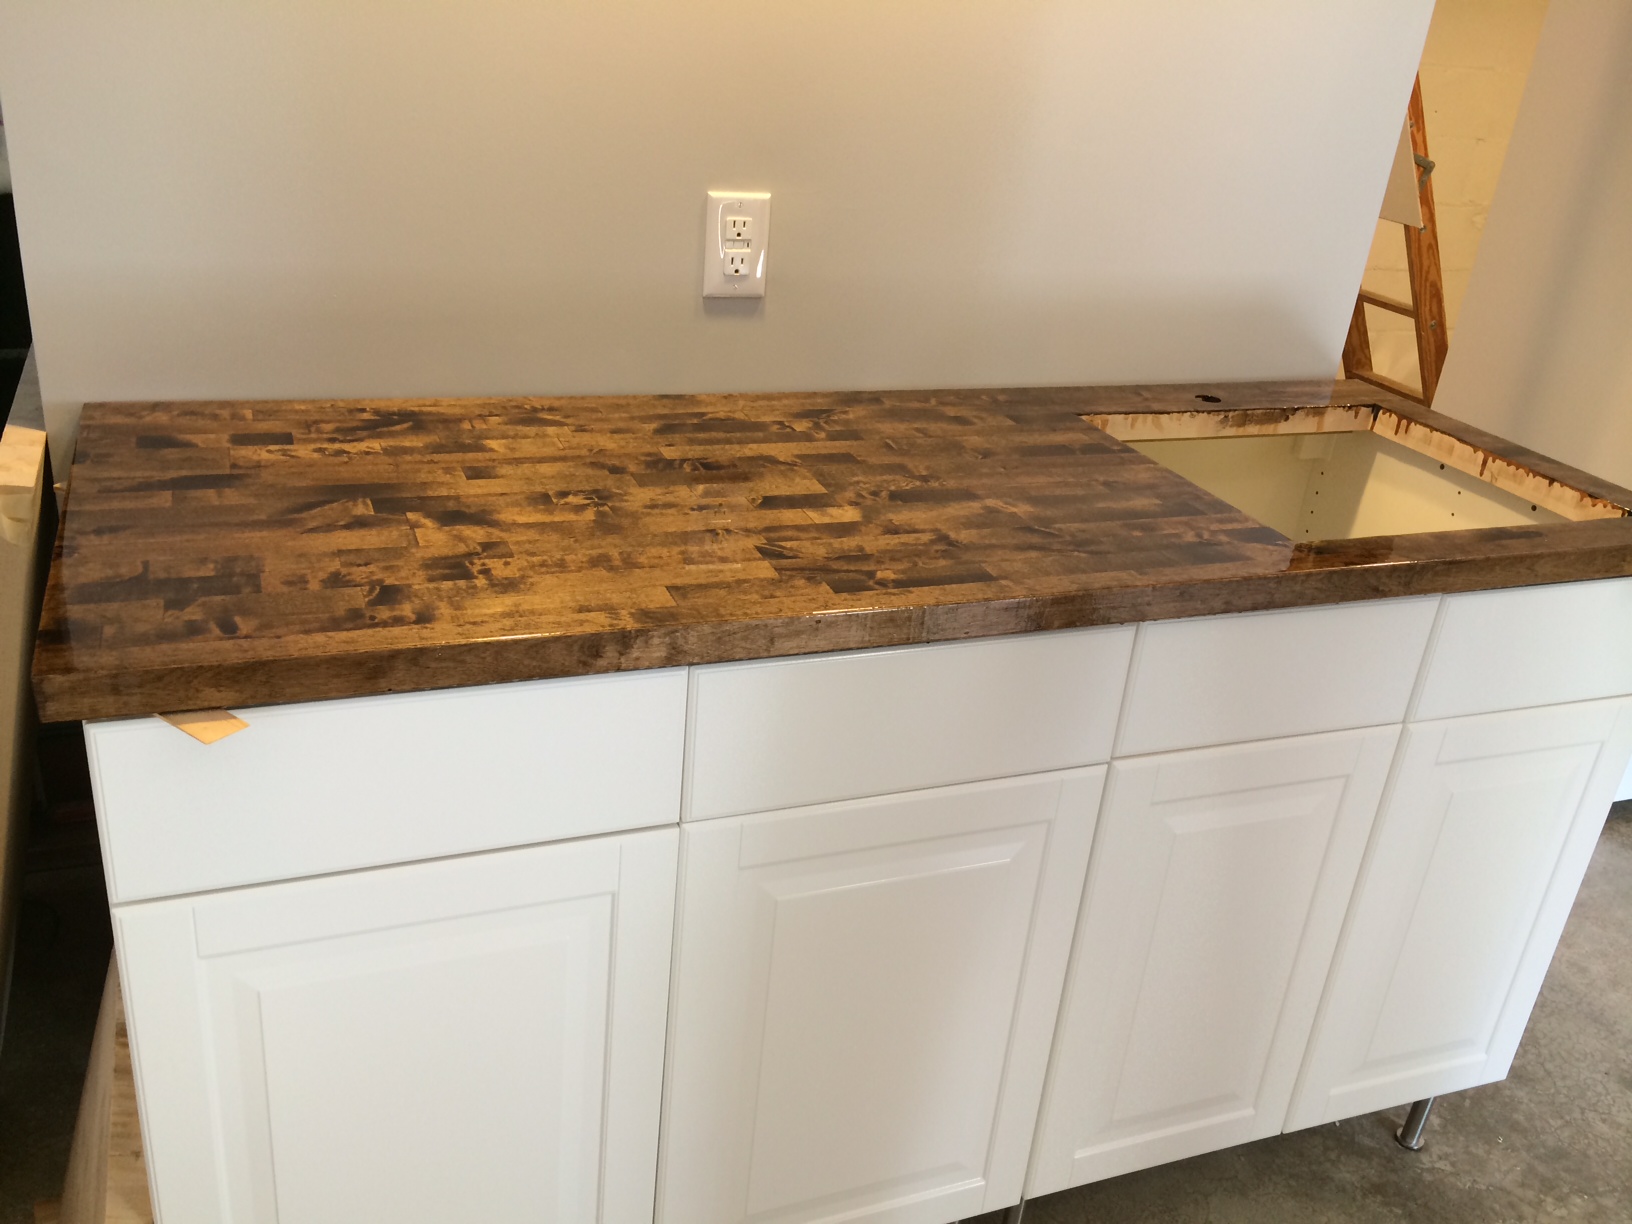
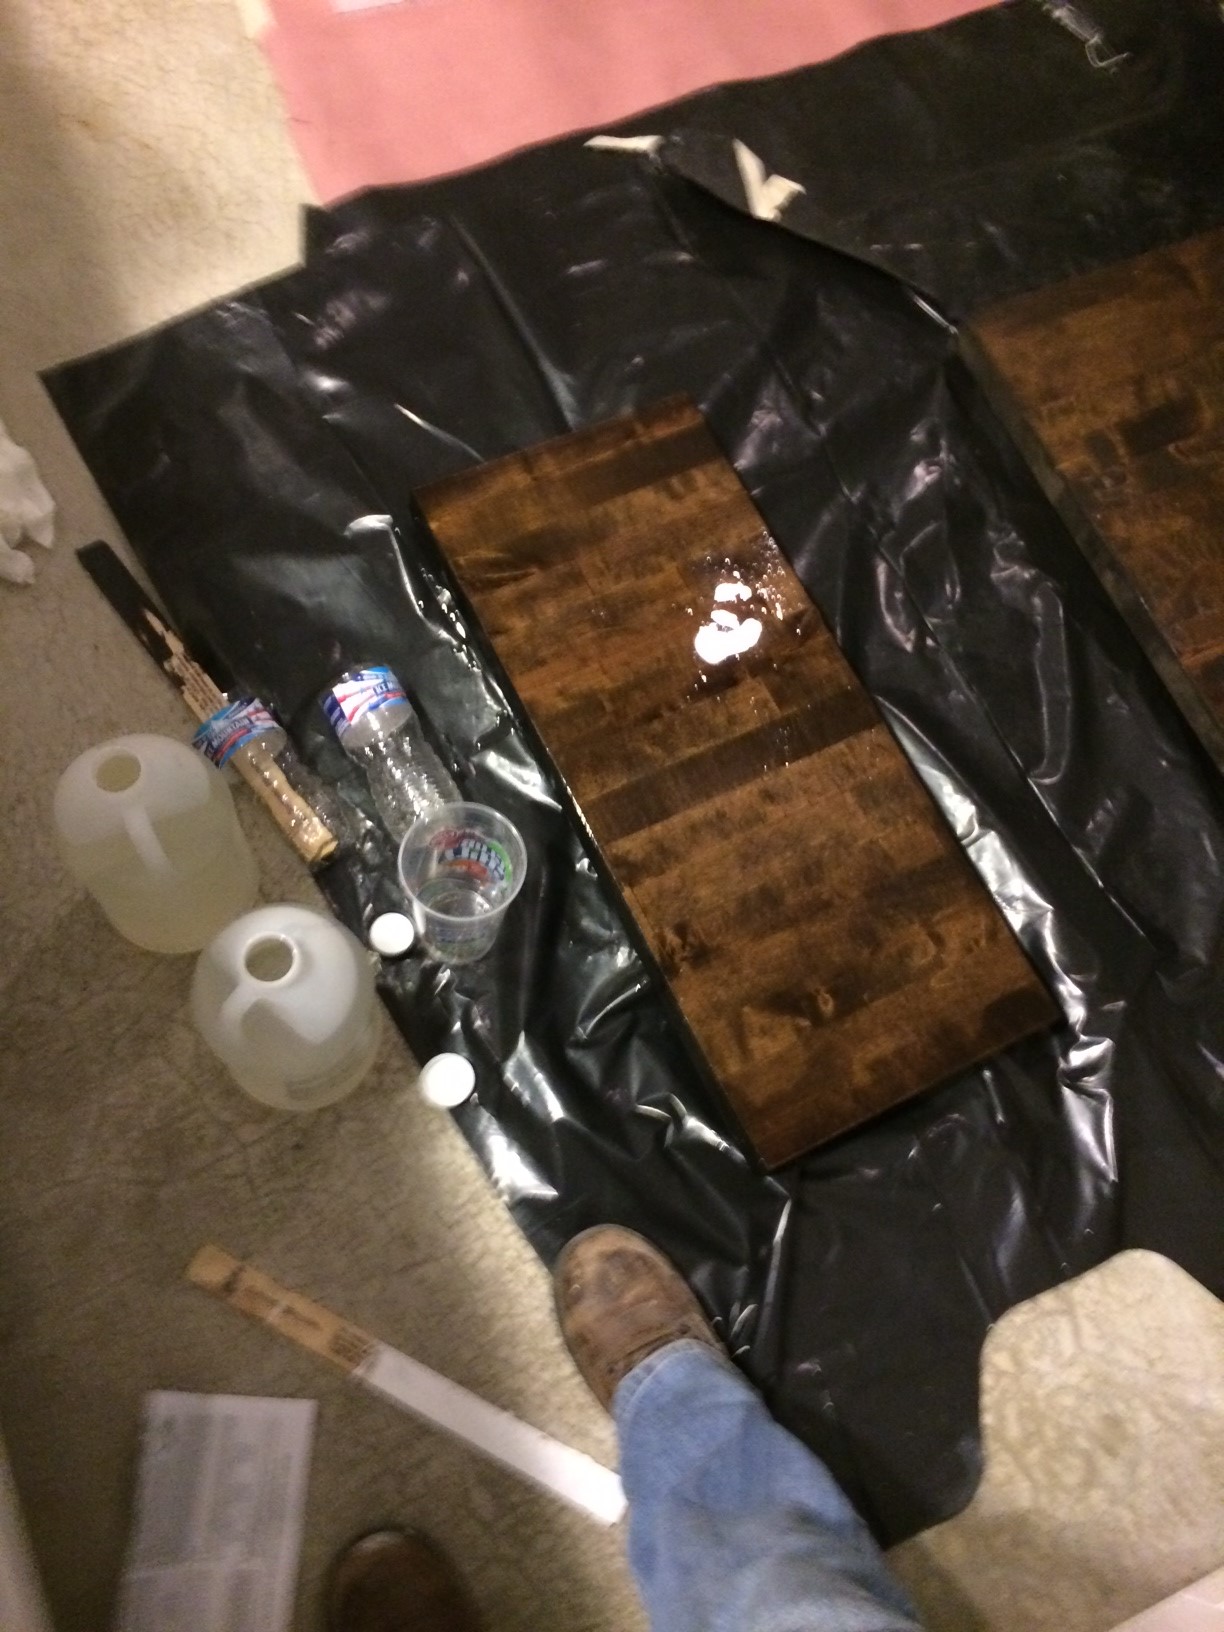
I then stained the shelf the same color as the kitchen counter tops. When Derek got home the next day, he seemed to like the color fine..and then I said, "Doesn't it look a bit 90's to you?" We both laughed and then agreed. We totally have a 90's shelf. I tried to then stain it black...and boy that didnt work. We now have a funky stained shelf. Once again, adds character.

Bunker move 3-10 Bunker move 3-9

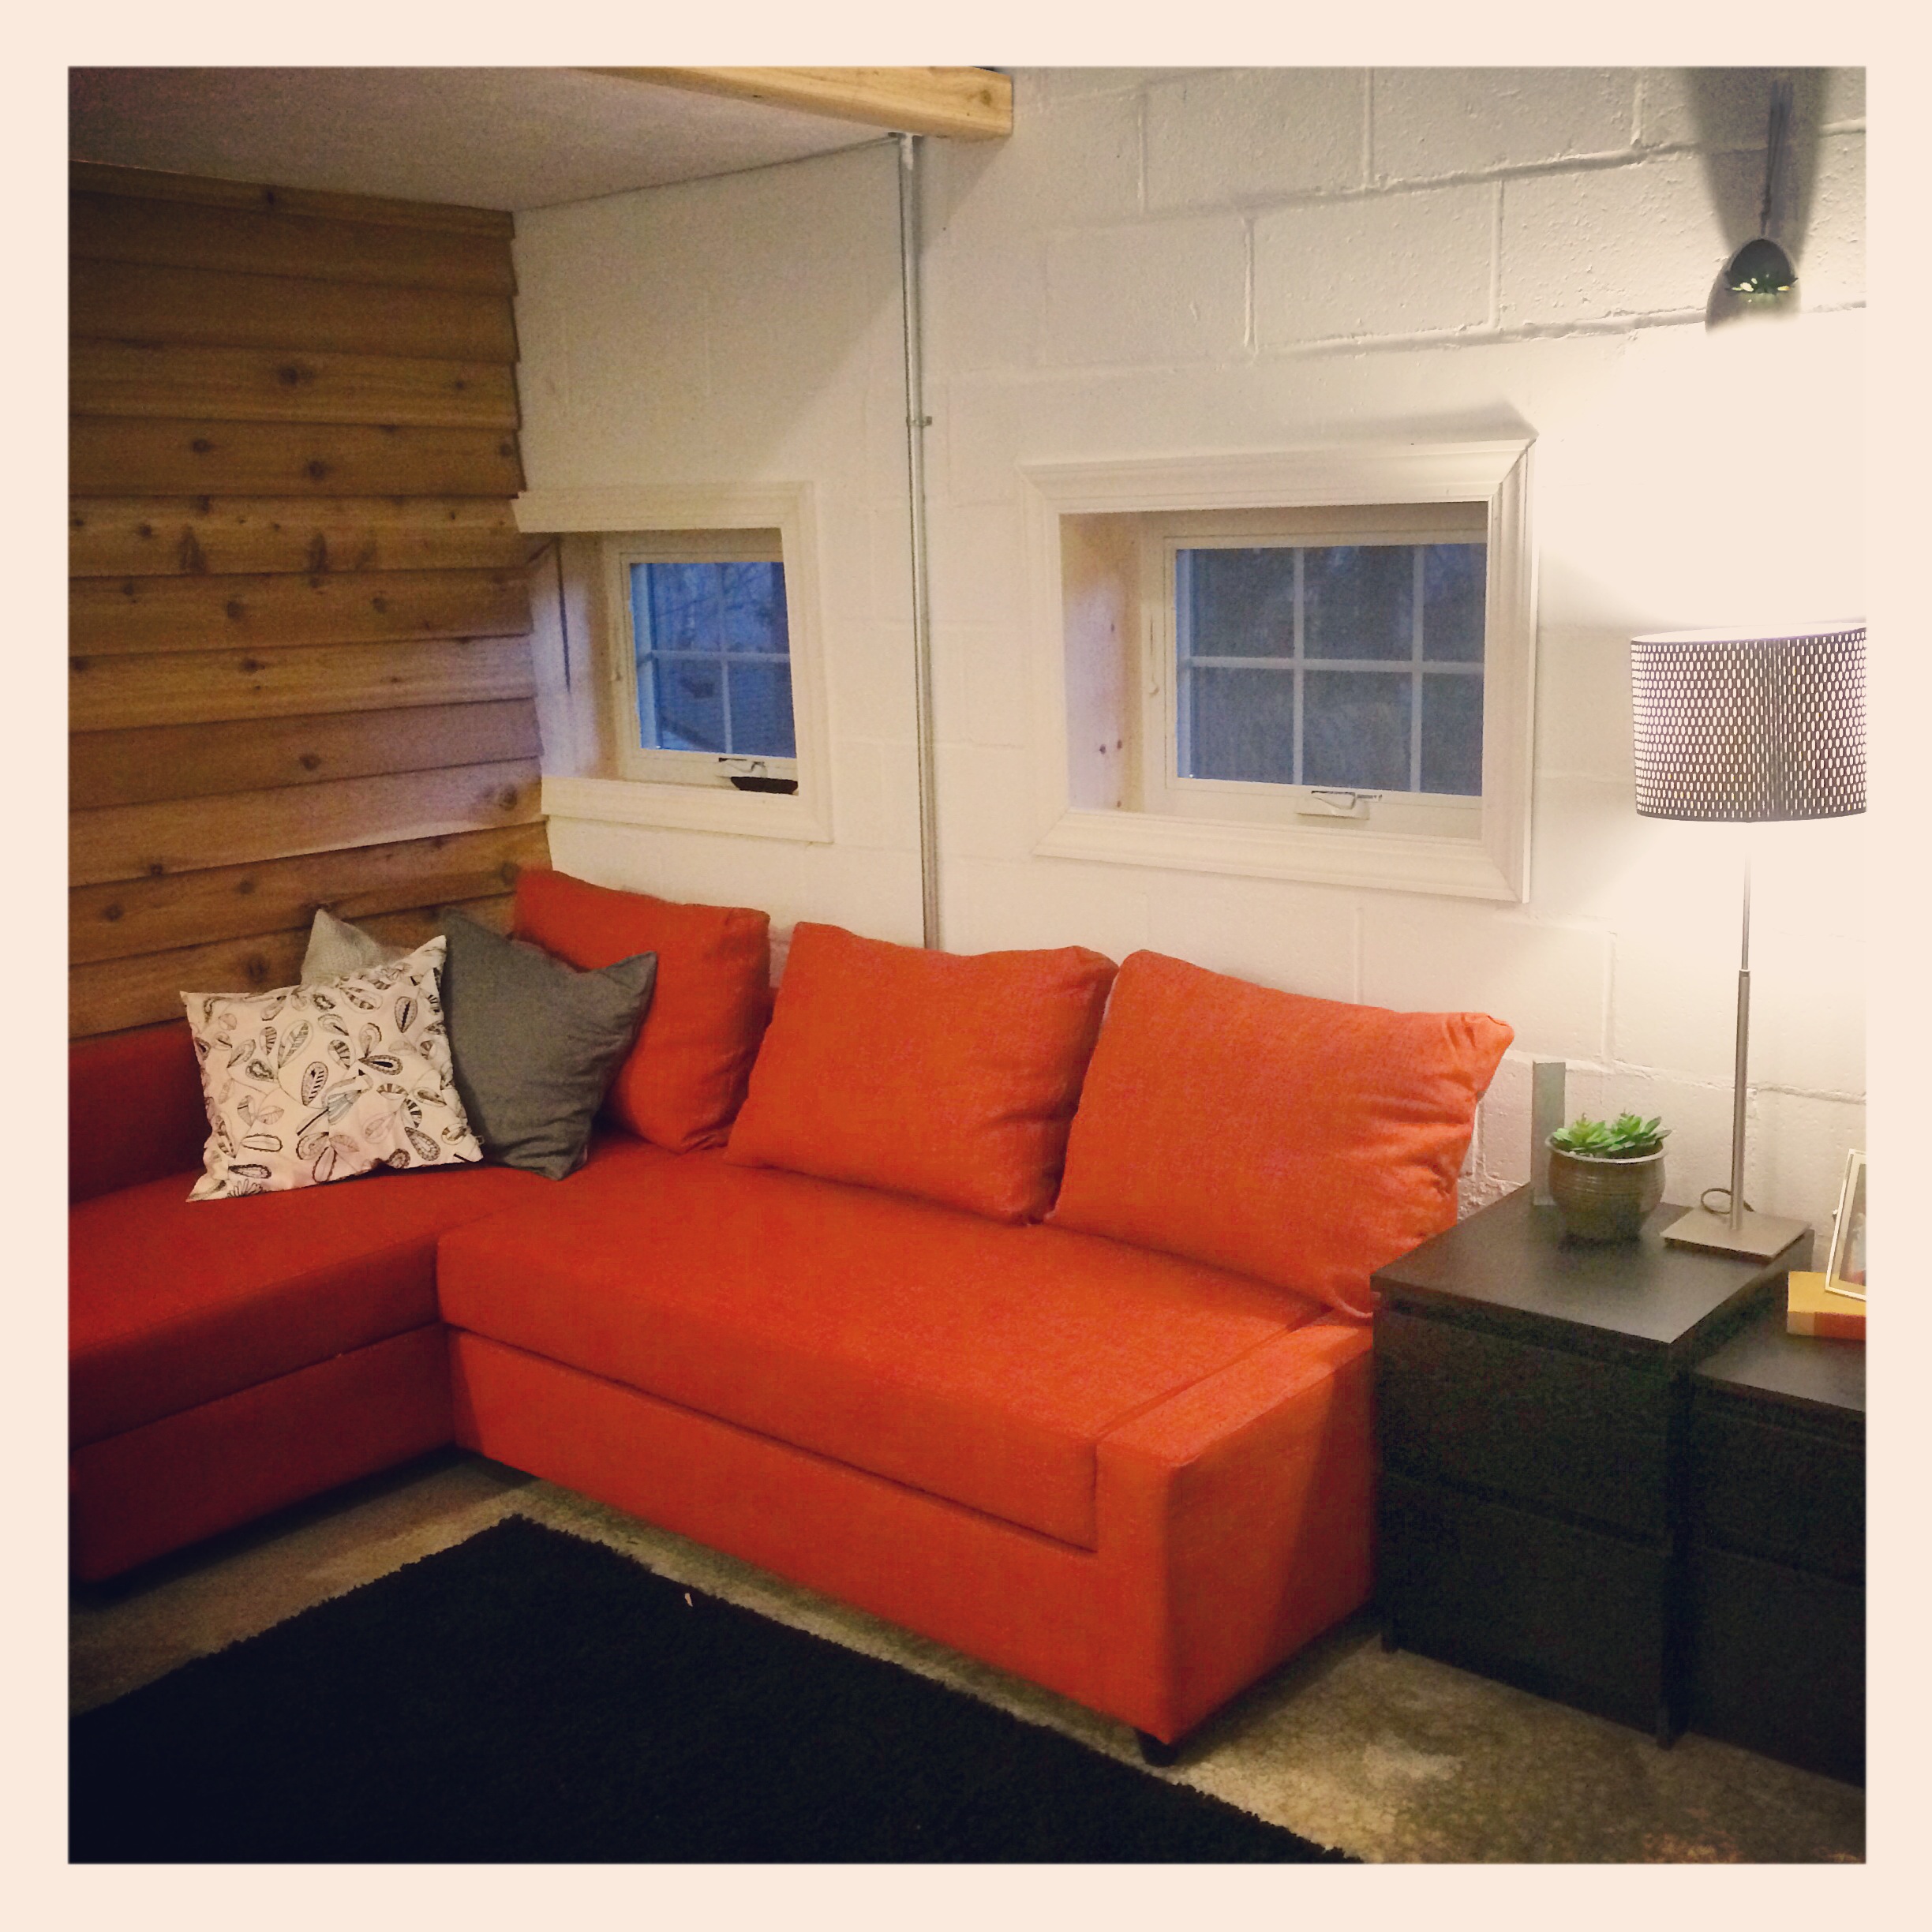
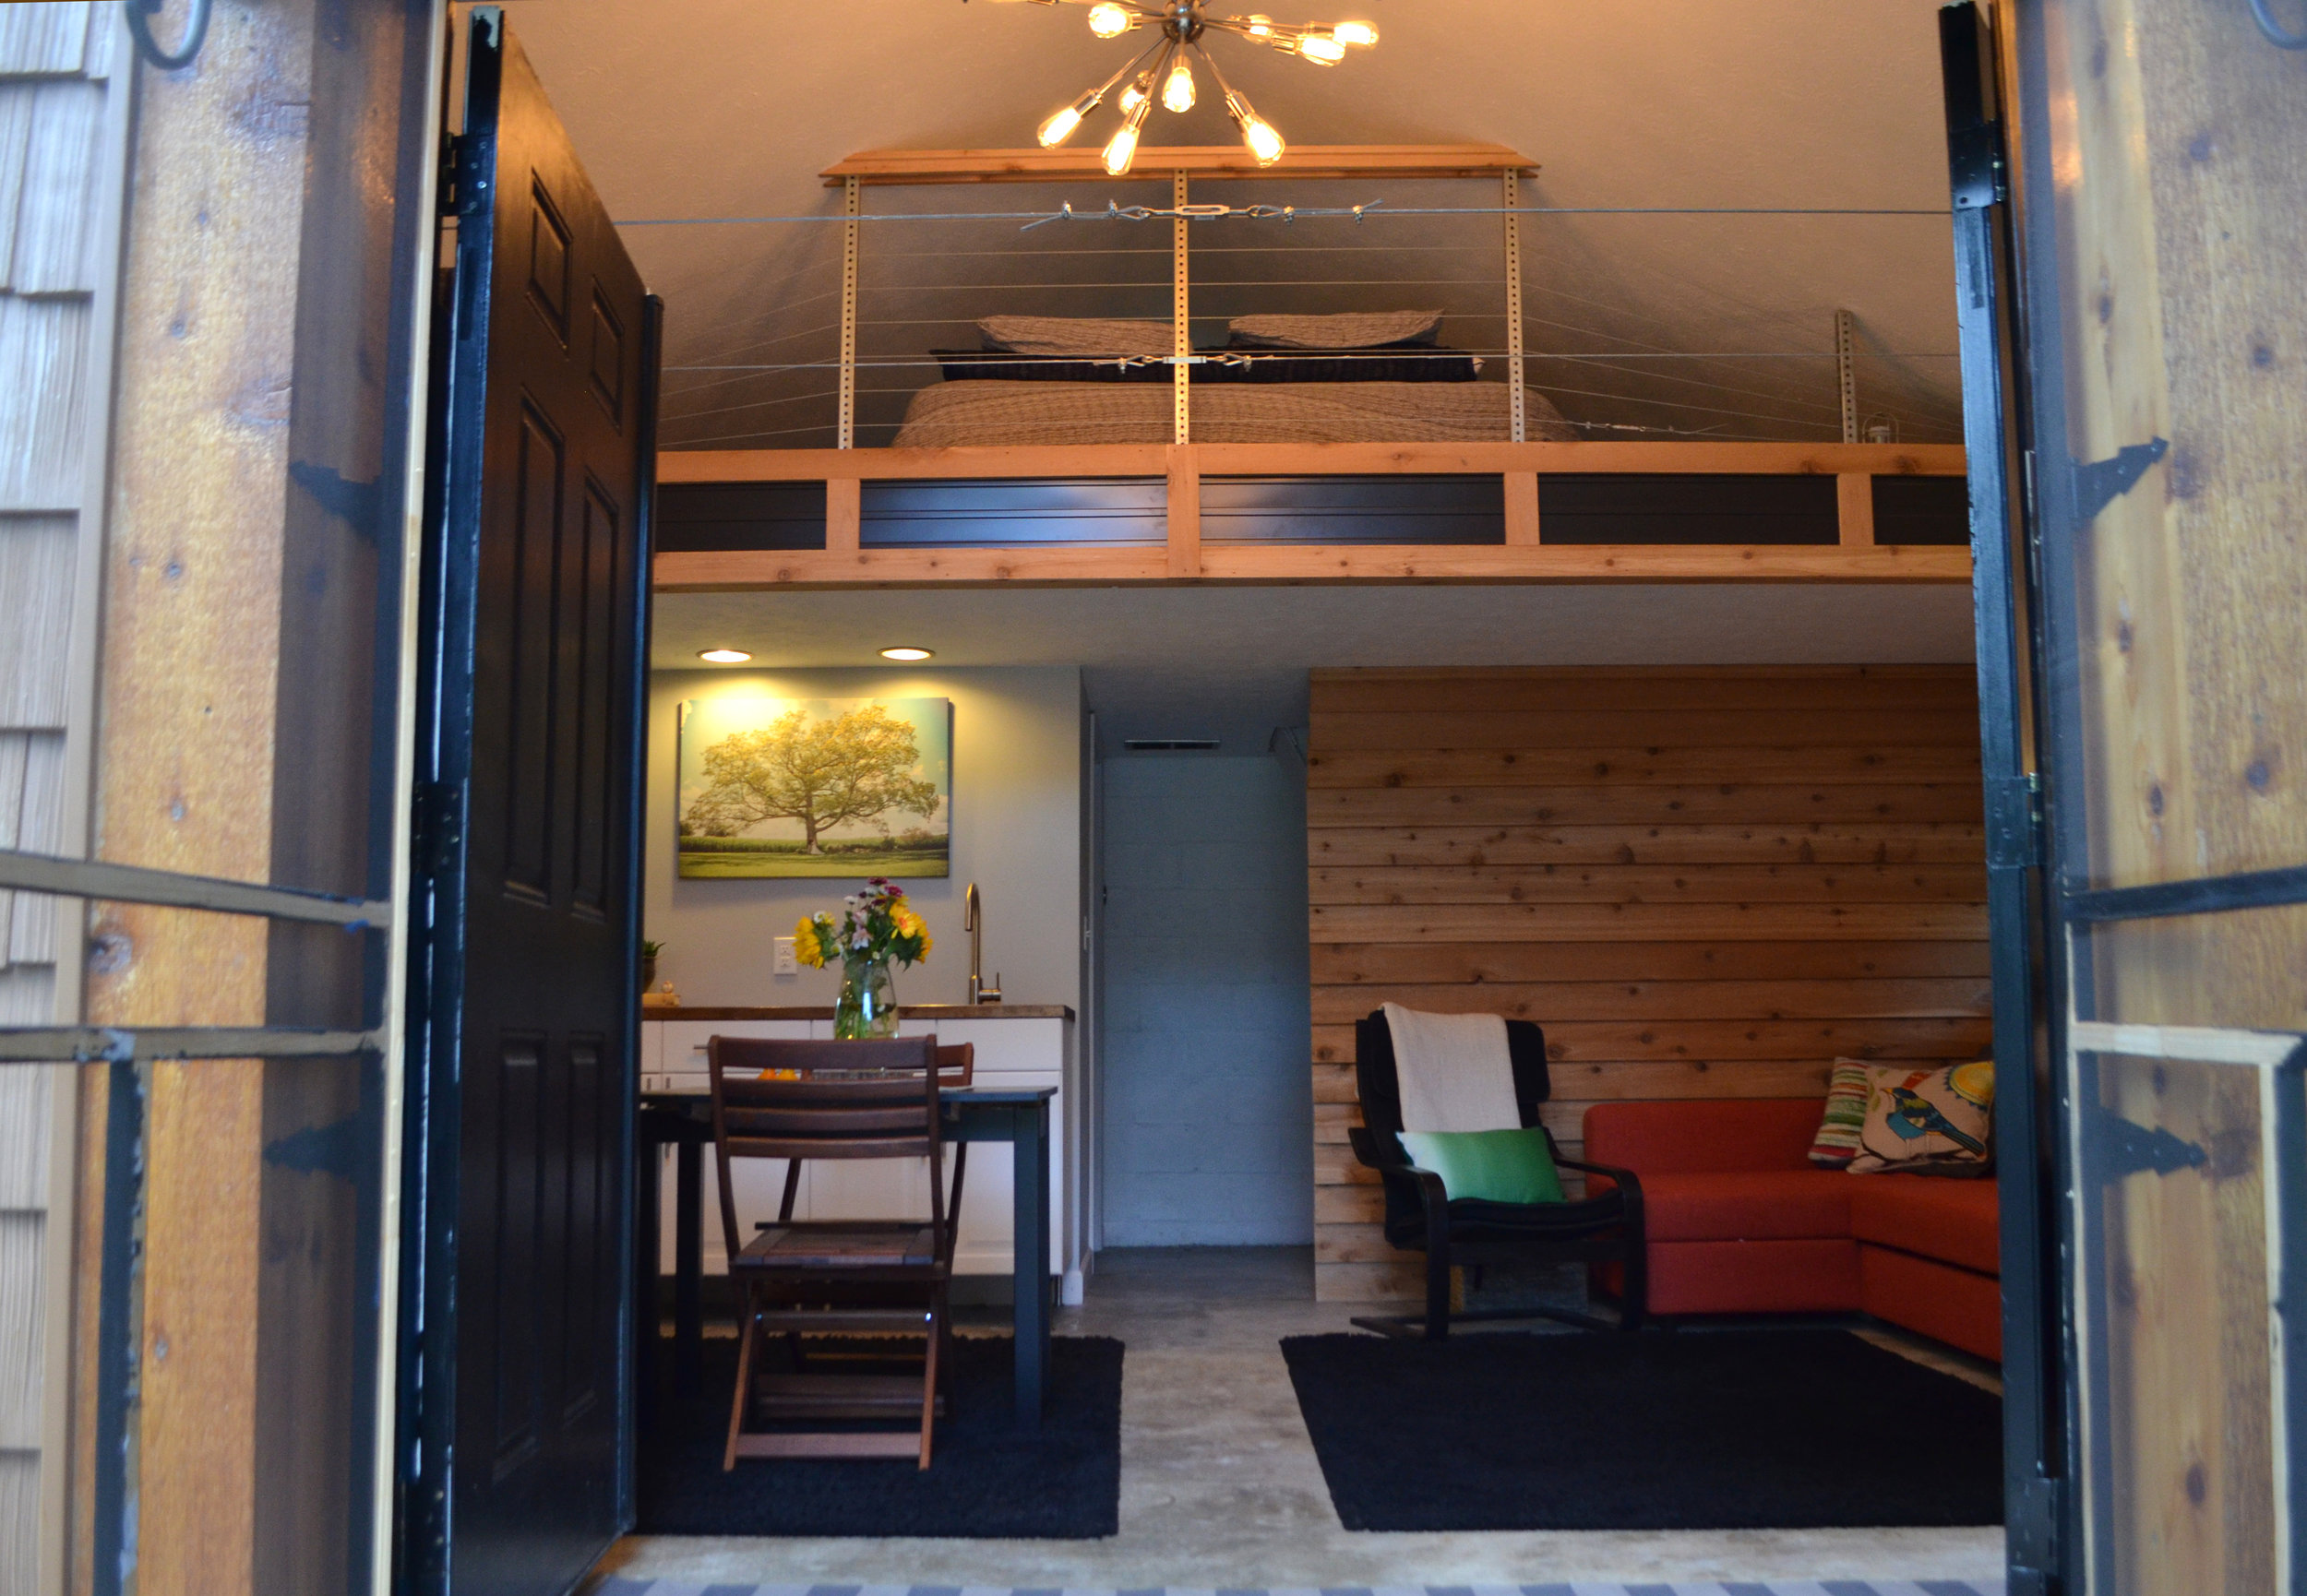
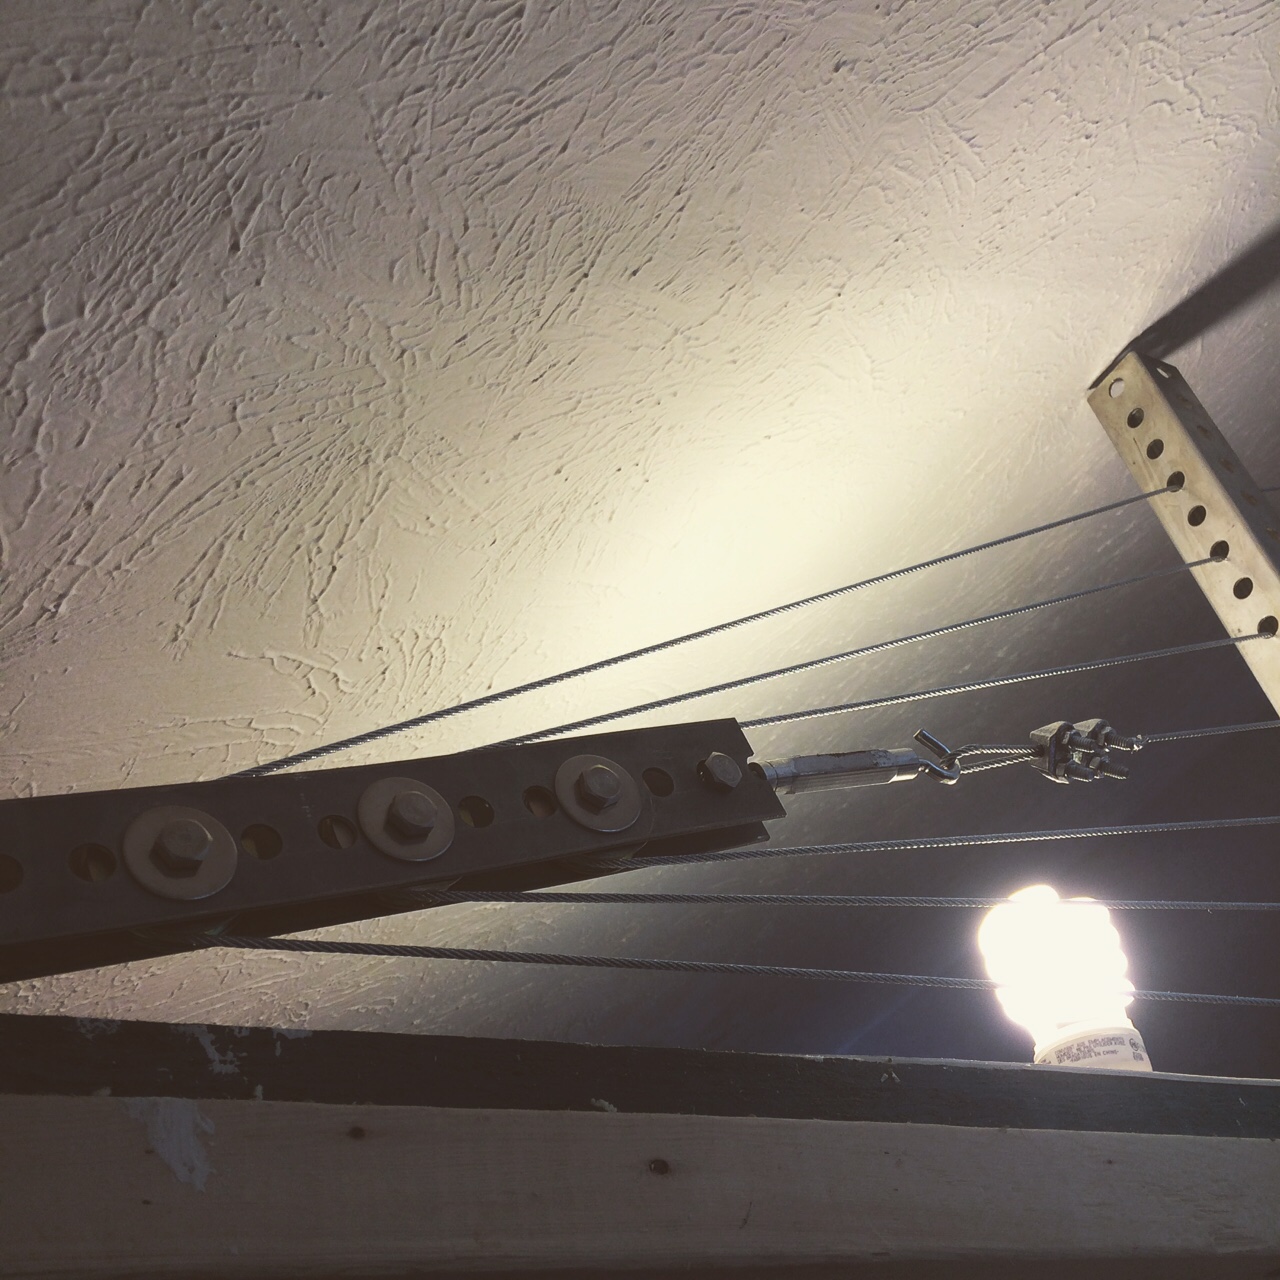
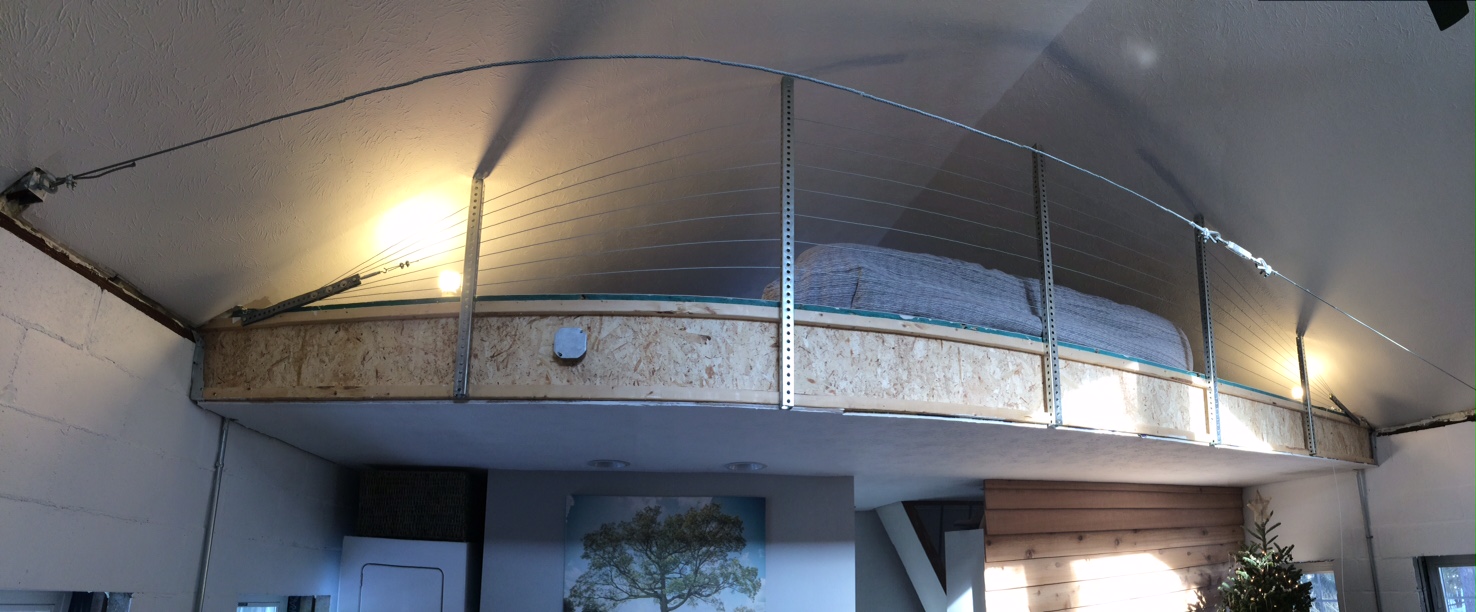
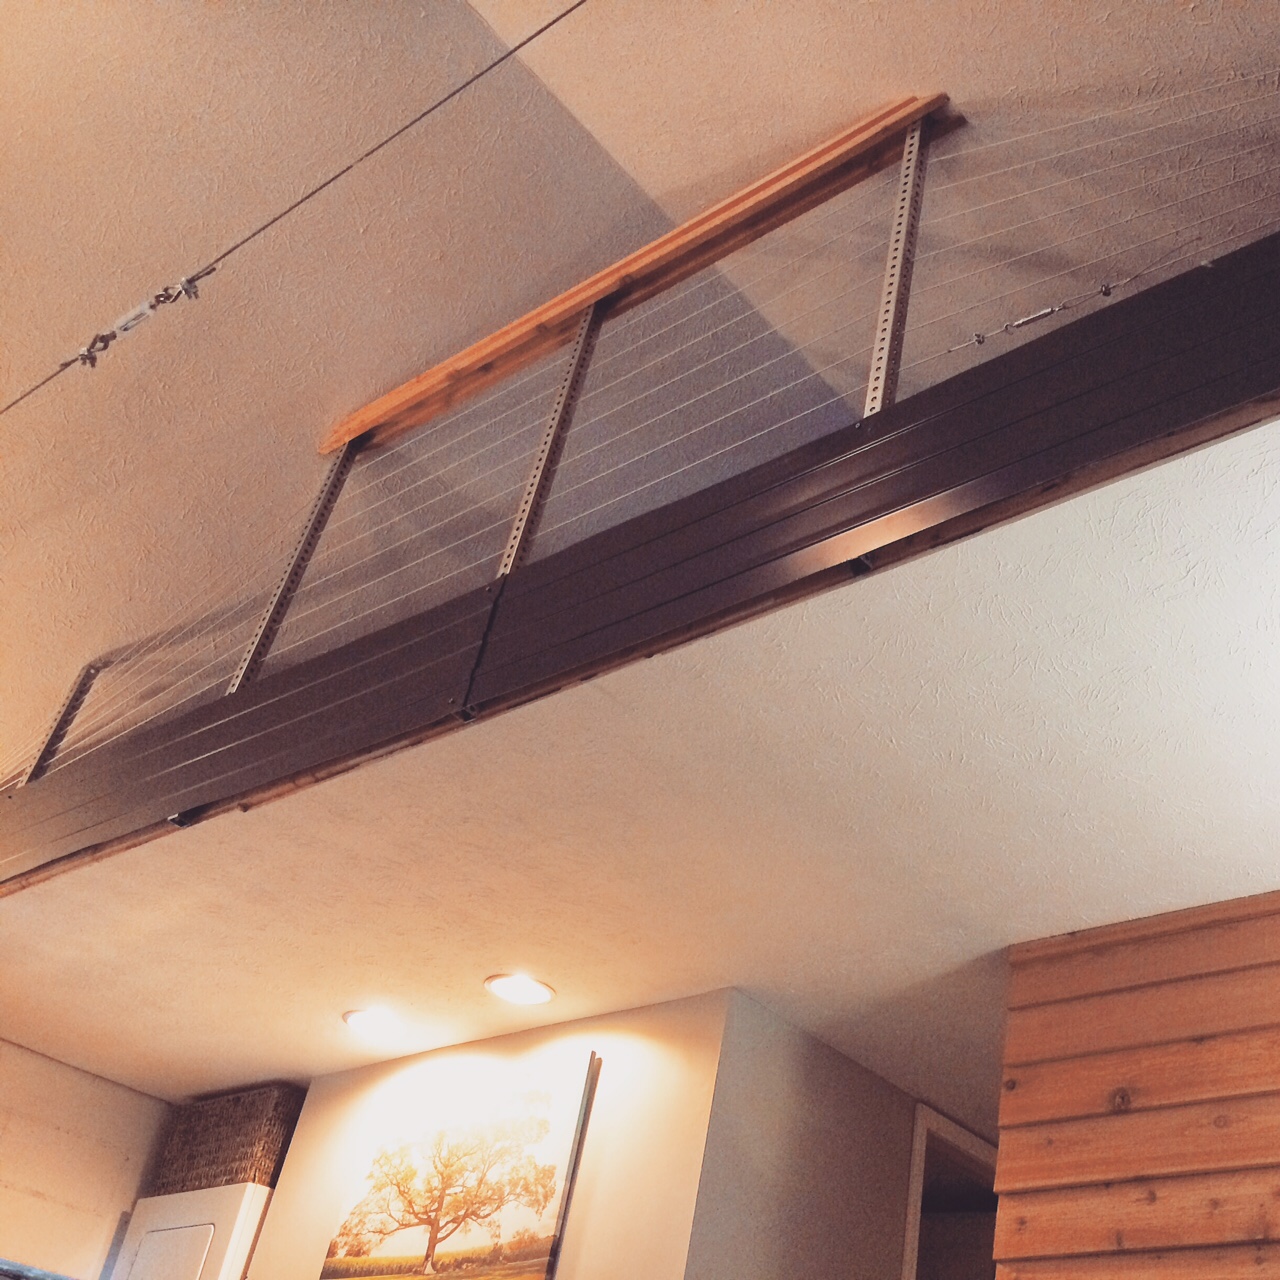
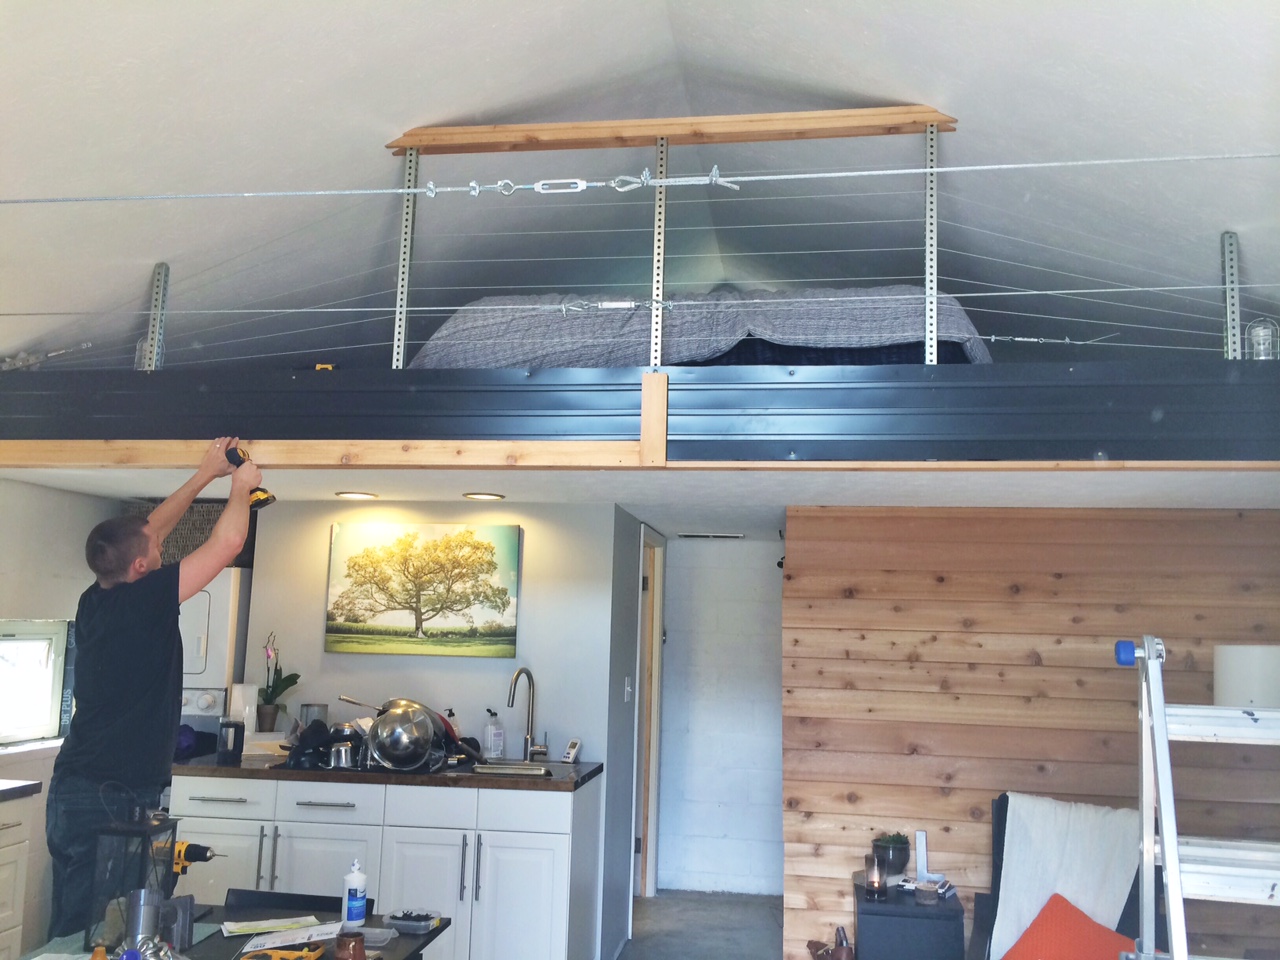
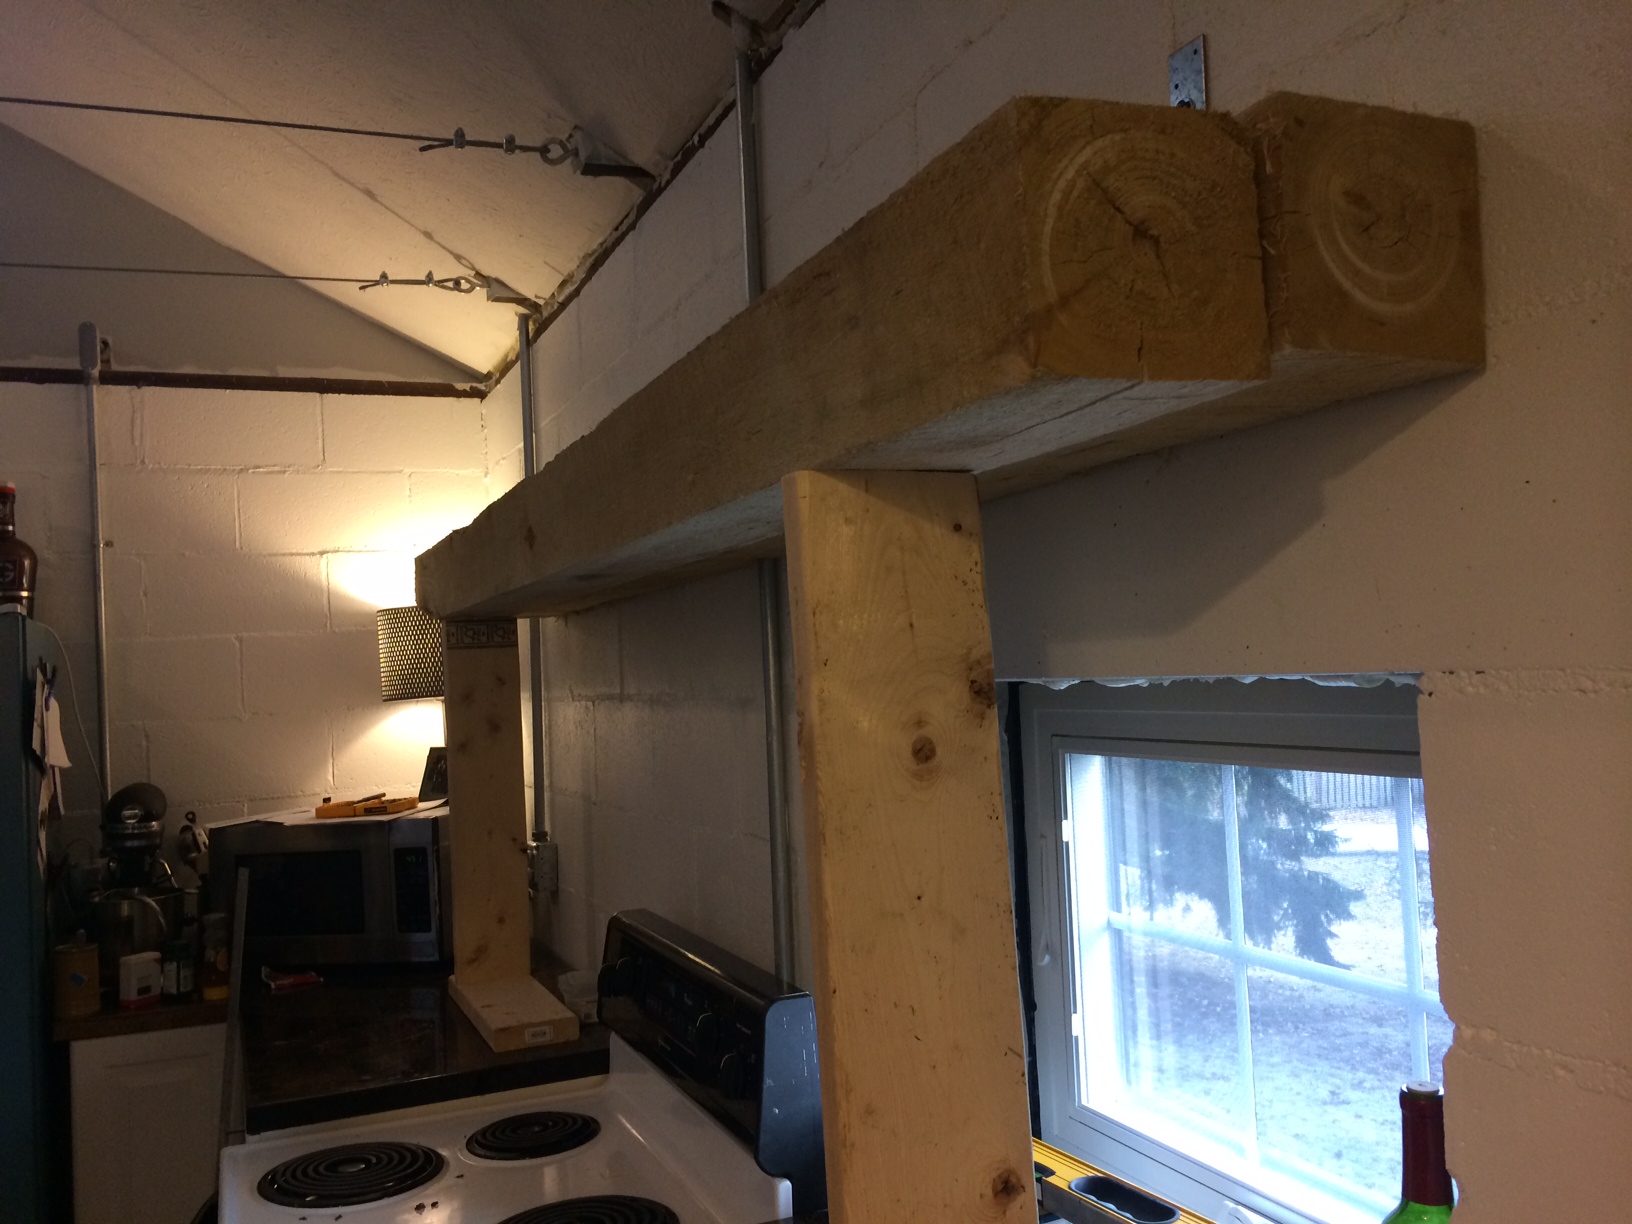
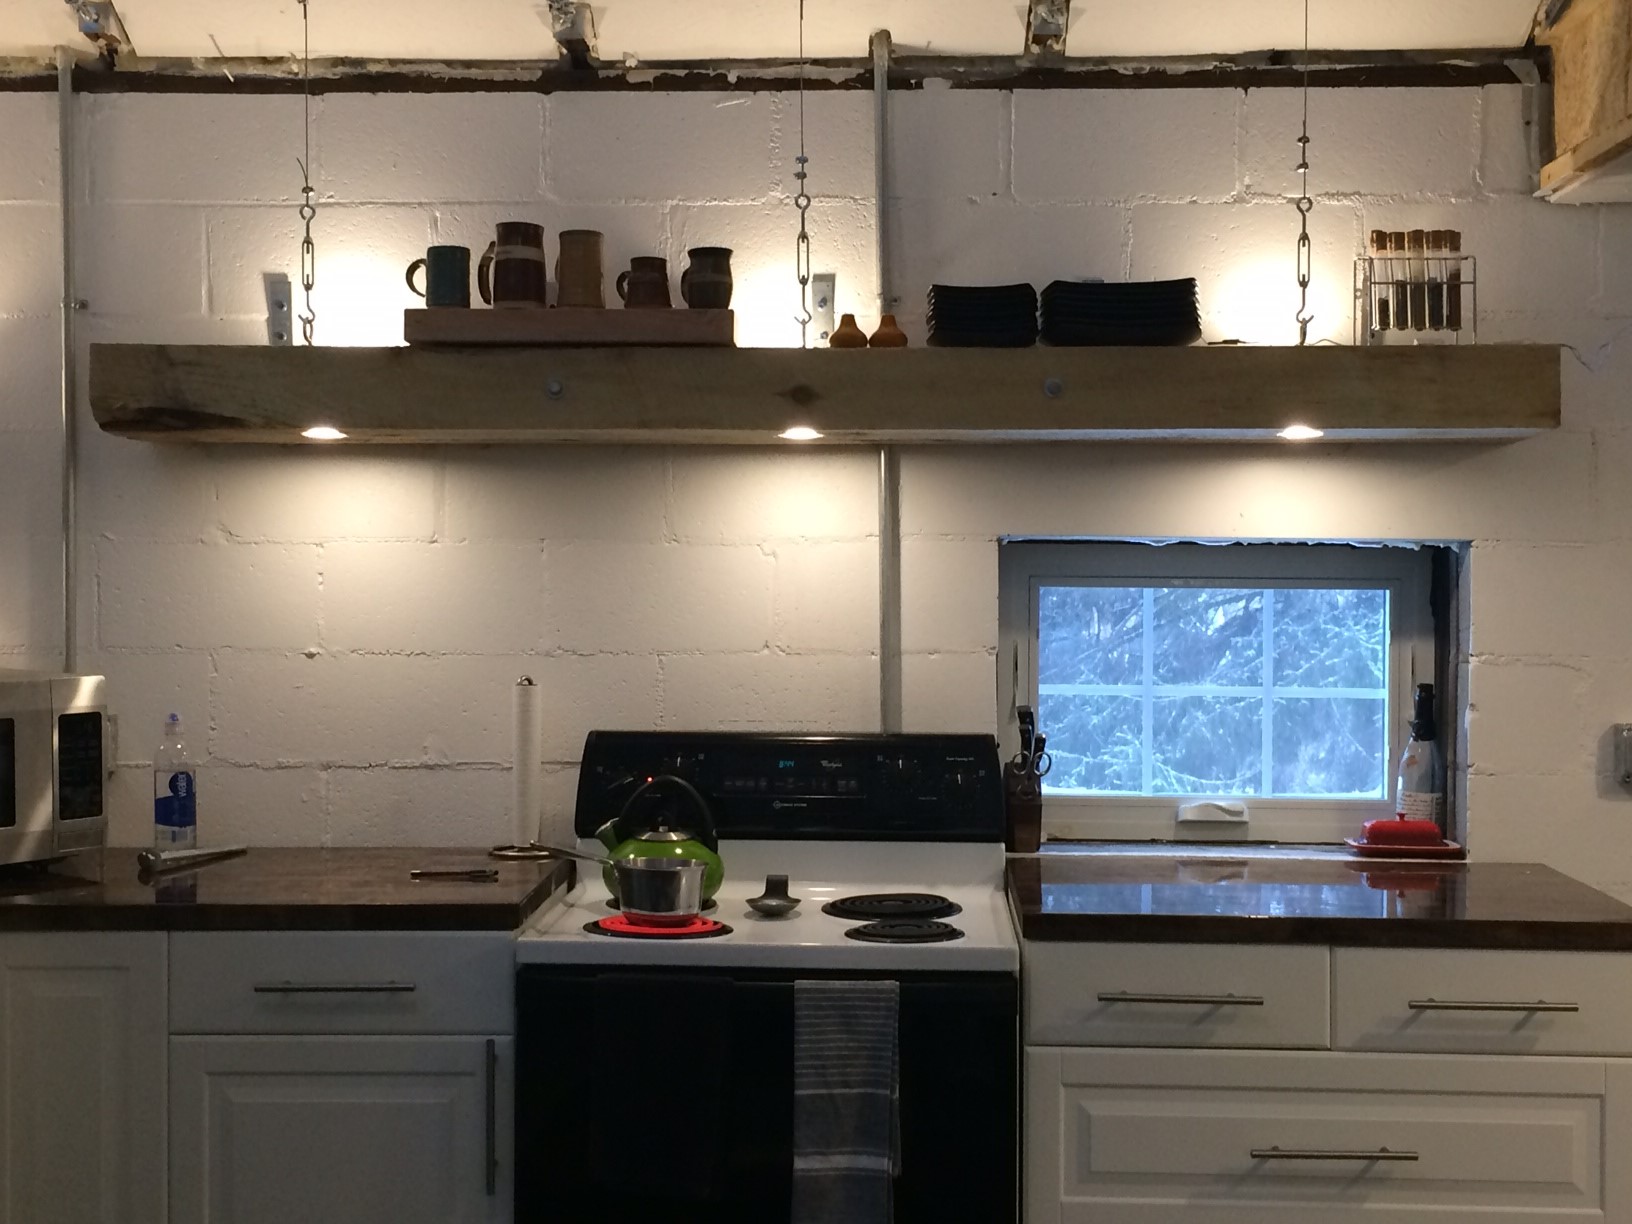
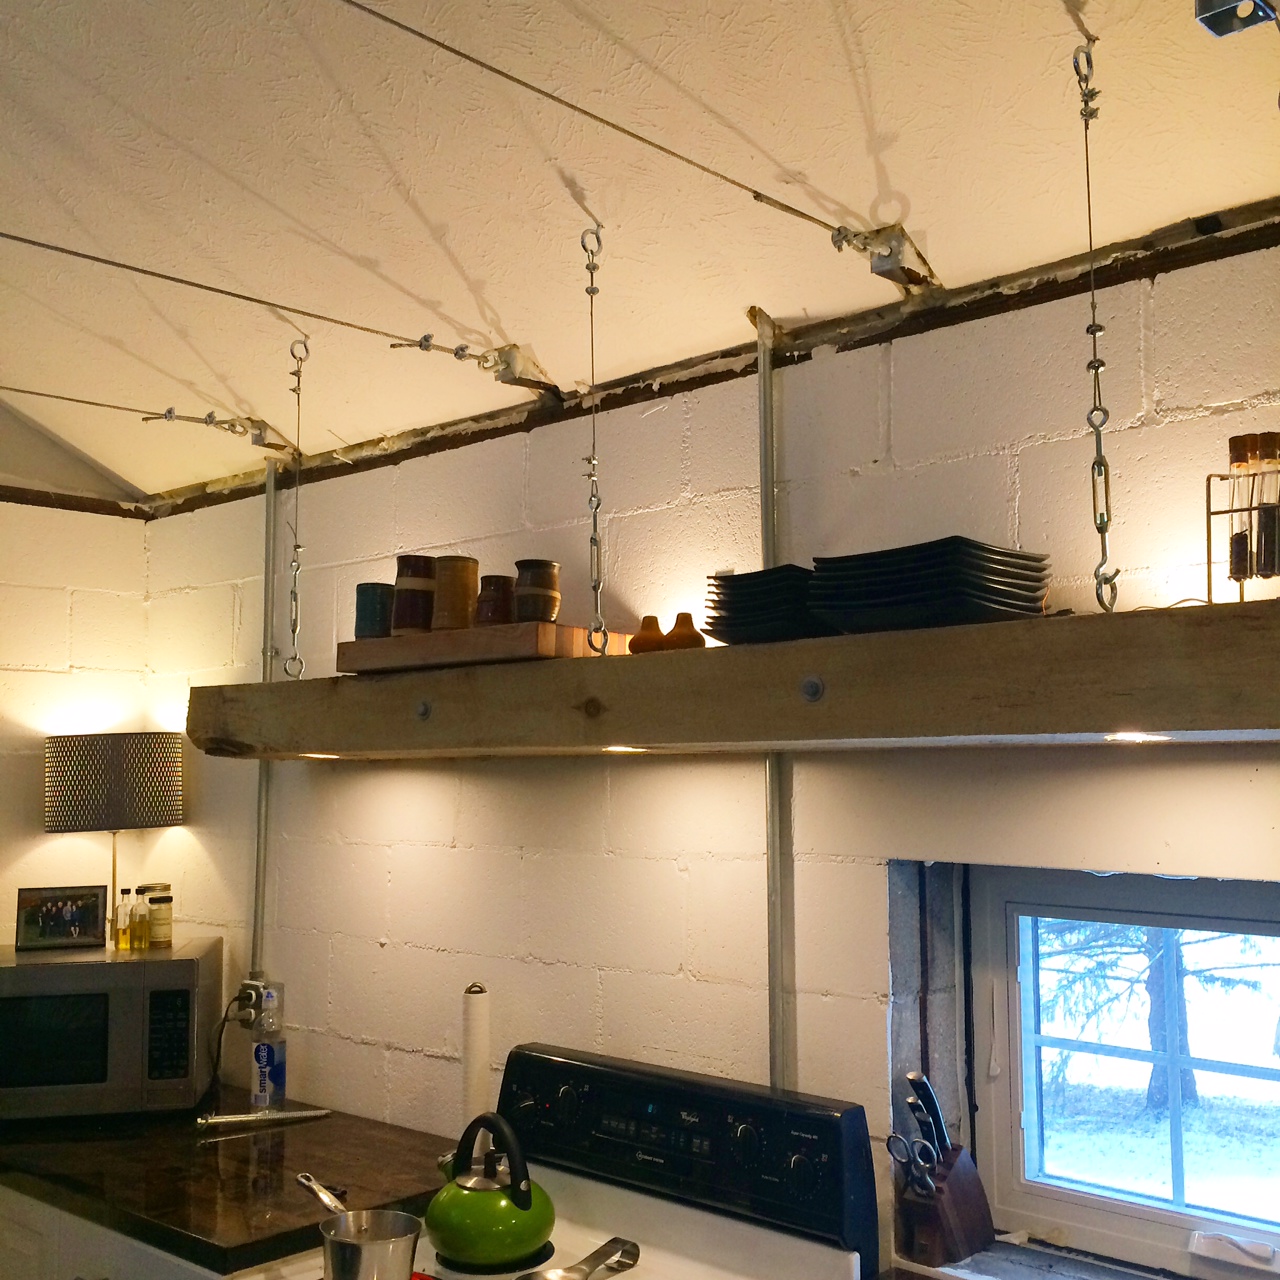
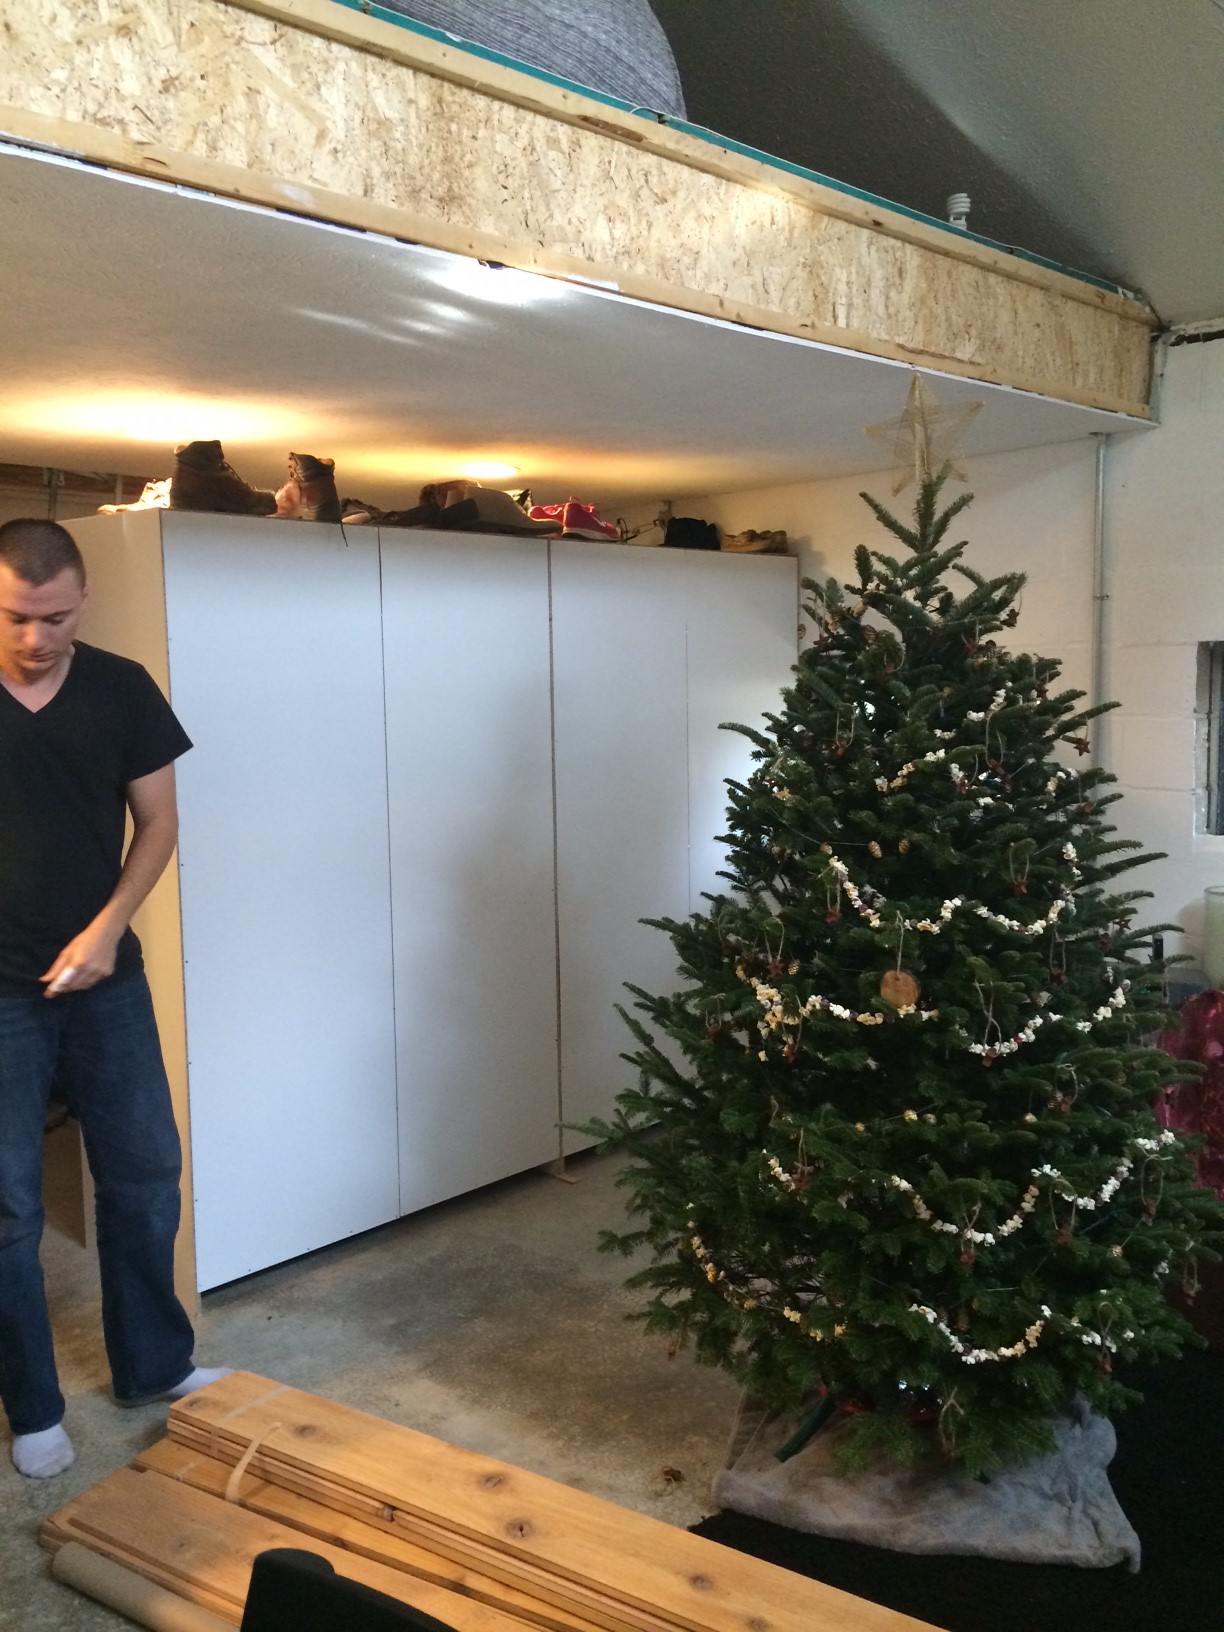
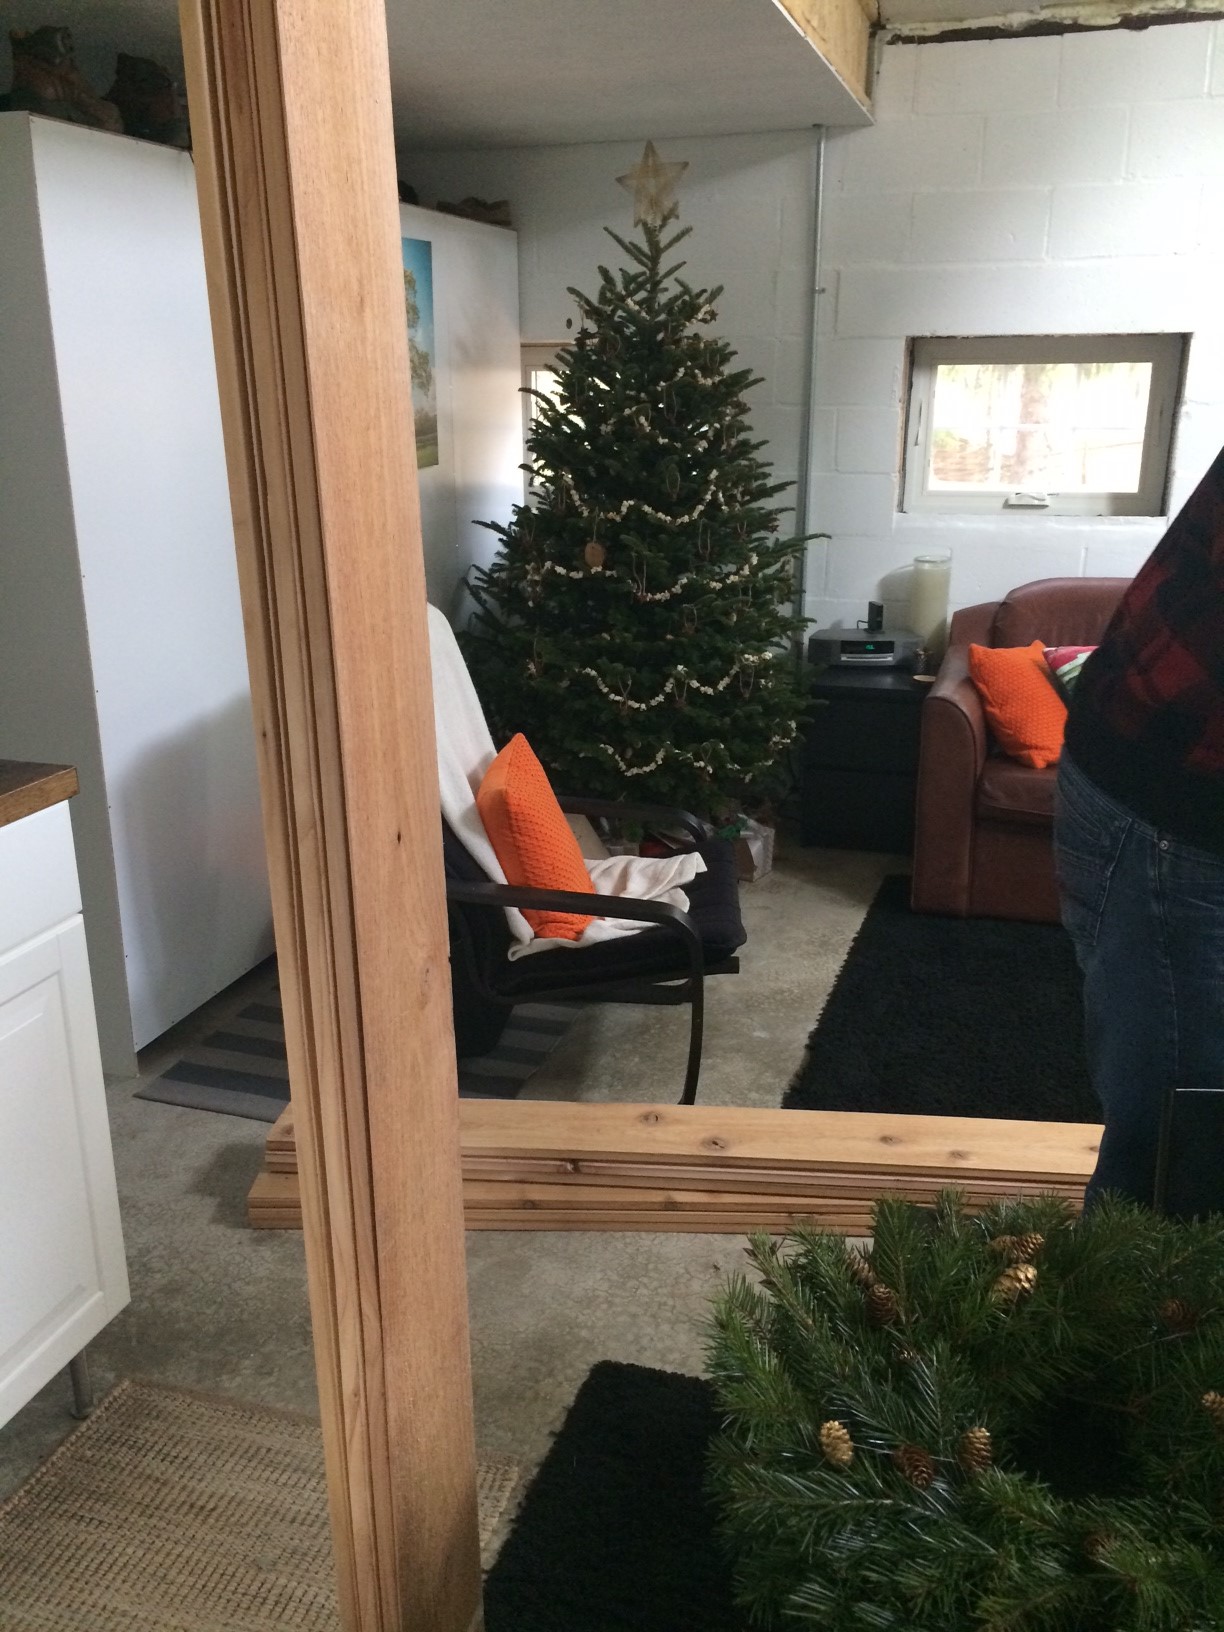
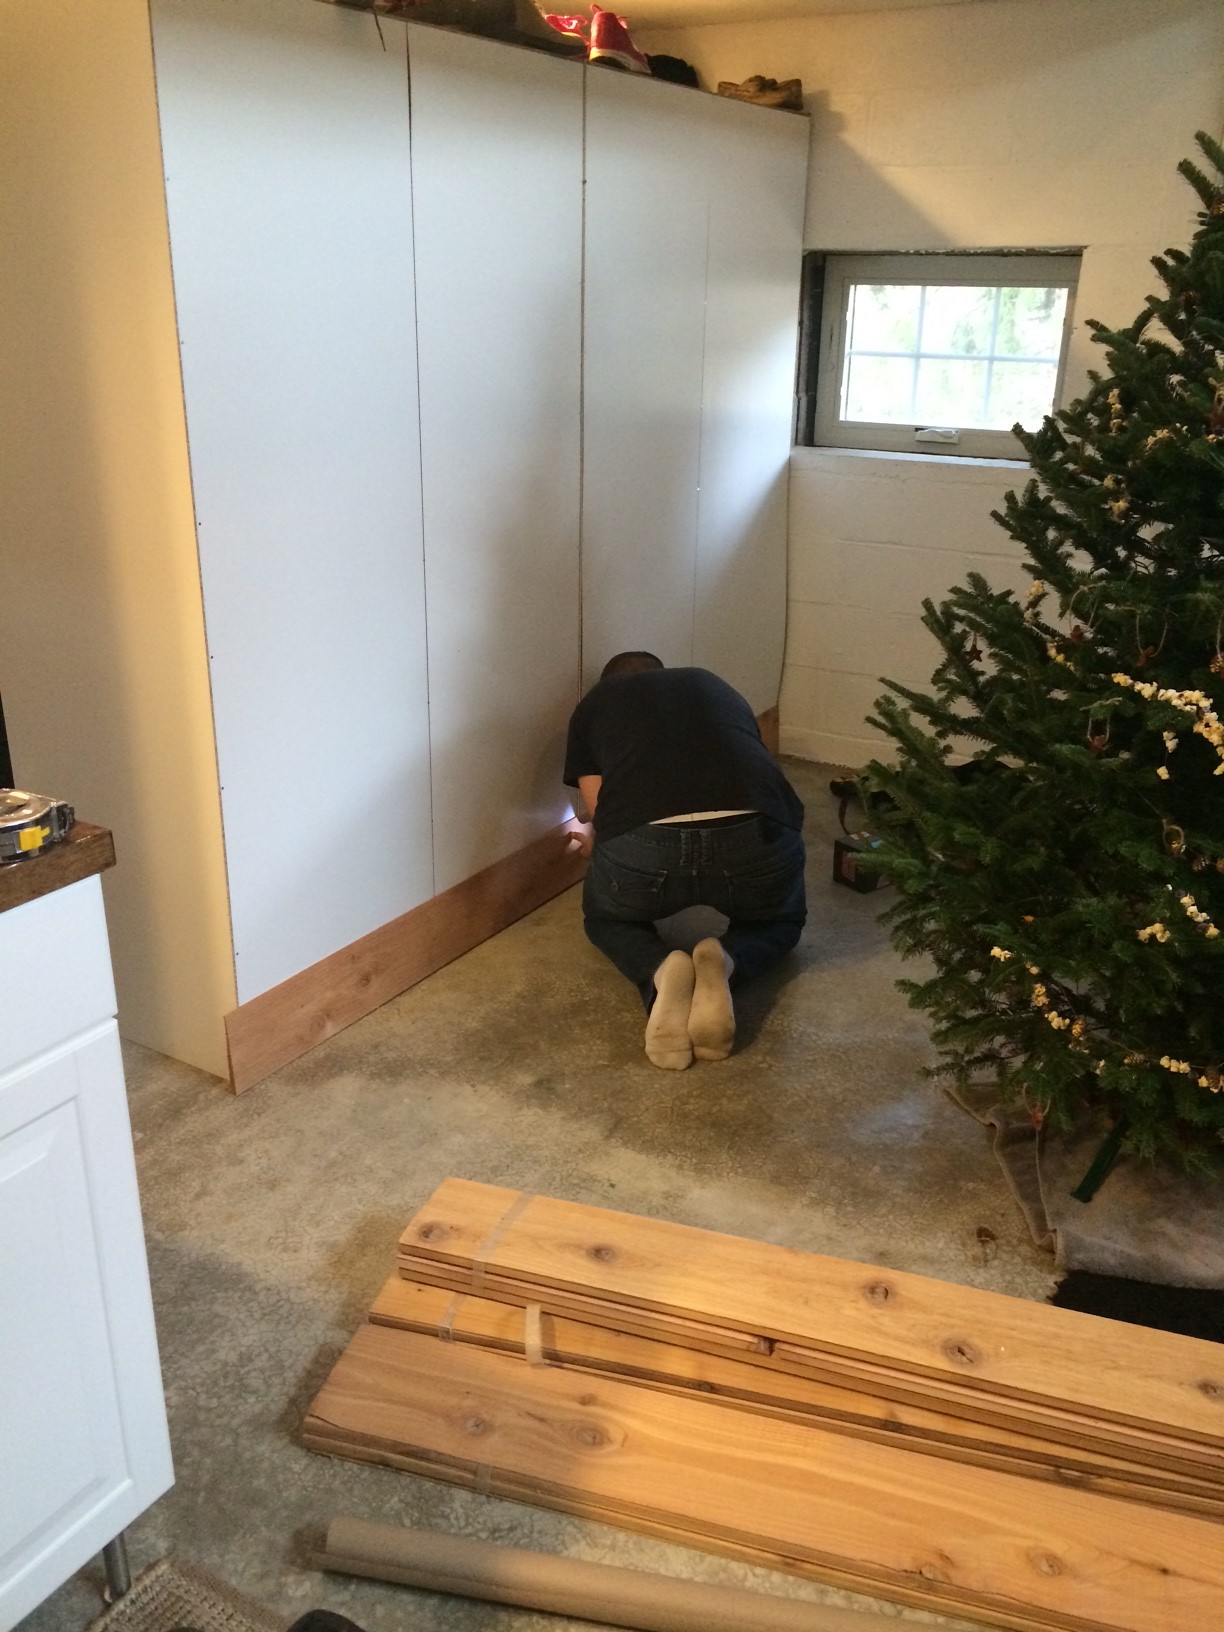
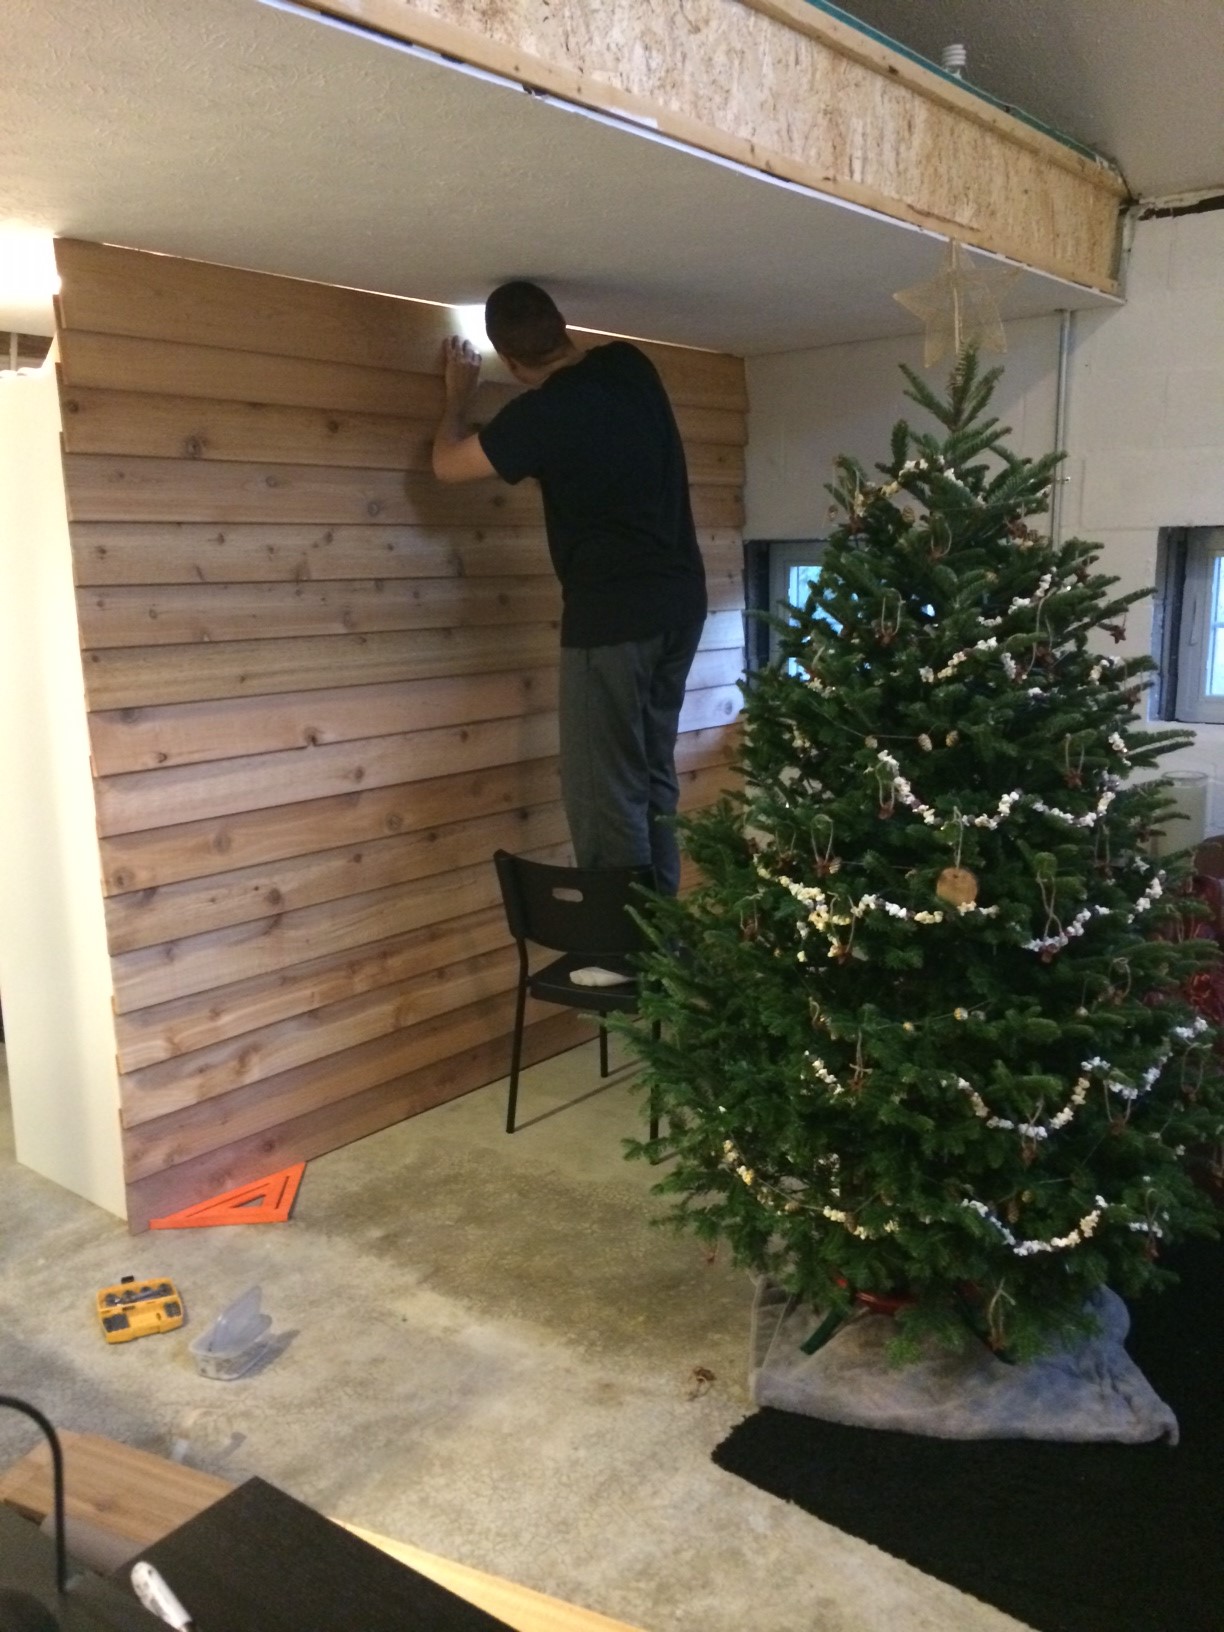
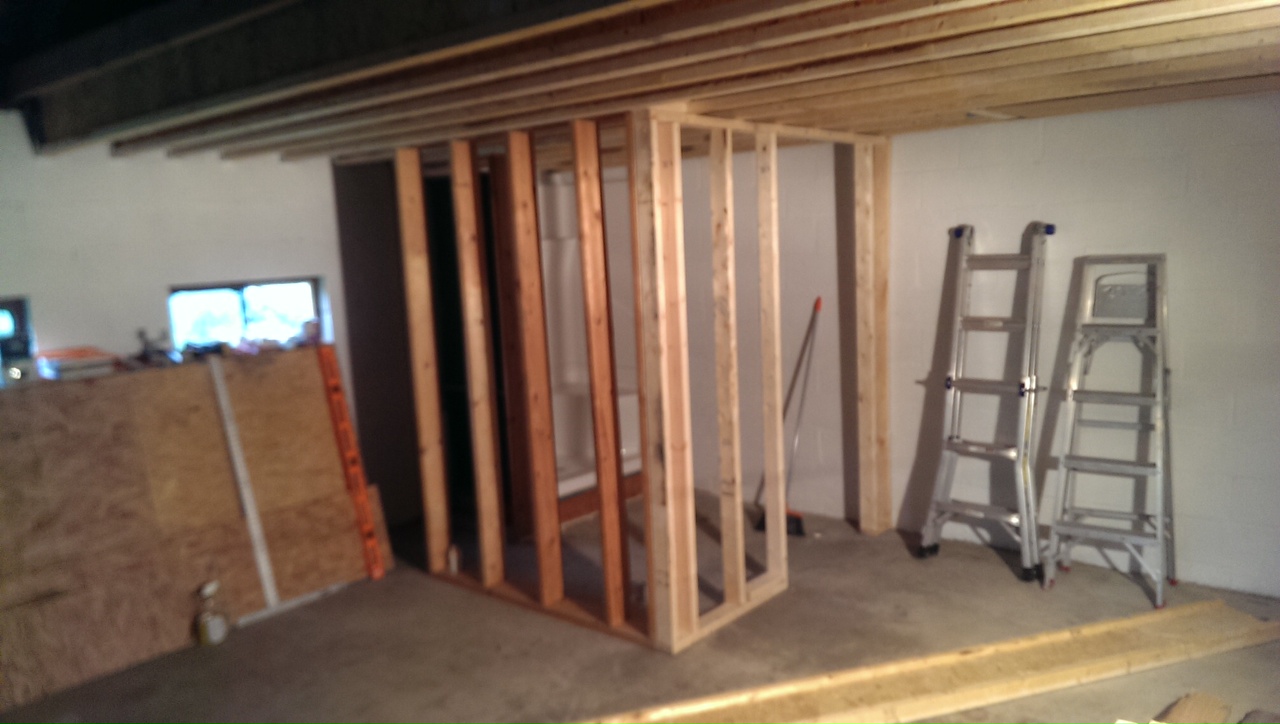
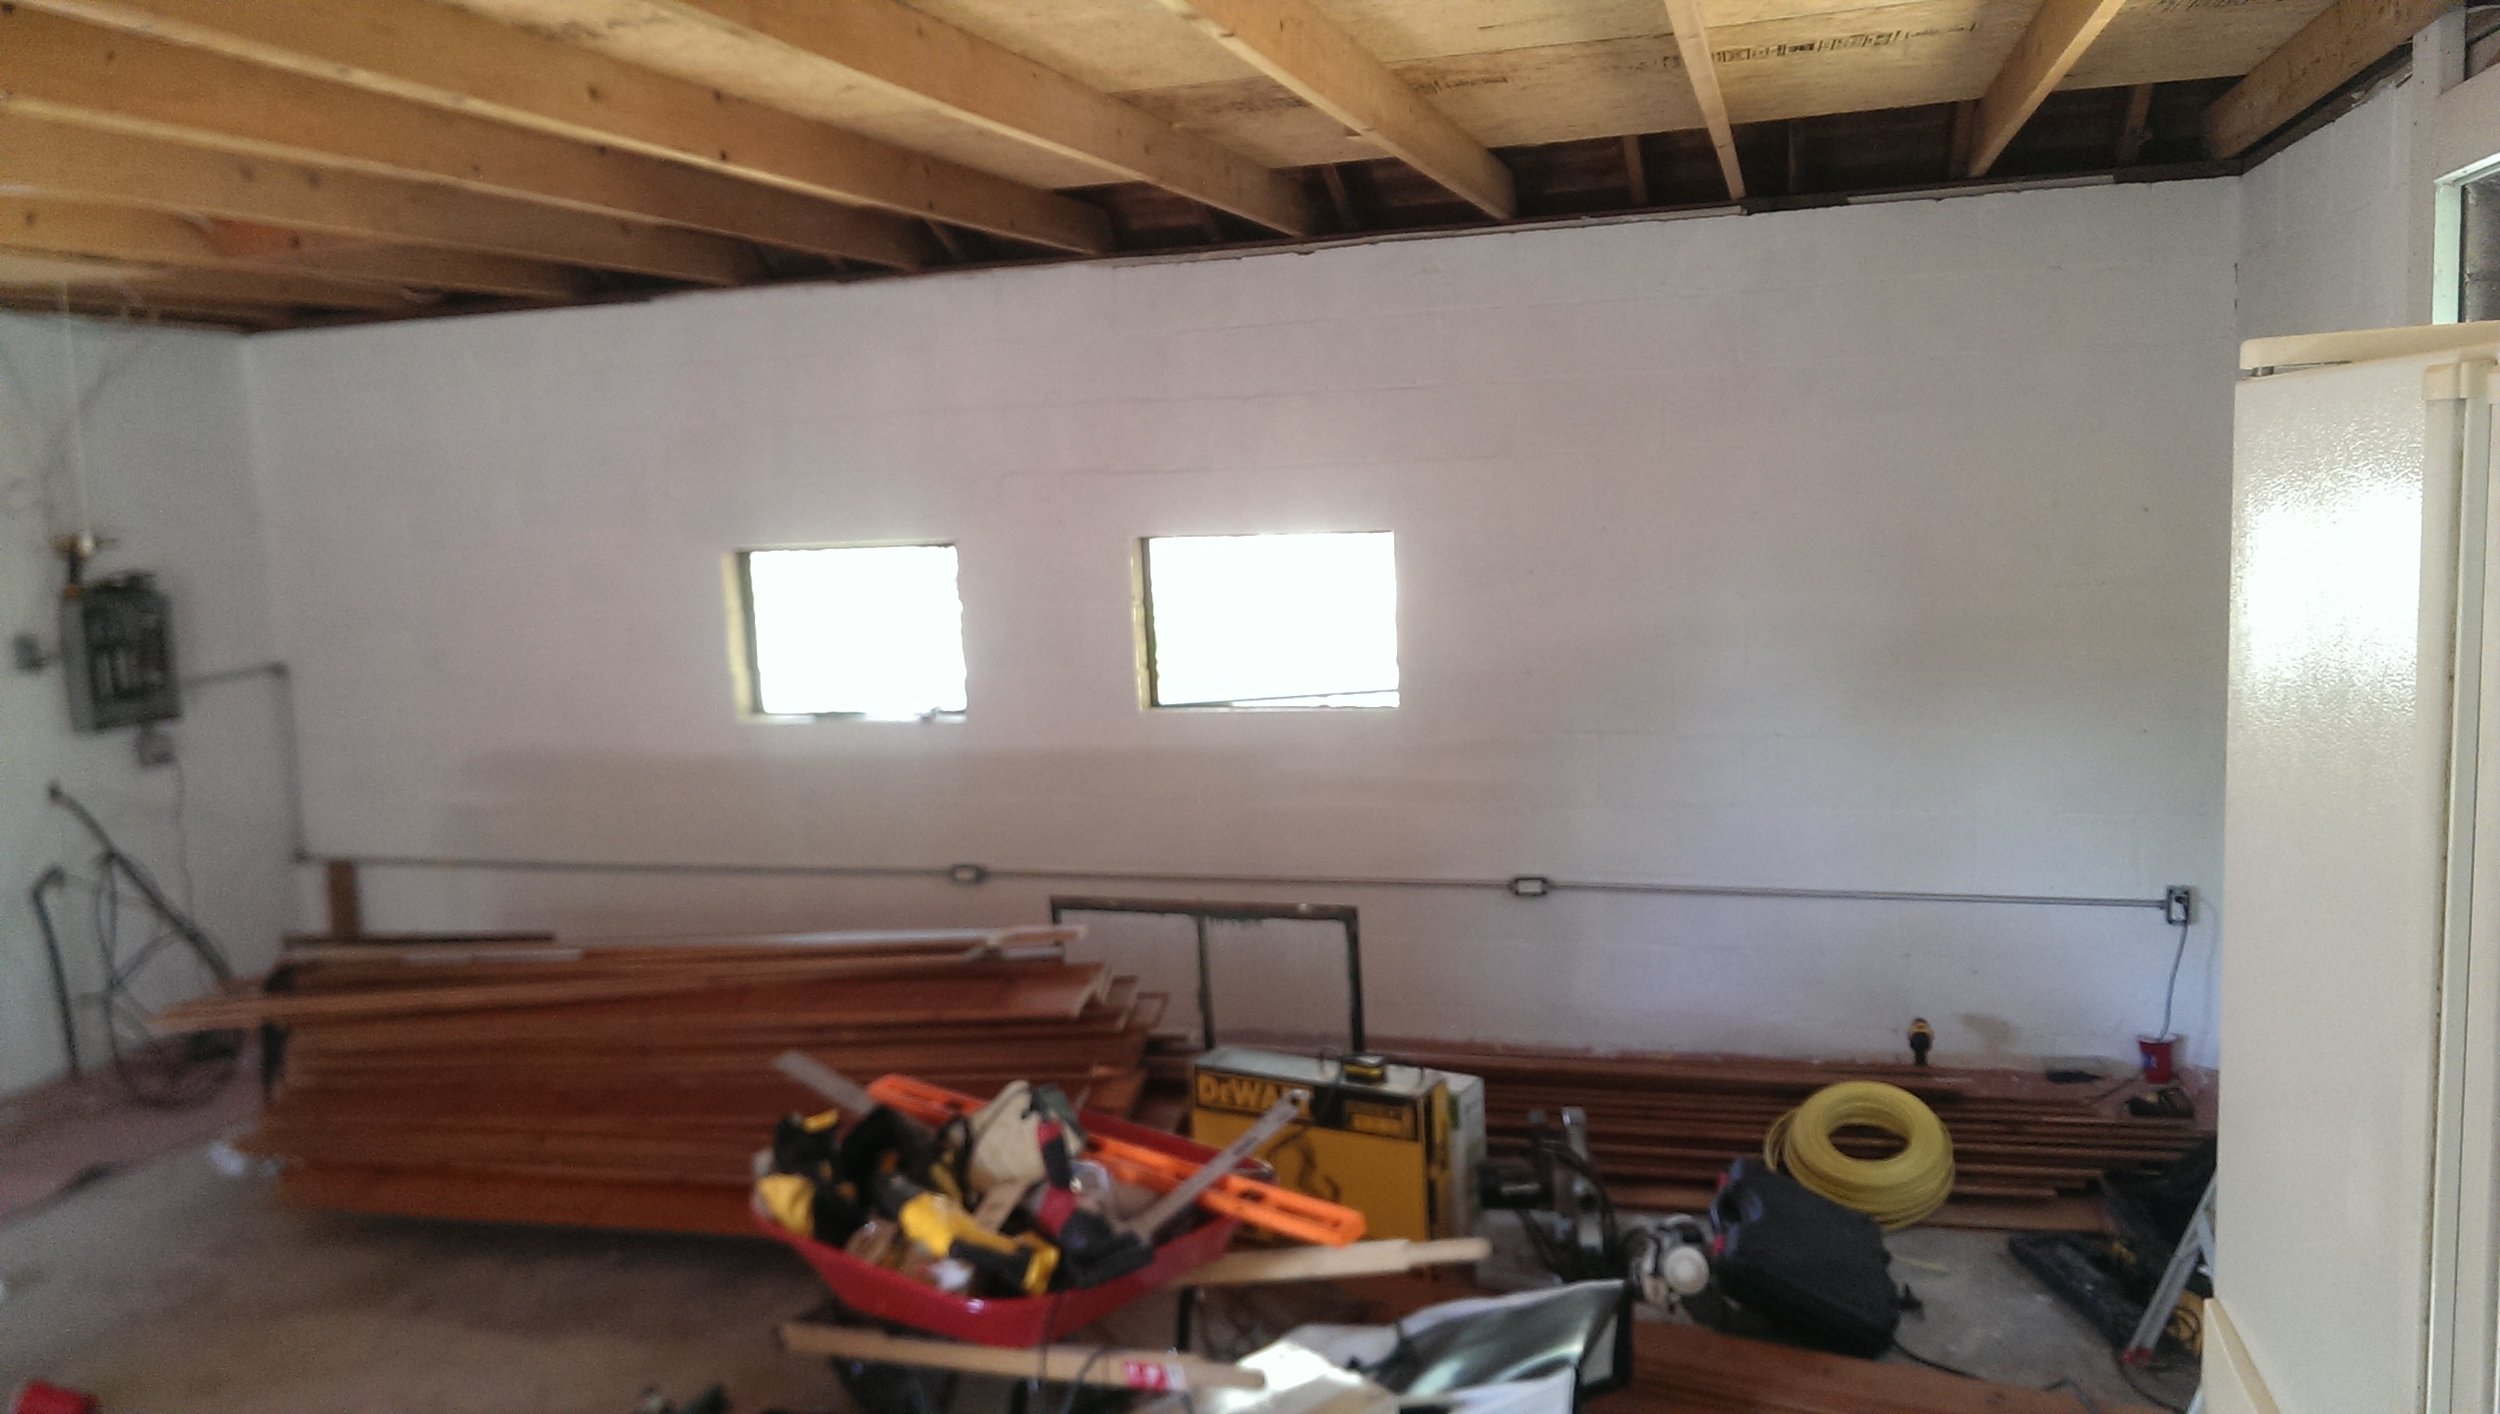
Layout! My mom came by a few weekends ago and helped me with the layout. I was really struggling with how to set the space up. This is what we came up with. The back left wall (with the picture) will eventually be covered in something that goes floor to ceiling, mainly to cover up our little shoe shelf we've got going on. I THINK we have decided on what we will cover it with, but I will let that be a surprise.

Also, who loves my little Halloween candle holder thingy? My dad got that for me when I was 10. It is now a fall staple.

Bunker move 3-8

-----------------------------------------------------------------------------------------------------------------------------------------------------------

As a little treat for reading this entire blog, I have a story. A bit humiliating, but if I dont share it, Derek will. I want to be the one to make sure all the facts are out there. 

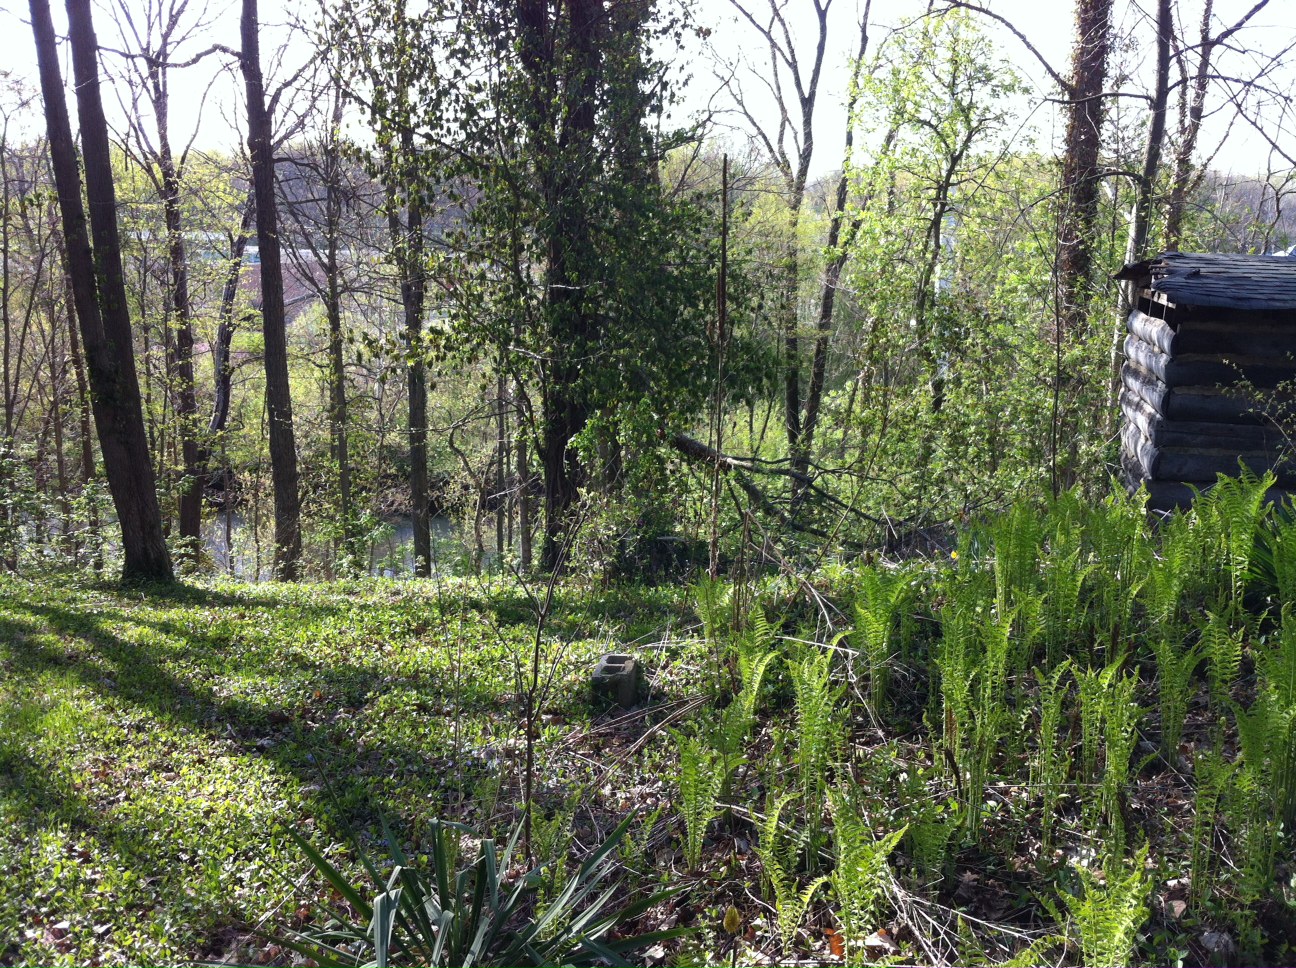
We bought a car last week. Since Billy (our pickup truck) isn't  dependable enough for the 30 min city commute, we opted to buy a used car. We love it. His name is Rupert and he is handsome..which makes this story hurt a bit more...

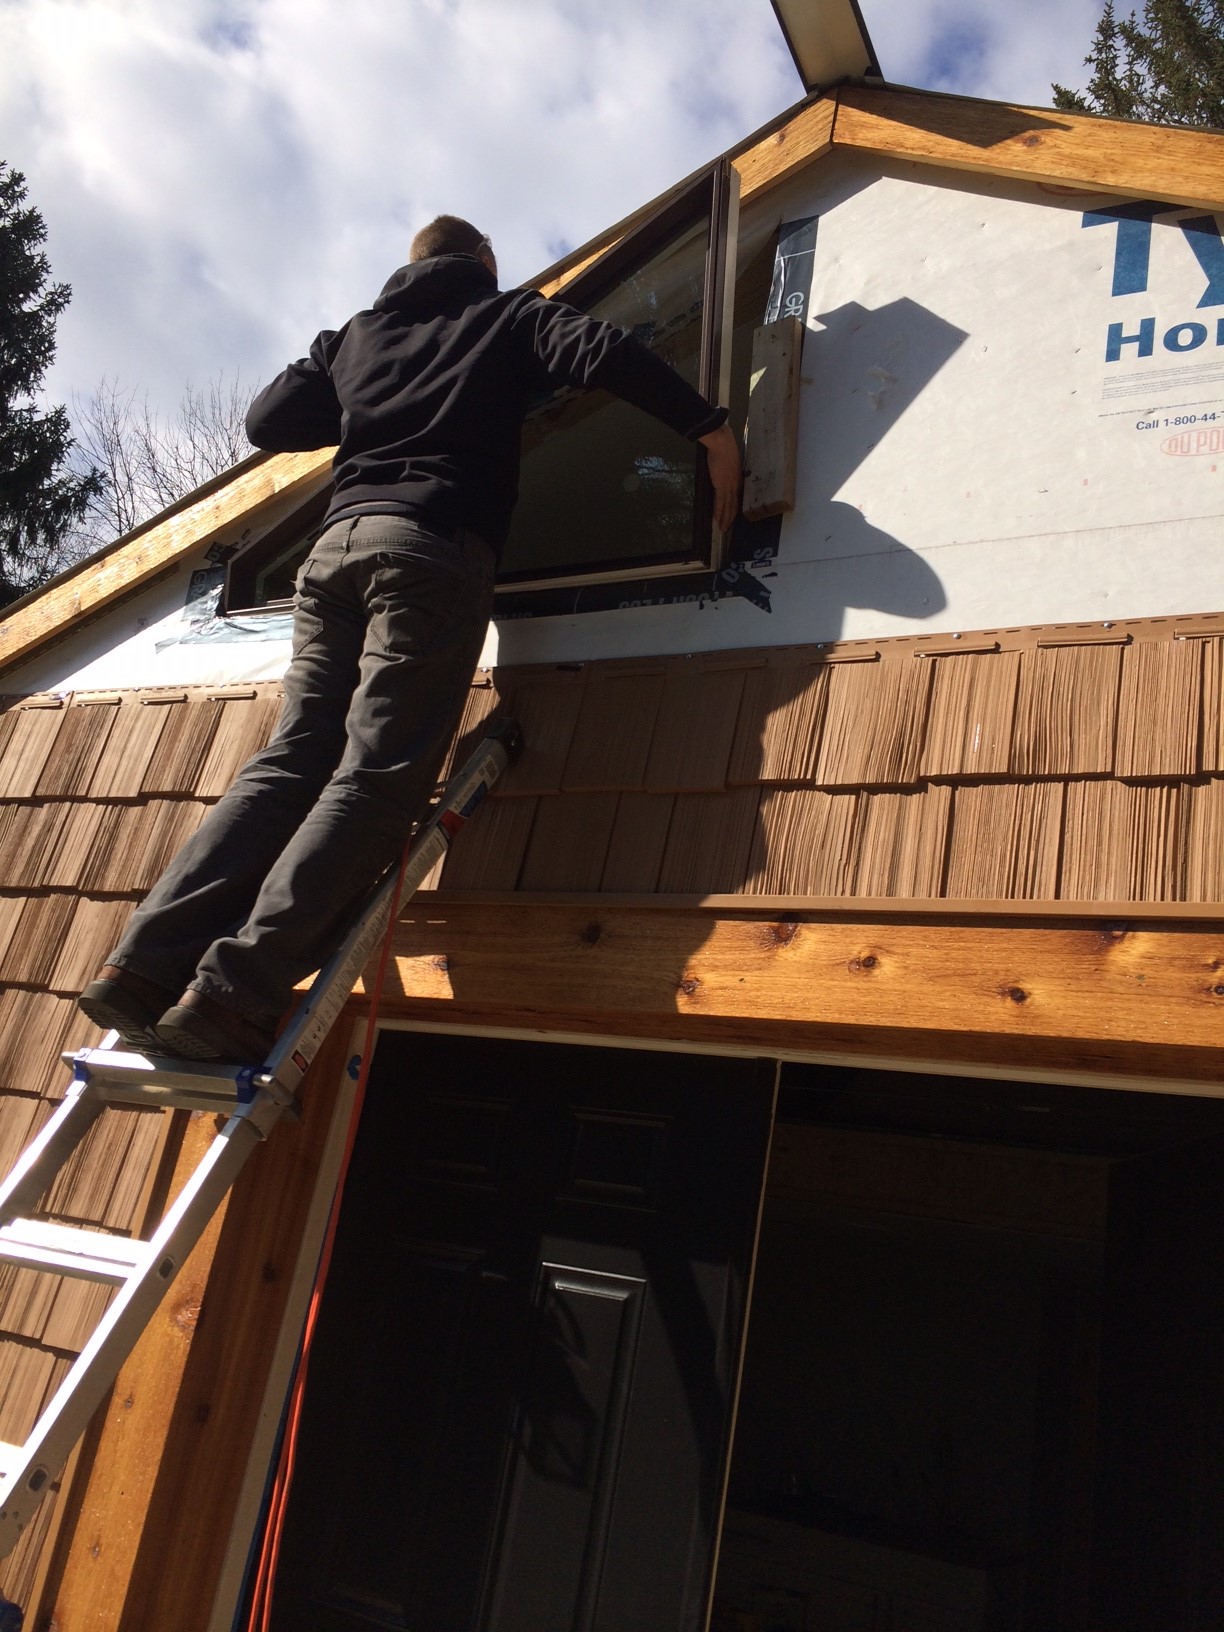
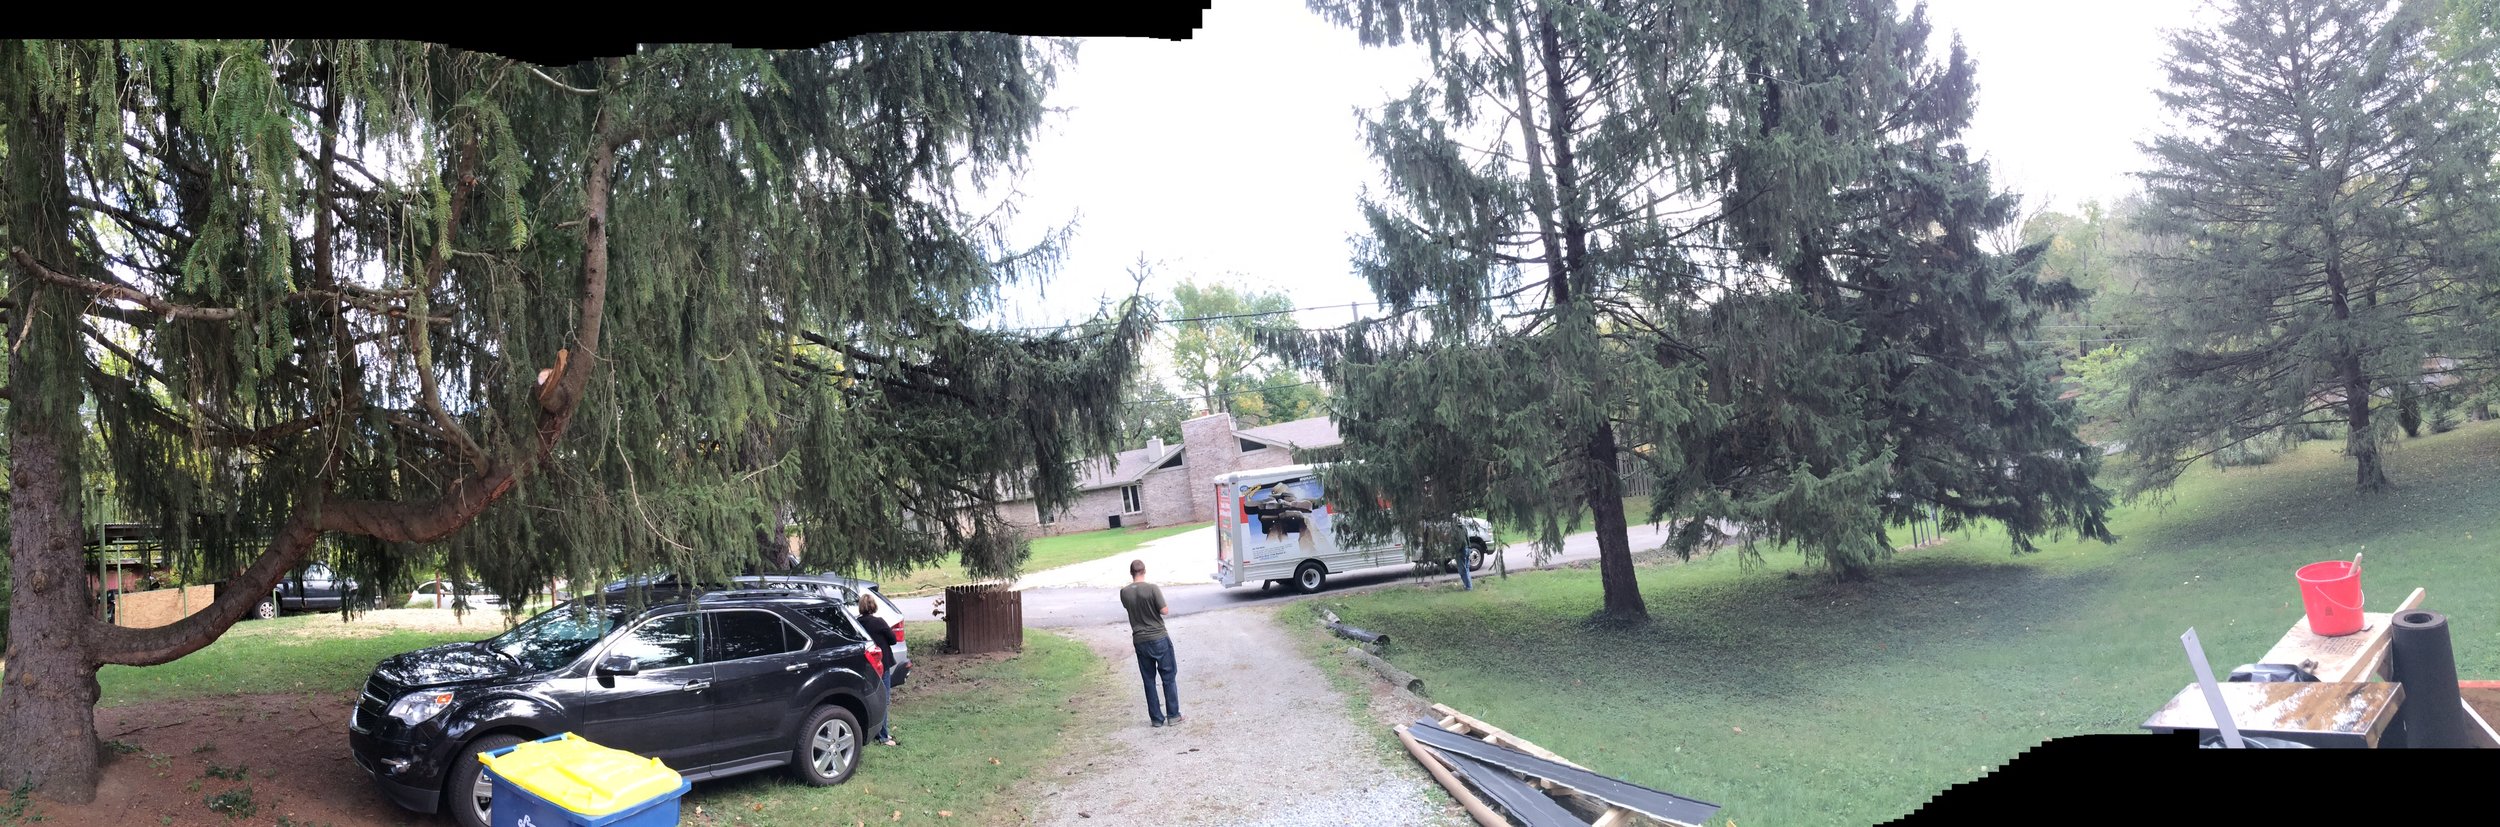
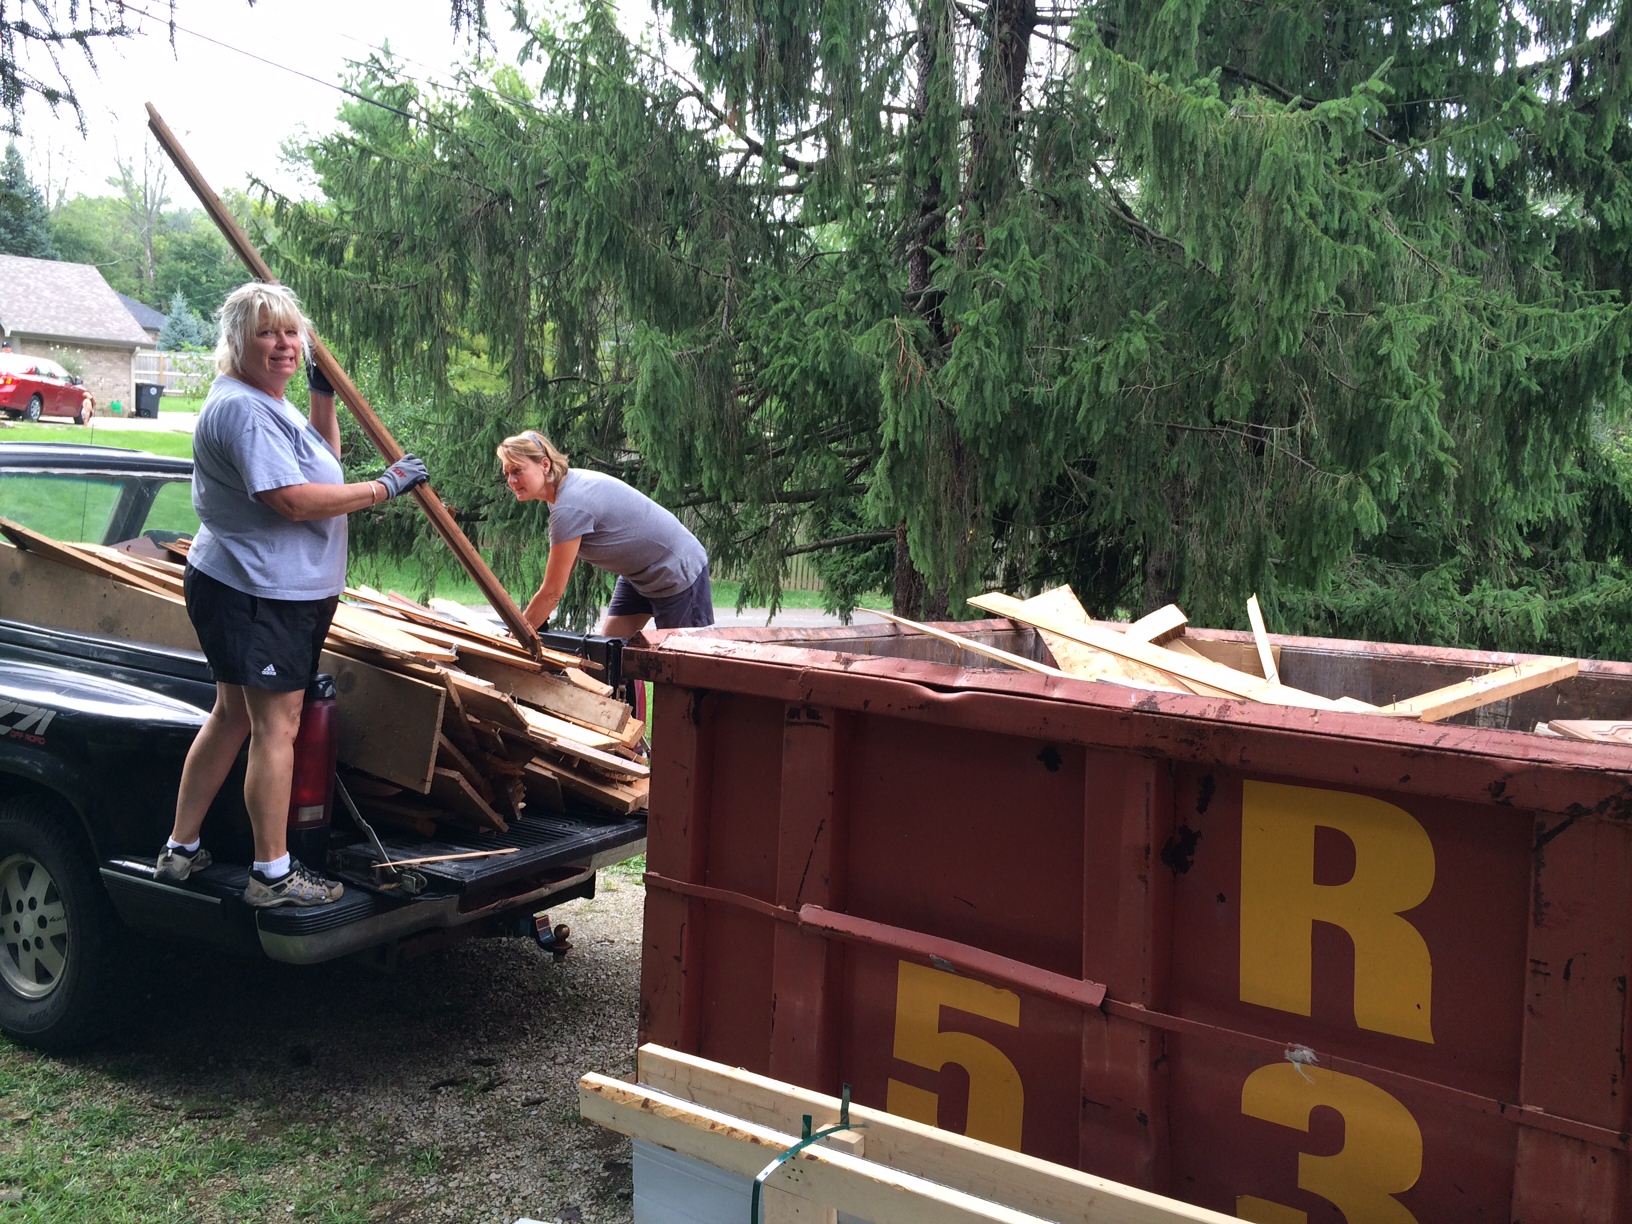
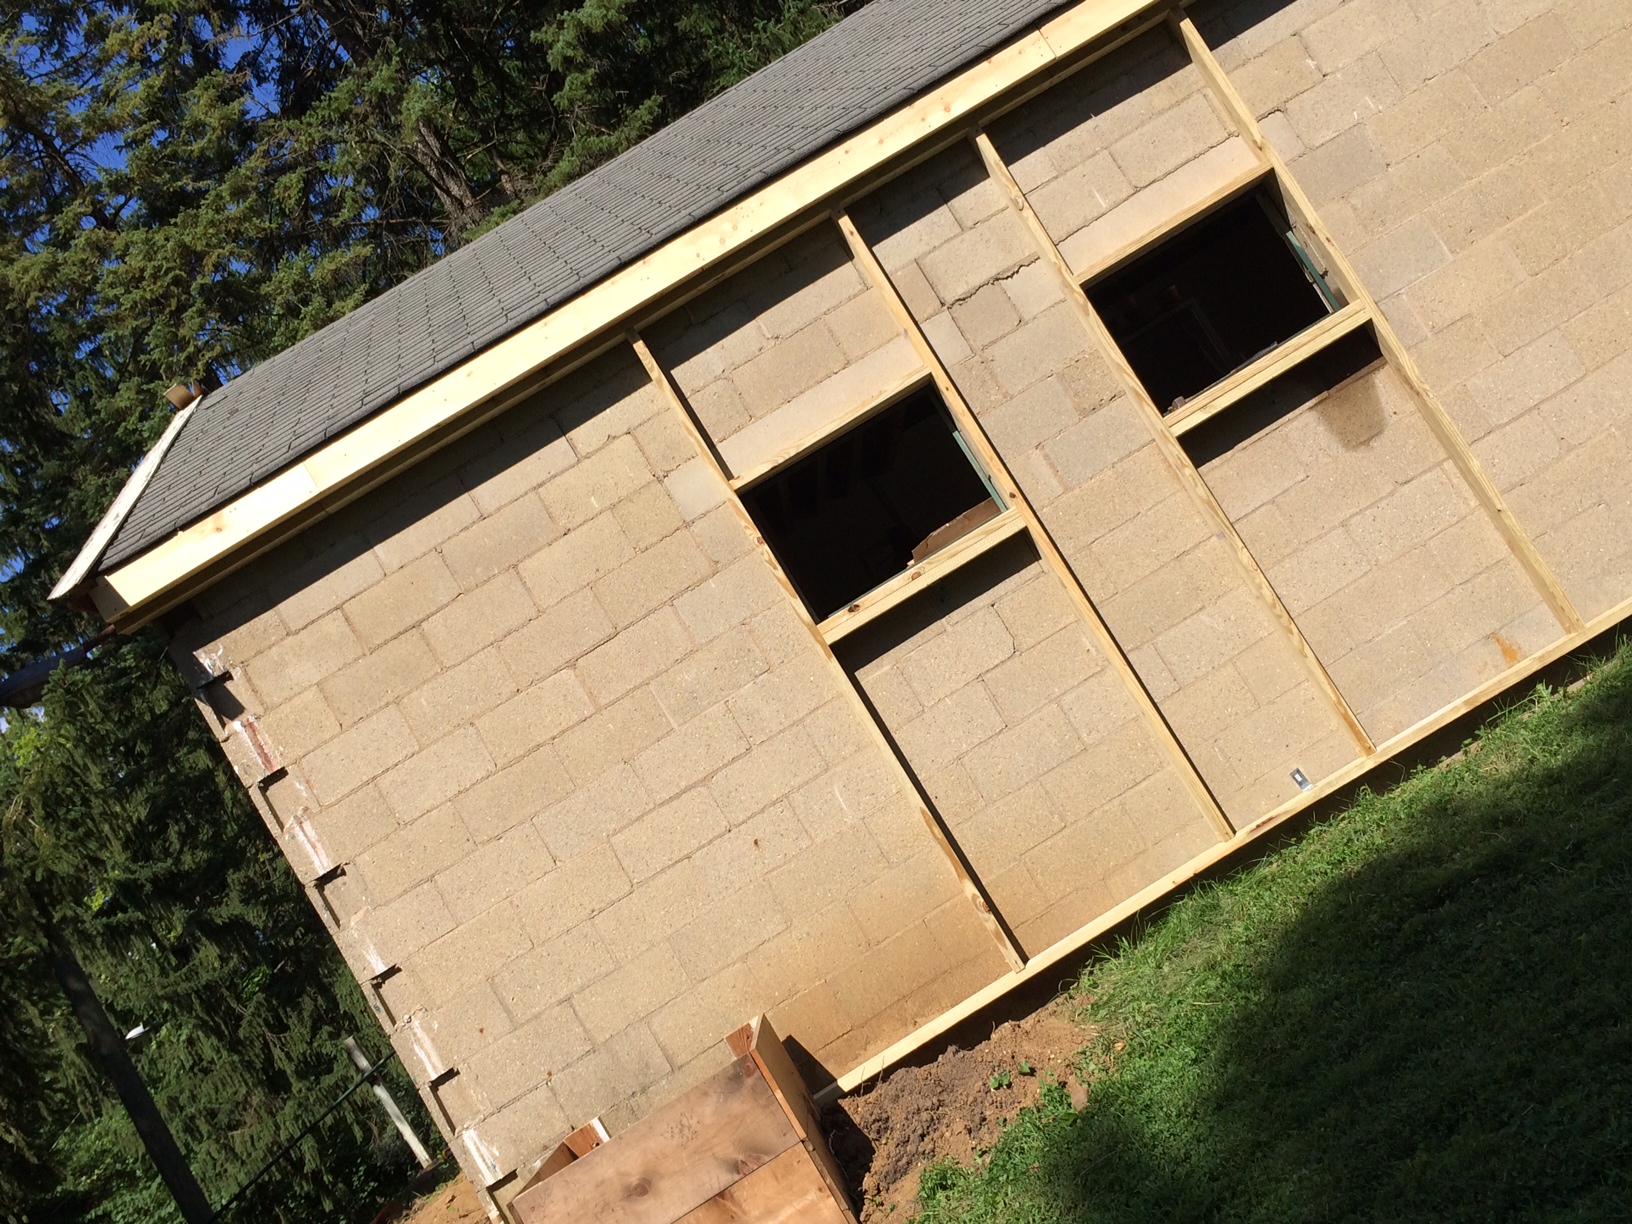
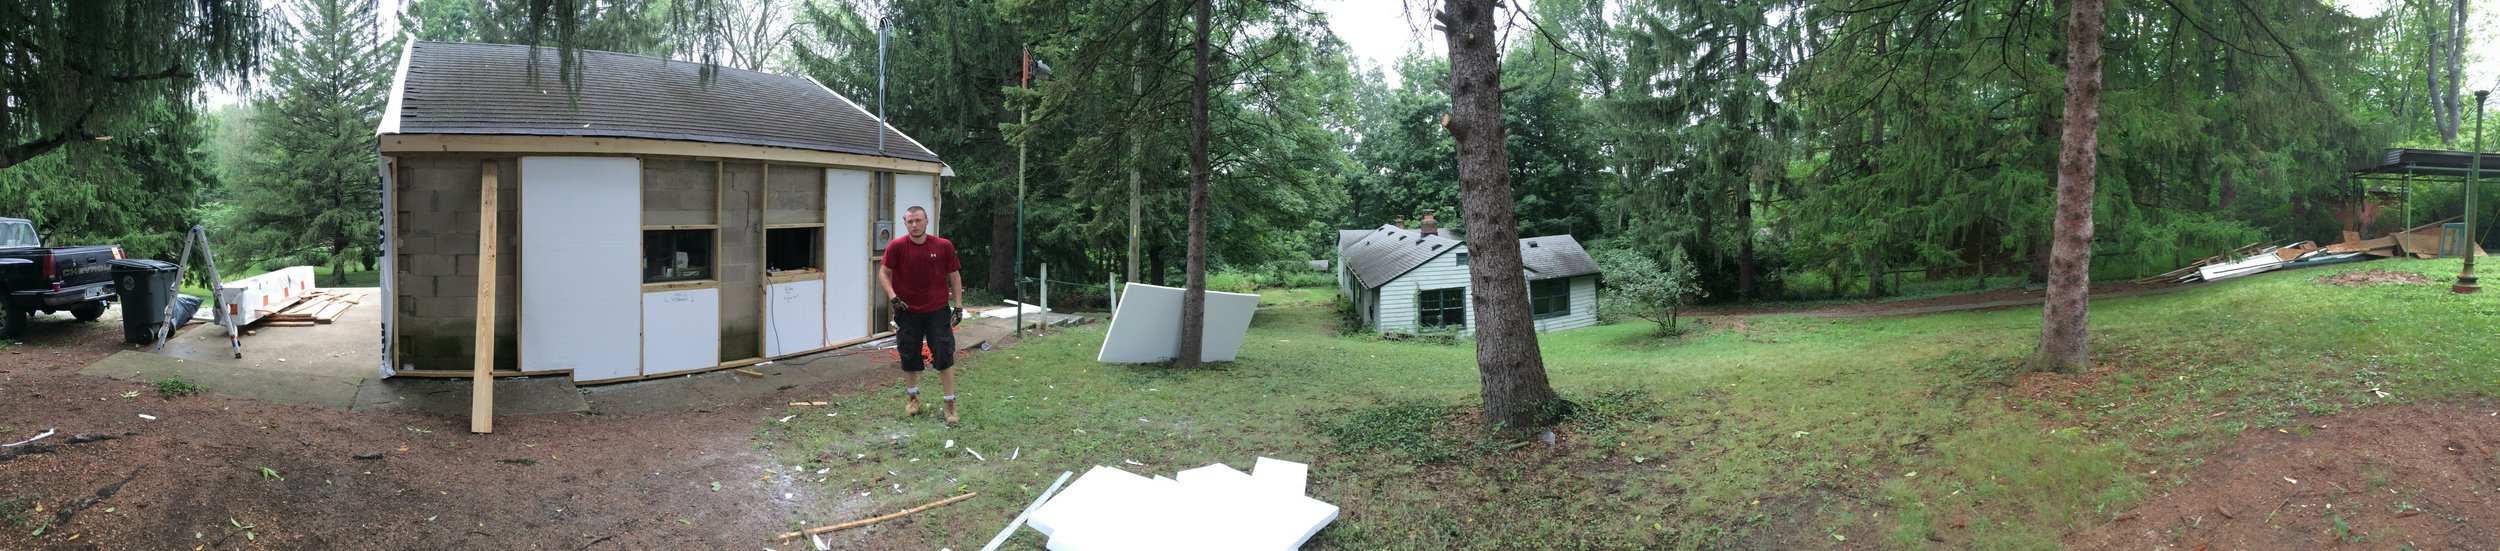
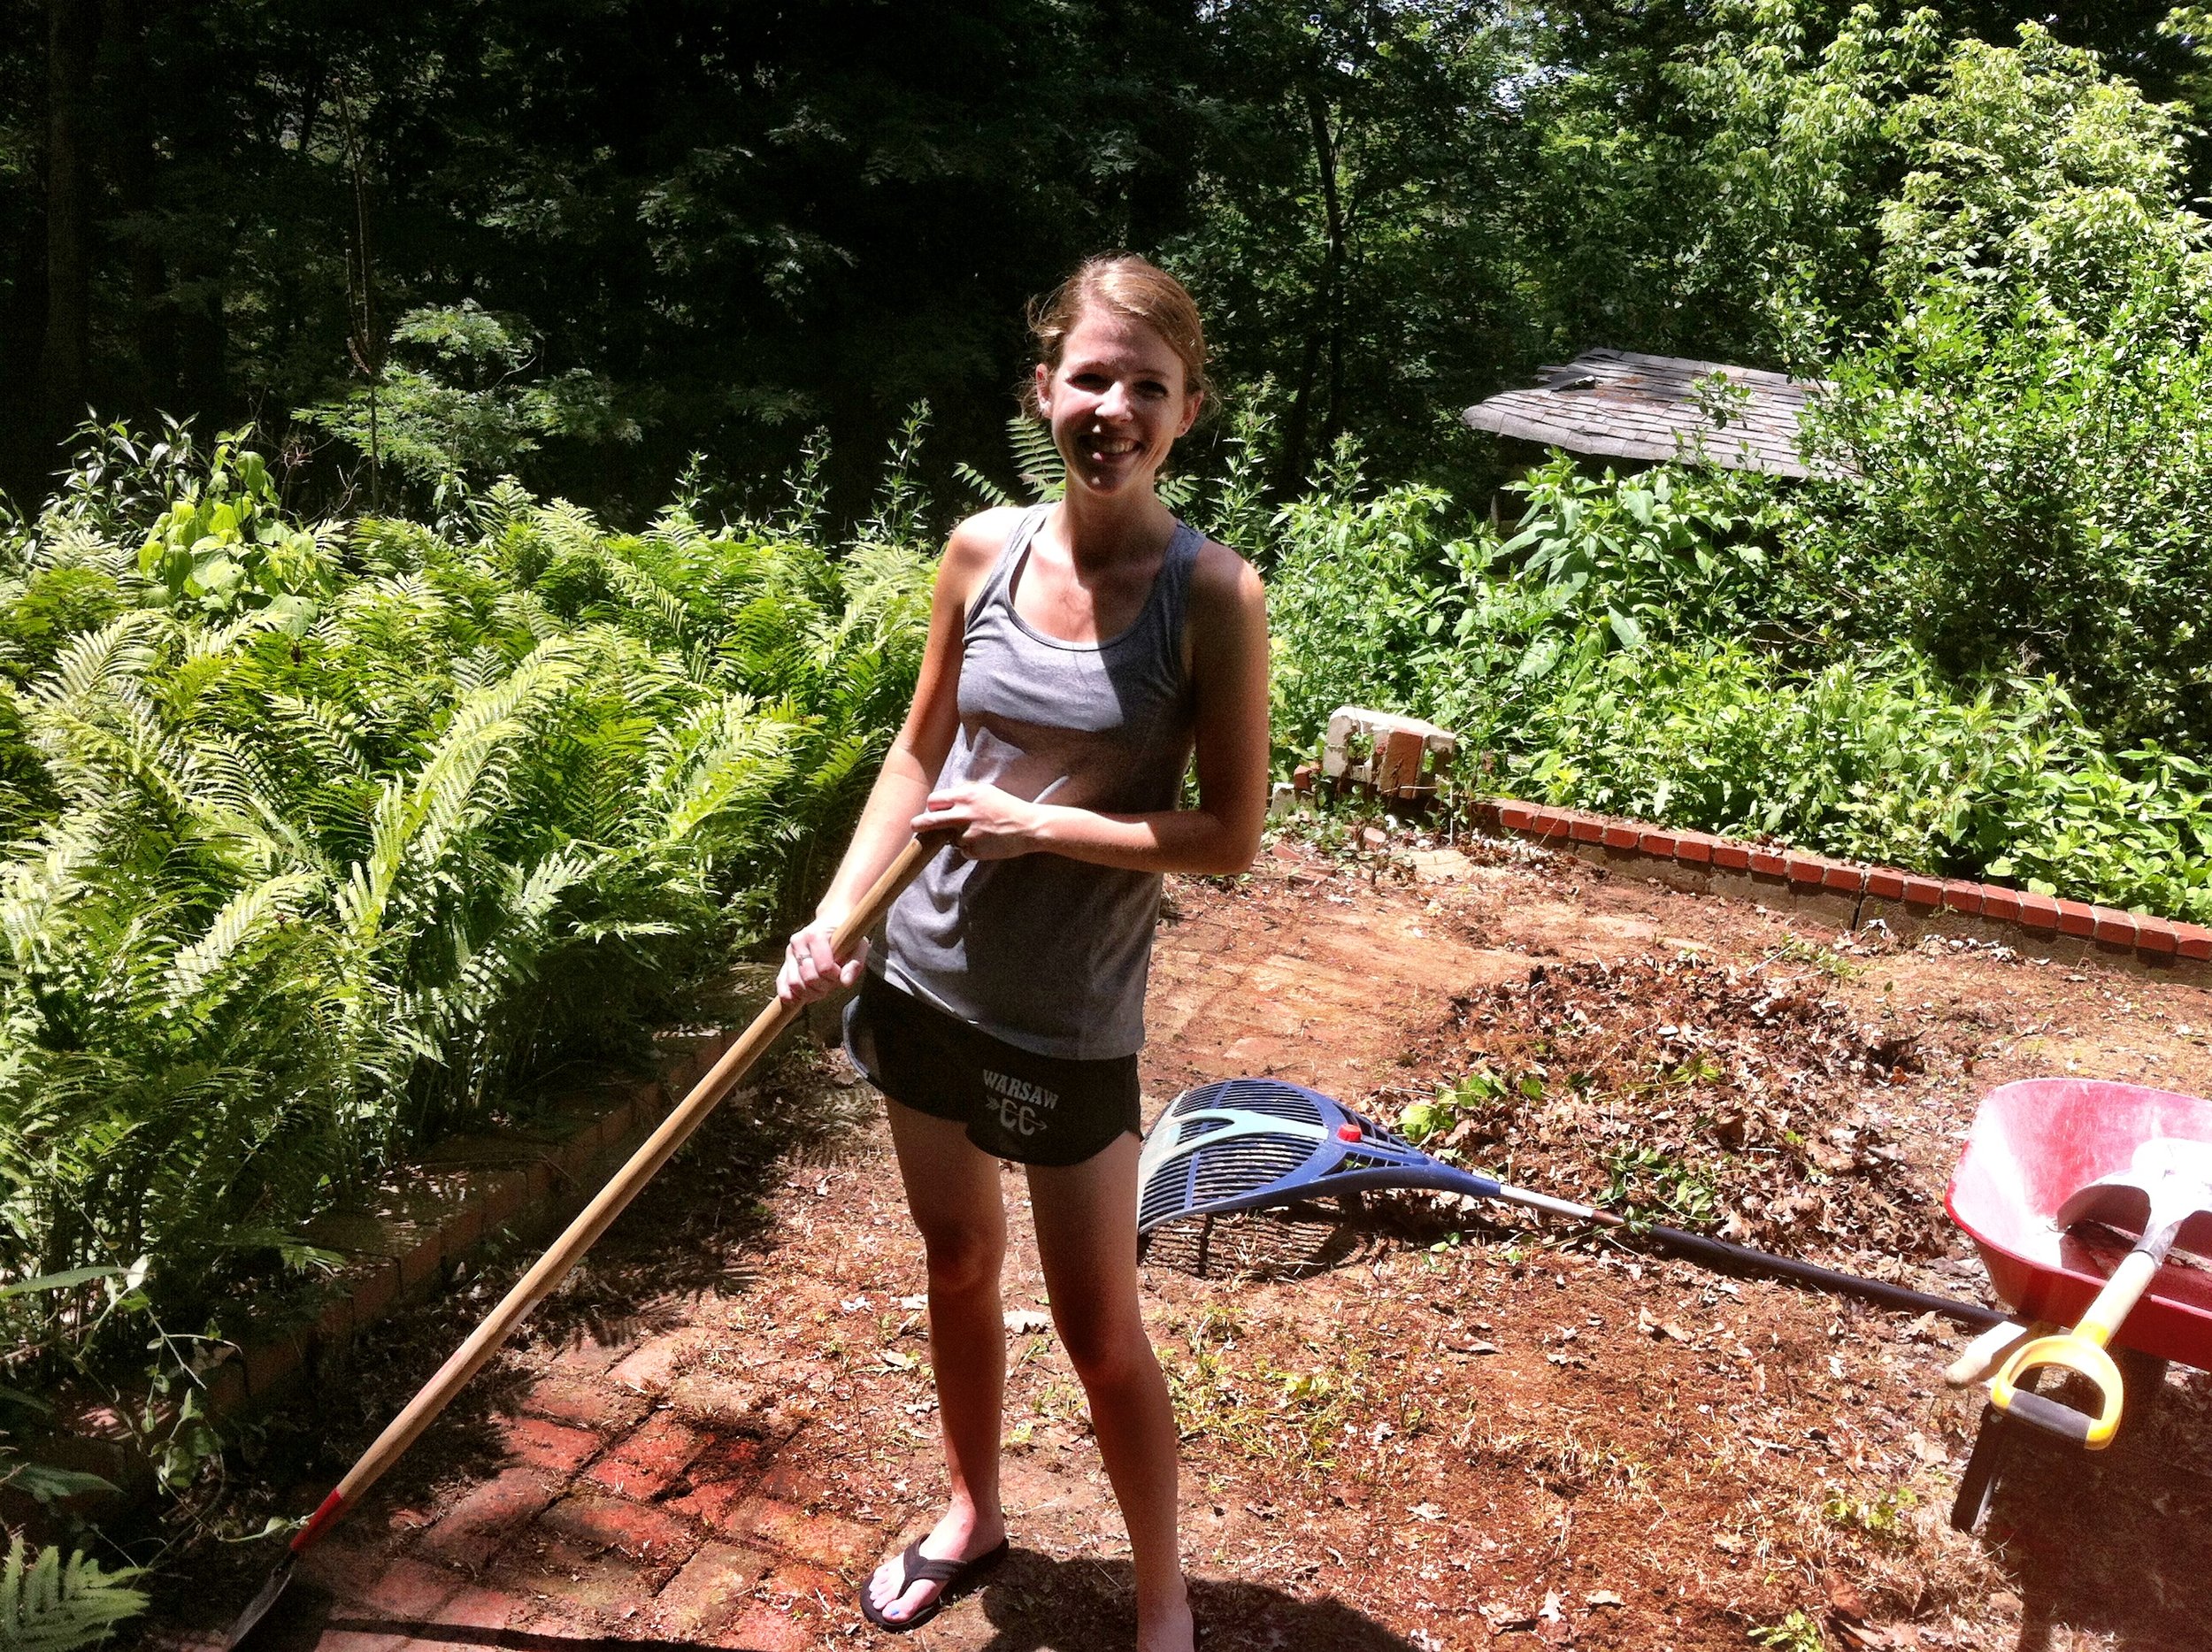
Derek and I had a working day on Sunday. He worked on installing our windows and I was in charge of filling up our rented dumpster with any type of junk I could get my hands on. As I was throwing 2x4's into the dumpster, I got a little carried away. I chucked the last piece and watched it bounce off the edge of the dumpster and slam into Rupert's hood.

For the record, I wasn't the one who parked him right behind the dumpster...

So yes. That happened. I literally gasped and then turned around to see if Derek saw/ heard (which he didn't). I ran to Rupert to see the damage. I was shocked to see the piece of wood had hit in the exact spot where there was already hood damage. SHEW! Crisis adverted. Almost.

5 minutes later, I grabbed the keys and climbed into the car to run to the paint store. As I backed out, I heard a nice screeching noise. I looked over my right shoulder to see Billy and Rupert hugging. My gut SANK. I put Ruper in Drive and pulled slowly forward. I once again noticed that Derek did not see or hear a single thing.During my time in the car, I was mentally preparing myself on how to tell him. Even though there really wasn't any damage from either incident, I knew how much this made me look like an idiot. When I returned, I told Derek what happened. As you can suspect, the teasing has been non stop ever since.

Ok. End of Story. More updates coming soon!

The rest of the move & a few bonuses.

Bunker move 2-7

We would like to make an official statement: Although we find the  "tiny house movement" cool and does technically apply to Bunker, we are doing this out of necessity. The [plan] is to be living in a normal size house with normal rooms in the near future. 

3 things I have learned in the past 3 weeks:

1. I have a greater fear of crickets that I do spiders- Mainly, crickets jump and I have no idea where they are jumping too. Although the beautiful wolf spiders that call Bunker home are quite large, at least they RUN away from me

2. I have never slept as good as I have in Bunker. Pitch black, silent (except for the crickets), and no drunk people screaming the words of Journey at 11pm at night. Life is good.

3. Never ever underestimate the power of a handy husband.

------------------------------------------------------------------------------------------------------------------------------------------------------------

Now, onto the rest of the move:

Mom and Uncle Kevin helping unload boxes

Bunker move 2-8

We happened to be graced with the presence of the cutest moving helper. That being Courtney of course.

bunker move 16

We got to work a bit more on our cabinets and got the kitchen sink placed

---------------------------------------------------------------------------------------------------------------------------------------------------------We so appreciate all the helpers we had. Since Caleb and Courtney were moving out of the apartment as well, we were able to take advantage of all the extra hands!

Bunker move 2-10

------------------------------------------------------------------------------------------------------------------------------------------------------------

The cricket struggle is real folks Bunker move 2-18Bunker move 2-12

We now updated from homemade traps (see above) to sticky traps. We placed the sticky traps all over the house and just waited. One night, Derek heard a "Cricket" wrestling around with the trap trying to get out. Come to find out, we got ourselves 2 little mice as well! Best. Traps. Ever.

------------------------------------------------------------------------------------------------------------------------------------------------------

Our sweet neighbors brought us over a meal just 2 days after we moved in. And here is Derek installing the garbage disposal just minutes before their arrival:

Bunker move 2-11

------------------------------------------------------------------------------------------------------------------------------------------------------------

We are finally fully unpacked. Huge shout out goes to my mom who came in just to help me unpack and put away everything.

Also, Derek found us a washer and dryer at Lowe's. (I know, not Menards!)....Who knew you could haggle with Lowe's people? To quote my husband, "I told the manager it had been sitting there for a week and had blood on it, so I would give her $500." This is the part when I said...."Ummmm you NEVER mentioned there being blood on it!" But the blood came off and it works just fine, so I think we will keep it.

Bunker move 2-14 Bunker move 2-13

------------------------------------------------------------------------------------------------------------------------------------------------------------

And finally, our awesome bathroom faucet.

Yes. I keep my retainers in a hot pink case.

But again, lets focus on the faucet....

Bunker move 2-16

A video tour of Bunker

Everyone loves pictures but videos are even better!

-----Here is a short tour of the place on move in day-----

Tour of Bunker

Just to refresh your memory, this is what Bunker looked like 6 months ago:

bunker 1 bunker 2 bunker 3 bunker 4 bunker 19 IMAG0190

 We are still working on unpacking, killing as many crickets as possible, and loving our place. Just in case you were wondering

Bunker Move In part 1

Well if you have been keeping up at all, you know we were suppose to move into Bunker on Monday. I am happy to report that WE DID MOVE IN! Although we are living among boxes, crickets, and have to use a wrench to turn on the shower, we are officially home and it feels awesome.

I have decided to break this event up into 2 blogs because so much happened in the days leading up to the move. I don't want to just show you all the good stuff at once!

1. Our shower. Although this is just a glimpse (because it isn't quite done), Derek designed a waterfall type shower head thingy. Basically, it is great. Since we had to raise our shower up a few inches for the drain, anyone over 6'3 will hit their head. Therefore, we found it necessary to put the shower head in the ceiling instead of a more common type. Obviously, I don't speak the technical shower language, so bear with me.

bunker move 1

2. Our bathroom toilet and vanity are hooked up and ready to go! We picked the vanity out at Menards. I think it is awesome but I am partial. The faucet should be coming in the mail next week. We are also putting in shelves where you see the rectangle by sink.

bunker move 2

3. We purchased and installed the bedroom loft floors. We opted to go with an inexpensive vinyl which you just cut and lay. I had many floor samples picked out and I thought there was no way I could find something in laminate I liked. Well, surprise surprise. Menards did it again. 88 cents a square ft and we have ourselves a fake wood floor.

bunker move 3

4. Counter tops. Ah. This has been one of my favorite little projects so far. Last week, Derek asked how I felt about Butcher Block. Well, who doesn't love Butcher Block?? Pretty trendy right now, but whatever. It was fairly inexpensive and really easy to work with. We love it.

 *Although Menards is not sponsoring me, they should.

We also picked these up at Menards.  I was really on the fence about keeping them light or staining them. In the end, I chose a Dark Walnut stain from Sherwin Williams. It was really easy to work with and I love how they turned out. We then sealed them with a 2 part Epoxi mix. Check it out:

bunker move 4

bunker move 9

bunker move 7bunker move 8bunker move 5

My mother-in-law was a huge help in the sealing process. We had to mix, pour, smooth, and examine all in very specific time frames. My cell phone is still recovering from my sticky fingers messing with the stop watch.

bunker move 11

bunker move 12

The finished product!

bunker move 16

We also got our closet space set up and ready to rock. So glad Derek thought of this idea. It really adds a lot of needed storage to Bunker. We got the closets from Ikea and just placed them side to side. We will be adding something to cover up the back part of the closets. Eventually. Baby steps people.

bunker move 5bunker move 6

We had so many awesome helpers take time off work. We are so so thankful. Moving blog will be up soon. But until then, just a couple teasers:

bunker move 13 bunker move 14

Finish Work Galore.

blogging 114

Our move into Bunker is quickly approaching. By quickly, I mean literally 5 days. Check out the picture above which shows what Bunker looked like last Saturday. The left wall is where the closets and couch will be. The right wall is the kitchen. To your far right, you can see the stairs (to the lofted bedroom) and the entrance to the bathroom. I am standing at the far corner, which is part of our closet. Got it?

This past week has been packed with busy evenings doing the fun finish work!!!

1. We finished the refrigerator! Turns out that Derek's idea to paint it a color was a good one. I love the color it brings to our little cement block home. We chose the color Loreta Lake from Ace's paint collection. From start to finish, it only took a couple hours!

 blogging 116

2. We had a painting party. With the drywall done, our goal was to finish the painting ASAP so we could get to building our kitchen. We were surprised at how quickly we were able to finish up priming the surfaces. By the end of the afternoon on Saturday, we had most of the place painted.

bunker 100

bunker 101

bunker 117

3. We finished up the floors! After much indecision on my part, I opted to just seal the floors. I am going for the "trying to look like we aren't trying" look. I goofed up and didnt put anything to protect the floors during drywalling. This resulted in me scrubbing down the floor with some chemicals before sealing it. I was literally thinking about how awful Cinderella must have felt cleaning her step-mothers floors. O the things renovations do to the brain.

Before!

The sludge that I used to clean the floor. Although I would like to say it was a miracle cleaner, I dont think it really was. I think my little steal wool was the real life saver in the situation

During

This was taken after part of it was finished and dried. I has potential...nothing a few big rugs in the space won't fix

4. We added some fun fixtures!

bunker 111

bunker 108

bunker 105

bunker 106

The longest update in the history of updates- Drywall

 With our move in date 13 days away, the pressure is mounting. Actually. As I was driving yesterday, I realized we have ZERO backup plan. Plan B's are for wimps right?!

BUT in the past 7 days, we have accomplished quite a lot. We got the place insulated, hung the drywall, painted a fridge, headed to Ikea and even found time to pick out & purchase all our paint!

Here we go:

1. My parents came in for a day to help us out. The deal? They came to help us and we would go to a car show with them. I think we got the MUCH better end of the deal. While the boys were busy hanging the first of the drywall, Derek convinced mom and I to paint our fridge.

More about that later.

Bunker NOW looks like a house. You can start to see the outline of the kitchen, bathroom, and our ceiling.

 Bunker Drywall 3Bunker Drywall 6

Bunker Drywall 7

Bunker Drywall 11

2. As I said earlier, Derek convinced me to paint our fridge. A color. Here is how the conversation went down in the car.

D: What are you ladies going to do this morning? L: We are going to paint the fridge since it has some rust spots. D: Cool. You should paint it a color. L. Yes. White. Just a touch up. D: No. Like a cool color. L: Are you crazy? I am not drawing attention to that stinky refrigerator. Never ever am I doing that. D: Im serious. I think we should do a color. L: (pulls up Pinterest on phone)...O....Ya ok. I can now see it. L: You are right Derek.

And that is how it went. We then practiced how I would tell mom that we are painting it a color. Her reaction at Dunken Donuts was just about spot on as Derek's impersonation. After showing lots of pictures and driving around town trying to find a paint color, I think we convinced her it was cool.  Well. It is now actually all painted and I really love it. I forgot to take a FINISH picture (sorry) but will update you later this week.

Steps: 1. Pick out an Epoxi Paint color you like. (We went with a bluish gray) 2. Sand it down lightly 3. Clean it off well 4. Tape off the handles 5. 2 coats TA DA.

Bunker Drywall 2

Bunker Drywall 20

3. We hired a foam guy to come out and insulate for us. Derek has been talking about spray foam for about a year. I do not kid. Bunker is now Sally Spider proof, warm, and basically feels like you are in a cocoon. Considering Spray Foam? It is awesome. Costs a little bit more but all the research shows it helps drastically with heating. The R value is 3.7 per inch. We chose the LD-C 50 foam. Thanks Thad!

Bunker Drywall 10

4. Who has an awesome brother in law? We do. Caleb also came out to help us finish up the drywall! The guys spend a whole Saturday getting it almost done.    We rented a lift from Menards for under $20. It was a huge help. While the boys worked, Mom and I played with the nephews. I have never thrown a tennis ball against a piece of plywood so many times.

Bunker Drywall 12 Bunker Drywall 13

Bunker Drywall 14

Bunker Drywall 16

Bunker Drywall 17

5. We went to Ikea. And it was stressful. First of all, why are there SO MANY KIDS there? It is like a 10 yr old girls dream land. Play house. Run around. Scream. I will have nightmares.

Anyway. We got down to the warehouse and were feeling good about our pre-made shopping list online. We then started searching for the pieces and couldn't find ANYTHING. We discovered we were suppose to order everything up in Kitchens first and then they get it ready for us. Back up to kitchens we went.

Also, am I the only one who gets frustrated with the ZERO exit route in Ikea...lets hope there is never a fire in that building..good grief! We got our kitchen all ordered and picked out our wardrobes.

  Bunker Drywall 15

We somehow got it all into our car. And it is still there. I am a danger on the highway.


Next up? Drywallers are doing the finish work for us this week. We will start painting on Saturday!!


Our beginnings

This post serves as a re-introduction (or just a plain old introduction) for those who may want to catch up or get to know us a bit. We are the Lavender's. A simple, Midwest couple in our late 20's. Newly weds with no children and no pets. We enjoy picking out Redboxes, trying new restaurants, and dry walling together.

The Lavender's Longshot blog was created about 6 month's ago after the purchase of our first ever home. Now, when most people think of their very first home, white picket fences usually come to mind. We decided to scratch the white picket fence and go for something a tad more adventurous. We found our little home on a foreclosed website in September, purchased in January, and then affectionately named it Longshot.

Once we demolished out the inside of Longshot, we started talking game plan. The idea of developing our unattached garage into a small apartment didnt come forth until April.  Our thought was to turn this space into a small studio apartment to live in for a few years while we work on redoing the house. We named the space, Bunker, and got right to work.

We should be finishing up our loft apartment in the next few weeks. Of course there will always be things on our To Do list, but we are just so excited to get on our property!


bunker 1longshot siding 6

Bunker got a face lift!

Who doesn't love a good "Before and After" post?? As I was writing about Bunker's transformation, I was reminded of our old school pictures. For some reason, we are all fascinated with how goofy we looked back in in the day. Case in point:

derek 1 photo (3)

So now we get to see how goofy Bunker looked and how a little TLC goes a long way.

We started siding last week and are about 1/4 of the way done. I debated on waiting until we were completely done, but I am just too excited! I want to show you what we have been up too!


But first. We need to remind you what Bunker looked like back in April:

bunker 1


And this is what Bunker looks like now:

longshot siding 6

longshot siding 7

Yay! Although I am partial, I am absolutely in love with the colors, the siding, and the trim we chose.

Ok. So now that you see the results, I know you are about to exit out of our blog. Ouch. At least stick around and see how we did it:


Our families came in to help us over Labor Day.  We chose a synthetic cedar shake through Certainteed. Although it is not real cedar, we think it looks pretty close!


longshot siding 1         bunker 36


Why is the top not done? Good question. If you look super close, you can see a faint line a bit foot above the siding. Above the line will be our triangle windows and below will be trim.  We are still working on getting those ordered.

longshot siding 5

Longshot Siding 4


Our moms came in to help! They ended up filling this huge dumpster with scraps from Bunker and Longshot


We hope you love the new Bunker as much as we do. In fact, it feels more like a cabin now. Stay tuned for dry wall, a painted refrigerator, and hopefully no more stories about me tripping on the road.

Image-1

PS. Derek started work this past week. We are officially both working the 8-5 and doing Bunker on the side. Wish us luck!

longshot siding 9

Our new roof!

Are you ready to watch a fun transformation? Fun for you. Not fun for Derek. As we were all complaining about the heat last week, please keep in mind this guy was sitting on a black roof for 3 days. Putting on a steel roof. By himself. His tan lines alone are enough to impress most.

bunker longshot 5


bunker roof 1

bunker roof 9

bunker roof 2

bunker roof 3


With being at work, I wasn't able to take any pictures of Derek putting on the roof.

We chose our black steal roof from Premium. The type is Premium Pro Snap Hidden Fastener. They came in 16 inch wide strips. One side screwed into the deck of the roof and the other side snapped into the previous panel. Within 3 days, we had a new fancy roof and lots of shingles on the ground.

bunker roof 8

bunker 46


bunker roof 15

The roof compliments our siding really well.

O the siding? Ya. You are going to have to wait for that. Hopefully we will a super fun update this next weekend!

Until then, here is a sneak peak of the trim.

bunker roof 13


And to finish off your Labor Day, here is a good laugh for you:

Some of our neighbors drove up to Bunker to introduce themselves. I walked over to the road to say hello and tripped on the curb. I then fell into the street and smacked my head. After laying there for a minute, I stood up, attempting to act like it had never happened. All while there were tears running down my face. Needless to say, I made quite the impression. And we found out the neighborhood refers to us as the kids.

Always graceful.

bunker roof 17


Foam, Foam, and more Foam.

bunker siding 9 We have been quite busy at Bunker the last few weeks. Now is the time that being a faithful follower of our journey is going to pay off...you get to see the fun stuff!

Side note- Derek refuses to shave until he starts work next week. Enjoy the beard while it lasts.

Today. Insulation.

Later this week. *hopefully* Roof

Early next week. *hopefully* Unveiling of the freshly sided Bunker


But for now, lets stick with Insulation and a sweet little contraption Derek has made.

Bunker is a solid, cement block structure. Therefore, in order to stay warm in the winter and keep the Sally's out (we call all spiders "Sally" in order to help tame my fear), we needed to seal her up. Derek measured and framed out the structure in order to apply the insulation.

Here are the steps for Fun Insulation:

- Frame out the building

bunker 47

-Measure the frame and then cut foam insulation to fit inside the frame. We doubled up on insulation (she is quite cozy), so there are usually 4 foam pieces per framed in area

bunker siding 12       bunker siding 1

- Cover foam with measured plywood

bunker siding 13

- Screw plywood into the cement block

- Avoiding smashing lizards behind the insulation

bunker siding 5


- Cover with House Wrap

bunker siding 7

Ta- da! This process took us about 3 days. Lots of foam, squished Sally's, lifting, squatting, gluing and wrapping, we are finally done! The siding will now just tack onto the house wrap!                    yes. We realize we put the house wrap upside down  :)


Second fun thing:

We want to rid ourselves of those low hanging beams. Unfortunately, they are important in holding up our roof. Therefore, Derek created a wire type gadget that bears the weight of the roof without the bulk of the beams. AND it looks cool. There will be 3 total at the front of the living area. Derek made these Sunday morning. Since it was early, we attempted to not wake our neighbors and opted to create them inside!

bunker siding 4 bunker siding 3 bunker siding 2


Last fun thing:

We put a new window in!! The other 3 should be going in this week.

bunker siding 8 bunker siding 6

PS. Derek let me work with cement. I am starting to dress like him. He drilled a hole for our new spigot!

bunker siding 15bunker siding 14  bunker siding 16


Rough Construction Construction is Rough

This is a milestone post. Why, you may ask? Since owning Longshot, we have been juggling a lot of other commitments. Well as of a few weeks ago, a majority of those stressful commitments are complete. *Sigh of relief*

Therefore, we have he has been able to really get down to work. After all, move in day is 6 weeks away!

We've got lots of random things to catch you up on. Here we go:

Disclosure: The person who has actually been doing all this work is still at the Bunker. So if I do not say it technically right, sorry. I am doing my best with my very limited knowledge of plumbing, water, and electricity.

1. Electricity. Although Bunker already had electricity, we needed to add more power (or something like that) in order to not blow a circuit every 10 minutes. We hired an electrician and they finished up the rough work on Friday. We are now waiting for IPL to come and run a line from Bunker to the street.

Not only did they add electricity, they also put in our can lights. There will be 2 above the kitchen sink, 2 by the stairs, and they also put in outlets for a few fun lights we are going to be adding to the loft.


See the electric lines running vertical along the wall? Our new breaker box

2. Plumbing. Apparently asking for indoor plumbing has made me a "high maintenance" wife. Thankfully, I got my plea. All you need to know if that the plumbing is basically ready to go. My dream of an indoor toilet is coming true!!

To your left (where the indent in the wall is) is where the washer and dryer will be going. The kitchen sink, washer, tub, bathroom utilities will all run into that system.

The plumbing. Derek finished this up a few days ago.

3. Secret Cubbys.  We added joist beams to help support the loft, which created an extra few inches of gap. We decided to create some "secret cubby holes" as a means to add more storage to our box with no closets.

We will have a few of these throughout the space.

4. Insulation. As Derek was describing this important step, I got a bit confused. Seeing it in action helps a ton! Basically, we need to add insulation to the outside of our home BEFORE adding the siding. We are adding enough to make it nice and cozy on the inside.

bunker 47We have now started adding the foam board around the framed area.Once the insulation has been added, we cover the site over with home wrap! After inspection, it will be ready for siding.

5.Little Electric Letter. Nothing crazy, but I did find an old electric L at a Flee Market. Although my husband gasped that I spent $12 on it, I think it will eventually make a nice touch in our little modern space. Now I just need to find some lights to put in it!


bunker 56bunker 45


In other news, we had some cute visitors check out our place. See our Facebook page for a tour of our place given by our oldest nephew.

bunker 57

Feel behind? Catch yourself up. Top 10 Updates.

Over the past week, Derek and I have traveled around visiting friends in family in Indiana, Ohio, and a little bit of Kentucky. Through these visits, it seemed the first or second question someone would ask would be related to the Bunker or Longshot. I gotta admit, I was shocked at the amount of people following our renovation process. Shocked and then super excited. It is fun that so many people are encouraging us along!

 It also made me realize that many of you are a tad behind. We have been blogging for 5 months now, so getting behind is totally understandable. No judgement here. I have decided to do a little update blog so you can catch yourself right back up. 

So. Here we go. Top 10 things you need to know in order to be caught up on the Lavender's Longshot

10. This is Longshot photo (82) She was purchased January 2014. When we tell people we bought a house, we usually put the word HOUSE in quotation marks. As a foreclosed home, she isn't livable but we see the potential!

9.  Longshot will not be our home for awhile but here is the layout we have in mind. She is about 1,200 square ft and will have a "modern cabin" theme. But please don't buy us a moose head. It's not THAT kind of cabin. Screen Shot 2014-02-01 at 7.33.36 AM

8. This is Bunker   

Since Longshot has quite a lot of work needed to make her livable, we decided to renovate the unattached, cement workshop that sits at the top of our property. We plan on moving into Bunker this fall and living here until we can finish Longshot.

8. This is the layout for Bunker Screen Shot 2014-04-06 at 11.58.54 AM Screen Shot 2014-04-06 at 11.58.01 AMThink small, industrial, studio apartment. I am really excited about this space and it is really taking shape.

7. Our property is an acre and sits directly on a creek, which runs straight into Indianapolis. We love the feeling of being secluded, with the benefits of being in a town and close to a city! bunker 11 bunker 10 bunker 9 bunke 7

6. Both Longshot and Bunker will rock the synthetic cedar shake siding with a black steel roof photo (50)

5. The first few months after purchasing Longshot was spent cleaning her out. We are proud that she is now pretty much ready to construction!

 photo (93)photo (87)photo (91)IMAG0122 photo (74)

4. Longshot is rocking some great potential with her new ceilings and her true beauty being exposed.

 photo (76) IMAG0112 (2)photo (78)photo (97)

3. Bunker got a serious paint job

painting 7painting 9

2. And some serious windows

bunker 26 bunker 37

1. There isn't really a number 1. I believe #1 needs to saved for something really sweet...like the pictures of a completed Bunker in October.

So. Whether you are new to our renovation process or have been following along the whole time, we hope you love it as much as we do. Your words of wisdom, encouragement, or the occasional "You guys are crazy", makes this journey way more fun!

Ps. We know we are crazy...but I have never enjoyed being known as crazy as I have these past 6 months!

End of June update

This was suppose to be moving weekend into Bunker. Instead, we gathered up our things and shuffled over to our new temporary home! Although not living on our land is disappointing, having a huge closet, bathroom, an awesome view of the city, and pool access is NOT. The past 2 weeks have been a little stressful (apparently I am not a good moving buddy- I tend to get a tad cranky). Thankfully, moving is done. Summer is upon us and I am excited to update you!

1. Our awesome friends, the Walkers, came to visit this weekend. We are so thankful to have buddies who are willing to just jump in and help at the house. The guys worked on framing out our "bedroom" window and the girls worked on the brick patio.

bunker 38

This brick patio is attached to the backdoor of Lonshot. It has been covered in weeds and sand. By the end, we successfully cleared off about half of the patio. We also had to dig up and re-do the bricks in some spot. This will be a great place to place a picnic table!

The brick patio before any work


bunker 37

bunker 42

      2. Our siding came in! We originally picked it out for Longshot but decided we could use it for Bunker as well. Our goal is to make both of the living areas match. Bunker will be a mini Longshot. We chose to use Cedar Impressions instead of real cedar due to cost and upkeep. The brand is CertainTeed.  [embed]http://www.certainteed.com/products/vinyl-siding/shake---shinglesiding/310307[/embed]

bunker 36


 3. Derek was able to install our double door last weekend. This bad boy is a game changer. Thankfully, the previous owner has framed out the area for a second door, so we didn't have to get into the concrete at all. Having a double door not only looks better but it also allows us to move things in and out much easier.

Here they are! We are planning on paint them black to match the windows and roof

 4. We got to meet our resident turtle and our resident 3 legged deer last weekend. I know I have discussed the 3 legged deer before, but I need to reiterate how cool it is. It is a deer and only has 3 legs. The front right one is missing. She also has a baby and lives right behind Lonshot. I also named her Trifecta. The turtle? Not near as cool as the deer.

bunker 41


Well. Keep on keeping on. And also pray I don't get poison ivy all over my legs. I think I may be doomed.